Lighting plays a critical role in setting the mood and functionality of any space. Whether you’re renovating your home, designing a new build, or simply looking to update your lighting system, low voltage ceiling lights offer a practical and energy-efficient solution. This type of lighting is known for its ability to provide bright illumination while using significantly less power compared to traditional lighting. In this article, we will explore everything you need to know about low voltage ceiling lights, from their benefits to different types, and how to choose the best ones for your home.
What Are Low Voltage Ceiling Lights?
Low voltage ceiling lights are lighting fixtures that operate on lower voltage than standard lighting systems, typically using 12 or 24 volts. This lower voltage is achieved by converting the standard 120V power supply in homes with the help of a transformer. The result is a highly efficient lighting system that reduces energy consumption and enhances safety.
Benefits of Low Voltage Ceiling Lights
Low voltage lighting offers a number of advantages that make it an excellent choice for residential, commercial, and industrial applications. Here are some of the key benefits of installing low voltage ceiling lights in your home or office:
- Energy Efficiency
One of the most compelling reasons to choose low voltage lighting is its superior energy efficiency. These lights consume less electricity than their high-voltage counterparts, which can lead to significant savings on your energy bills. This makes them an environmentally friendly choice, helping you reduce your carbon footprint without sacrificing brightness or performance. - Longevity
Low voltage lights, especially when using LED bulbs, tend to have a much longer lifespan than standard incandescent or fluorescent lights. This means fewer bulb replacements and lower maintenance costs over time. LEDs, in particular, can last up to 50,000 hours or more, making them an ideal choice for ceiling lights that are hard to reach or used frequently. - Safer Installation
Because low voltage lighting operates at a much lower voltage, it reduces the risk of electrical shock and fire hazards. This makes them safer to install and operate, particularly in areas like bathrooms, kitchens, or outdoor spaces where moisture may be present. For homes with children or pets, low voltage lighting provides an added layer of safety. - Versatility in Design
Low voltage ceiling lights come in a variety of styles and designs, allowing you to choose the perfect fixture to complement your décor. Whether you’re aiming for a sleek, modern look or a warm, cozy ambiance, there are low voltage lighting options to meet your needs. From recessed lights to pendant fixtures, these lights offer endless possibilities for creativity in lighting design. - Brightness Control
Many low voltage lighting systems are compatible with dimmers, giving you full control over the intensity of the light. This allows you to adjust the brightness according to your needs, whether you’re working, reading, or creating a relaxing environment.
Types of Low Voltage Ceiling Lights
There are various types of low voltage ceiling lights that you can choose from, depending on your lighting needs and aesthetic preferences. Below are some of the most popular options:
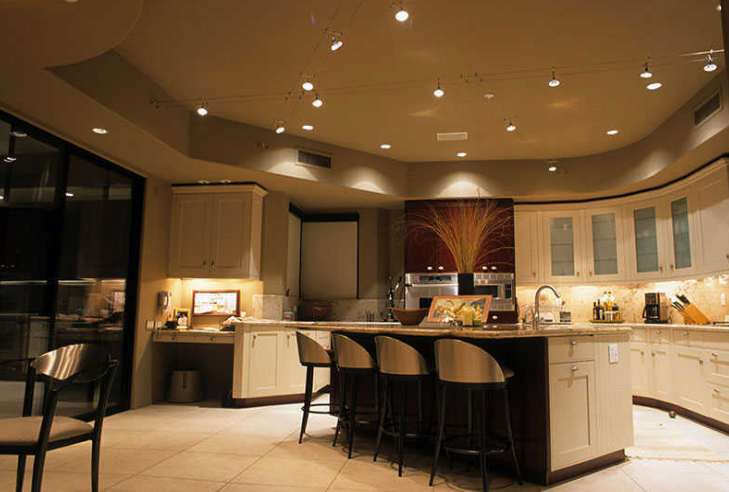
1. Recessed Lights
Recessed low voltage ceiling lights, also known as can lights or pot lights, are installed into hollow openings in the ceiling. These lights provide a sleek and modern appearance, as the fixture is hidden, and only the bulb is exposed. Recessed lights are perfect for creating ambient lighting in living rooms, kitchens, or hallways. Because of their low-profile design, they work well in spaces with low ceilings.
2. Track Lighting
Track lighting consists of multiple light fixtures attached to a track, which can be mounted on the ceiling. Low voltage track lighting is highly versatile and allows you to direct light precisely where it’s needed, making it a great option for task lighting in areas like the kitchen or home office. You can also use track lighting to highlight artwork or architectural features in a room.
3. Pendant Lights
Pendant lights are suspended from the ceiling by a cord, chain, or rod, and are a popular choice for kitchen islands, dining areas, and entryways. Low voltage pendant lights come in a variety of styles, from minimalist designs to more ornate fixtures, making them a focal point in any room. They also work well when grouped together to provide a balanced and cohesive lighting scheme.
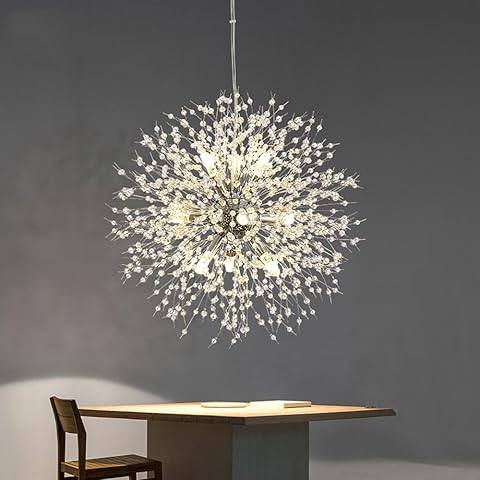
4. Chandeliers
Low voltage chandeliers are an elegant option for dining rooms, foyers, or living spaces. While chandeliers are often associated with traditional or classic designs, modern low voltage chandeliers offer contemporary styles that can suit a wide range of décor. These fixtures are typically equipped with multiple low voltage bulbs, providing both style and functionality.
5. Flush Mount and Semi-Flush Mount Lights
Flush mount and semi-flush mount low voltage ceiling lights are attached directly to the ceiling, with little to no space between the fixture and the surface. These types of lights are ideal for spaces with low ceilings or rooms where you need unobtrusive lighting. They provide excellent general lighting and are commonly used in bedrooms, hallways, or laundry rooms.
Choosing the Right Low Voltage Ceiling Lights for Your Space
When selecting low voltage ceiling lights for your home, it’s important to consider several factors to ensure you get the best performance and style for your space. Here are some tips to guide your decision:
1. Consider the Room’s Purpose
The function of the room should play a significant role in determining the type of lighting you choose. For example, task lighting is essential in areas where you need focused illumination, like the kitchen or bathroom. Recessed or track lighting might be the best fit in these areas. For spaces like the living room or bedroom, ambient lighting that creates a warm and inviting atmosphere should be the priority, and pendant lights or chandeliers may work better.
2. Lighting Layout and Spacing
Proper placement of your low voltage ceiling lights is crucial for achieving optimal lighting. If you’re using recessed lights, make sure they are evenly spaced to avoid dark spots. For pendant lights, consider the height at which they should be hung for the most effective lighting. The number of light fixtures you need will depend on the size and layout of the room, so plan accordingly to avoid under- or over-illumination.
3. Choose the Right Bulbs
Low voltage lighting often uses LED or halogen bulbs, both of which offer distinct advantages. LED bulbs are the most energy-efficient and long-lasting option, providing bright illumination while using minimal power. They also come in various color temperatures, allowing you to customize the ambiance of your space. Halogen bulbs are another option for low voltage lighting, offering a warm and natural light that’s ideal for task lighting.
4. Think About Aesthetics
Lighting plays a significant role in the overall aesthetic of a room. Make sure to choose fixtures that complement your existing décor. For a modern, minimalist look, consider sleek, simple designs like recessed or track lights. For a more traditional or ornate style, opt for chandeliers or pendant lights with intricate details.
5. Check for Dimming Compatibility
If you want the flexibility to adjust the brightness of your lights, ensure that your low voltage lighting system is compatible with dimmer switches. Dimmable low voltage lighting allows you to set the mood and adjust the light levels according to the time of day or activity.
Installation and Maintenance of Low Voltage Ceiling Lights
While low voltage ceiling lights are generally easier and safer to install than high voltage systems, it’s still important to ensure proper installation to avoid electrical issues. Here are a few tips to keep in mind:
- Use a Transformer: Low voltage lighting requires a transformer to step down the standard household voltage. The transformer should be installed in a location that is easily accessible for maintenance or replacement.
- Professional Installation: If you’re not experienced with electrical work, it’s advisable to hire a licensed electrician for the installation process. Proper wiring and connections are crucial to ensuring the safety and longevity of your lighting system.
- Regular Maintenance: Although low voltage lighting is energy-efficient and long-lasting, it’s still important to conduct regular maintenance checks. Ensure that the transformer is functioning properly, and replace any bulbs that have dimmed or burned out. Keeping the fixtures clean and dust-free will also help maintain their brightness and appearance.
Read too: Kitchen Lighting For A Vaulted Ceiling: Illuminating Your Space with Style and Functionality
Conclusion: The Future of Low Voltage Ceiling Lights
As energy efficiency becomes an increasingly important consideration for homeowners, low voltage ceiling lights are rising in popularity. With their versatility, energy savings, and long-lasting performance, they offer a sustainable lighting solution for any space. Whether you’re looking to upgrade your current lighting system or design a new home with modern lighting in mind, low voltage ceiling lights provide an excellent balance of style, safety, and functionality.