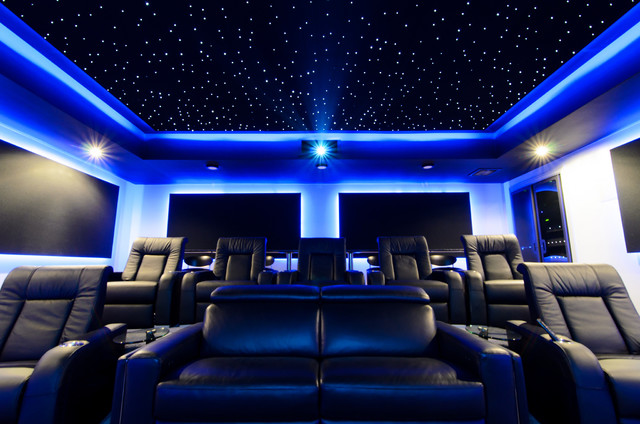
In modern home theater setups, audio quality is just as important as video quality. An in ceiling center speaker can significantly elevate your sound experience by providing immersive audio, especially in spaces where traditional speaker placement is not possible. Whether you are setting up a new entertainment area or upgrading an existing system, choosing the right in-ceiling center speaker can make all the difference. In this article, we’ll explore the benefits of an in ceiling center speaker, how to choose the best one for your needs, and how to install it to achieve optimal sound quality.
What is an In Ceiling Center Speaker?
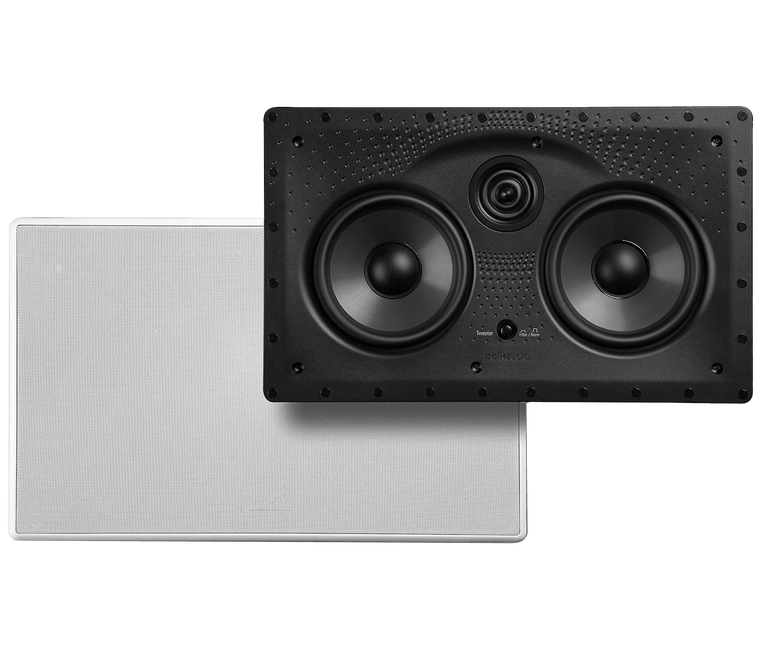
An in ceiling center speaker is a type of speaker that is installed into the ceiling, as opposed to being mounted on a wall or placed on a shelf. The center speaker, in particular, is a key component of a surround sound system, responsible for delivering most of the dialogue and central sounds in films, TV shows, and music. This setup is perfect for those who want a clean, minimalist look in their home theater without sacrificing sound quality.
Read too: Bathroom Flooded Through the Ceiling: A Comprehensive Guide
In-ceiling speakers are designed to blend seamlessly into the ceiling, offering a discreet and space-saving solution. They are often used in conjunction with other speakers, such as in-wall or floor-standing speakers, to create a fully immersive sound experience. However, when it comes to the center channel, it’s important to place it in a position that directs sound directly towards the listening area, and in-ceiling speakers can achieve that effect when positioned correctly.
Benefits of an In Ceiling Center Speaker
There are several advantages to using an in ceiling center speaker in your home audio setup. Here are some of the key benefits:
1. Clean and Modern Aesthetics
One of the primary reasons homeowners choose in ceiling center speakers is for their ability to maintain a sleek and modern aesthetic. Traditional speakers can take up valuable floor space and may disrupt the overall design of a room. With in-ceiling speakers, you get high-quality sound without sacrificing style or taking up any visible space.
2. Space-Saving Design
In-ceiling speakers are ideal for small rooms or spaces with limited real estate. Whether you’re setting up a home theater in a living room, bedroom, or basement, in ceiling center speakers allow you to maintain floor space for furniture and other essential items, which is especially helpful in areas where space is a premium.
3. Improved Sound Dispersion
In-ceiling speakers are capable of delivering a more uniform sound experience. When the in ceiling center speaker is installed properly, it can fill the room with sound more effectively than speakers placed at the front of the room. This helps create an immersive soundstage that enhances your entertainment experience.
4. High-Quality Audio
Many in ceiling center speakers are equipped with advanced sound technology that ensures high-fidelity audio. These speakers are designed to deliver clear, crisp dialogue and sound effects, which are critical in creating a cinematic experience. Even with the discreet design, in-ceiling speakers can offer impressive performance when paired with the right equipment.
5. Flexible Installation
Another significant advantage of in ceiling center speakers is their versatility in installation. They can be installed in almost any room with a standard ceiling, offering a flexible solution for those looking to avoid wall-mounted speakers. Many models also come with adjustable tweeters and pivoting drivers, allowing for customized sound dispersion.
Choosing the Best In Ceiling Center Speaker for Your Home
When selecting an in ceiling center speaker, there are several factors to consider to ensure you get the best performance and value for your home theater system. Here’s what to look for:
1. Sound Quality
The most important feature of any speaker is the sound quality it delivers. For the center channel speaker, clear dialogue and accurate sound reproduction are paramount. Look for models that offer a wide frequency response and high sensitivity to ensure the best sound. The frequency range should cover the entire spectrum of human hearing (20 Hz to 20 kHz) to capture all the nuances of audio.
2. Compatibility with Your Surround Sound System
The in ceiling center speaker should seamlessly integrate with the rest of your home theater system. Make sure that the speaker you choose is compatible with your receiver, as well as any other speakers in your setup (such as front, rear, and subwoofer speakers). The impedance of the speaker should match your receiver’s specifications for optimal performance.
3. Size and Design
In-ceiling speakers come in various sizes, and it’s important to choose a size that suits your room and your audio needs. Larger speakers tend to offer better bass and fuller sound, while smaller speakers might be more suited for compact spaces. Also, consider the design of the speaker. Many in ceiling center speakers feature paintable grills, allowing you to match the speaker to your ceiling color for a more seamless look.
4. Power Handling Capacity
Make sure the speaker can handle the power output from your amplifier or receiver without distortion. The power handling capability, often listed as watts RMS, is essential to ensure the speaker performs at its best without causing damage to the equipment.
5. Installation Features
Ease of installation is another critical factor. Some in ceiling center speakers come with a tool-free mounting system, making installation more straightforward. Additionally, many feature adjustable tweeters or pivoting drivers, allowing you to customize the sound direction and enhance the audio experience.
How to Install an In Ceiling Center Speaker
While installing an in ceiling center speaker can be a straightforward process, it’s important to take certain steps to ensure a proper installation. Follow these general steps for a smooth installation:
1. Plan the Speaker Placement
Before beginning the installation, plan where the in ceiling center speaker will go. The ideal location is typically in the center of the room or slightly behind the main seating area. The speaker should be aimed towards the listening area for optimal sound projection.
2. Mark the Mounting Location
Using a stud finder, locate the ceiling joists and mark the area where the speaker will be installed. This is important to ensure that the speaker is securely mounted. Make sure the location is free from any obstructions like wires or pipes.
3. Cut the Ceiling Opening
Most in ceiling center speakers come with a template that helps you cut a precise hole in the ceiling. Use a drywall saw to carefully cut out the opening.
4. Install the Speaker
Once the hole is cut, insert the speaker into place. Use the mounting brackets or clamps provided with the speaker to secure it to the ceiling. Be sure the speaker is firmly in place and that the wiring is properly connected to the receiver or amplifier.
5. Test the Sound
After installation, test the sound to ensure the speaker is functioning correctly. Adjust the positioning and settings if necessary to fine-tune the sound to your preference.
Maintaining Your In Ceiling Center Speaker
To keep your in ceiling center speaker in good condition, regular maintenance is essential. Here are a few tips:
- Dust the Speaker Grille: Dust and debris can accumulate on the speaker grille, affecting sound quality. Use a soft cloth or vacuum cleaner with a brush attachment to gently clean the grille.
- Check the Wiring: Periodically inspect the wiring connections to ensure they remain secure.
- Test the Audio: Periodically test the audio to ensure the sound quality remains consistent and that the speaker is functioning properly.
Conclusion: Enhance Your Home Theater with an In Ceiling Center Speaker
An in ceiling center speaker is a fantastic way to improve your home theater audio system while maintaining a clean and modern aesthetic. By choosing the right speaker, following proper installation techniques, and maintaining the speaker regularly, you can enjoy immersive sound and crisp dialogue that enhances your entertainment experience. Whether you’re a movie lover, a gamer, or someone who enjoys high-quality audio, an in ceiling center speaker can elevate your home theater to new heights.