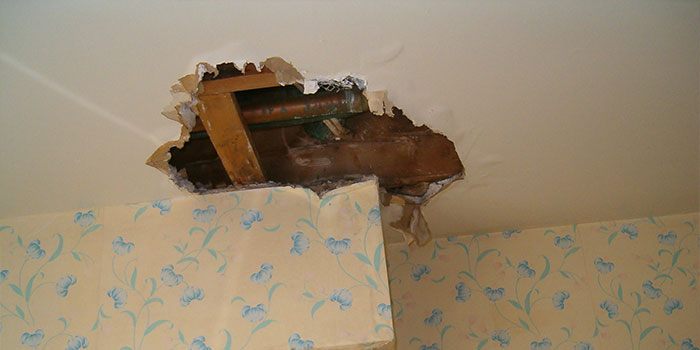
Brown Patch on Ceiling: Causes, Solutions, and Prevention

A brown patch on ceiling is more than just an unsightly blemish; it can be a sign of underlying problems that require immediate attention. Homeowners often overlook these patches, thinking they are merely cosmetic issues. However, they can indicate serious structural concerns or damage that needs to be addressed. In this article, we will explore the causes of brown patches on ceilings, how to identify the problem, possible solutions, and preventive measures to avoid future occurrences.
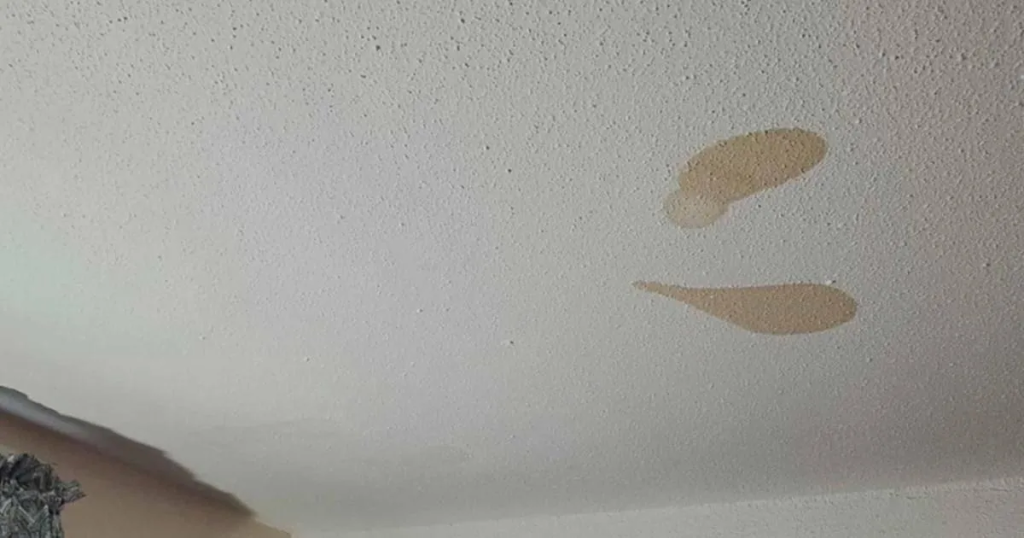
Brown Patch On Ceiling

Understanding the Causes of Brown Patches on Ceilings

1. Water Damage

The most common cause of a brown patch on the ceiling is water damage, usually resulting from leaks. Water can seep through ceilings from various sources, including:

  • Roof Leaks: Damaged shingles, flashing, or gutters can allow water to enter the roof and eventually reach the ceiling.
  • Plumbing Issues: Burst pipes, faulty plumbing connections, or overflowing toilets in upper levels can lead to leaks that manifest as brown patches on ceilings below.
  • Condensation: Poor ventilation can lead to excessive humidity, causing condensation to form on pipes and fixtures, eventually dripping onto the ceiling.

Read too: Shiplap Ceiling in Kitchen: A Timeless Trend for a Stylish and Cozy Space

Identifying Water Damage

Water damage typically presents as discolored patches, often brown or yellow in color. The texture of the affected area may feel soft or sponge-like, indicating moisture intrusion. If you notice any bubbling or peeling paint, this may also be a sign of underlying water damage.

2. Mold Growth

Another potential issue linked to brown patches is mold growth. Mold thrives in damp environments, making it more likely to develop in areas with existing water damage. Not only can mold create unsightly brown patches, but it can also pose serious health risks to occupants, particularly those with allergies or respiratory issues.

Identifying Mold Issues

If you suspect that mold is contributing to the brown patch on your ceiling, look for:

  • A musty odor
  • Dark spots or clusters, often fuzzy or slimy
  • Any signs of water damage, such as peeling paint or wallpaper

3. Smoke or Soot Damage

In homes with fireplaces, stoves, or other sources of combustion, brown patches on ceilings can also result from smoke or soot. Inadequate ventilation during cooking or fireplace use can cause soot to accumulate on ceilings and walls, leading to discoloration.

Identifying Soot Damage

Soot stains are usually dark brown or black and may have a greasy texture. These stains are often found near ceilings, especially in kitchens or living rooms where smoking or cooking occurs.

4. Rust

Rust can also contribute to brown patches, particularly if metal fixtures or ducts are present. Over time, moisture can corrode these metal components, leading to rust stains that drip onto the ceiling below.

Identifying Rust Issues

Rust stains are usually reddish-brown and often occur near HVAC vents or metal pipes. Look for signs of moisture accumulation around these areas.

Solutions for Brown Patches on Ceilings

1. Identify and Repair the Source of the Problem

Before attempting to fix the brown patch, it’s crucial to identify and address the underlying issue. Ignoring the cause will only lead to further damage and recurring patches. Here’s how to approach repairs based on the cause:

  • For Water Damage: Inspect your roof, plumbing, and attic for any signs of leaks or moisture intrusion. Repair any damaged shingles, plumbing, or flashing as needed.
  • For Mold: If mold is present, use a mold remediation kit or consult a professional for safe removal. Ensure that the area is properly ventilated to prevent future mold growth.
  • For Soot Damage: Clean the area with a solution of water and mild detergent. In severe cases, you may need to repaint the ceiling after thorough cleaning.
  • For Rust: Replace any corroded metal fixtures or ducts, and ensure proper insulation to prevent moisture buildup.

2. Repairing the Ceiling

Once you have addressed the underlying cause of the brown patch, it’s time to repair the ceiling itself. Depending on the extent of the damage, you may need to take the following steps:

Minor Stains

For minor brown stains, you can often use a stain-blocking primer followed by repainting the area:

  1. Clean the Area: Gently clean the surface with a sponge and water.
  2. Apply Stain-Blocking Primer: Use a high-quality stain-blocking primer to cover the affected area. This will help prevent the stain from bleeding through the new paint.
  3. Repaint the Ceiling: Once the primer is dry, repaint the area with ceiling paint that matches the surrounding color.

Major Damage

If the damage is extensive or if there are signs of structural issues, you may need to consider more significant repairs:

  1. Cut Out Damaged Sections: Use a drywall saw to carefully cut out the affected area of the ceiling.
  2. Replace Drywall: Install new drywall to replace the removed section, securing it with screws to the ceiling joists.
  3. Tape and Mud: Use joint tape and joint compound to smooth the seams and create a seamless finish.
  4. Sand and Paint: Sand the repaired area smooth once it is dry and then repaint to match the ceiling.

Preventing Brown Patches on Ceilings

1. Regular Maintenance

Regular home maintenance is key to preventing brown patches on ceilings. Here are some tips:

  • Inspect Your Roof: Conduct annual roof inspections to check for missing shingles, cracks, or other damage.
  • Check Plumbing: Regularly check your plumbing for leaks and signs of wear, especially around toilets, sinks, and appliances.
  • Improve Ventilation: Ensure proper ventilation in kitchens and bathrooms to reduce moisture buildup and condensation.

2. Control Humidity Levels

Excessive humidity can lead to water damage and mold growth. Use the following strategies to control humidity levels in your home:

  • Use Dehumidifiers: Place dehumidifiers in high-moisture areas, such as basements or bathrooms, to keep humidity levels in check.
  • Ventilate: Use exhaust fans in bathrooms and kitchens to expel moisture-laden air outside.
  • Insulate Pipes: Insulate cold water pipes to prevent condensation from forming on their surfaces.

3. Regular Cleaning

Keep ceilings and walls clean and free of dust and debris. Regularly wipe down surfaces to remove any potential mold spores or soot particles that could lead to brown patches.

When to Call a Professional

While some brown patches on ceilings can be addressed by homeowners, others may require professional help. If you encounter any of the following situations, consider contacting a professional:

  • Extensive water damage that may compromise structural integrity
  • Persistent mold growth that is difficult to remove
  • Unknown sources of leaks or stains that you cannot identify
  • Safety concerns related to electrical wiring or plumbing issues

Conclusion

A brown patch on ceiling is more than just an aesthetic issue; it can indicate serious underlying problems that need to be addressed promptly. By understanding the various causes, taking appropriate action, and implementing preventive measures, you can maintain a safe and beautiful living space. Regular inspections, prompt repairs, and diligent cleaning will go a long way in ensuring that your ceilings remain free of stains and damage for years to come. Don’t ignore that brown patch; take action today to protect your home!

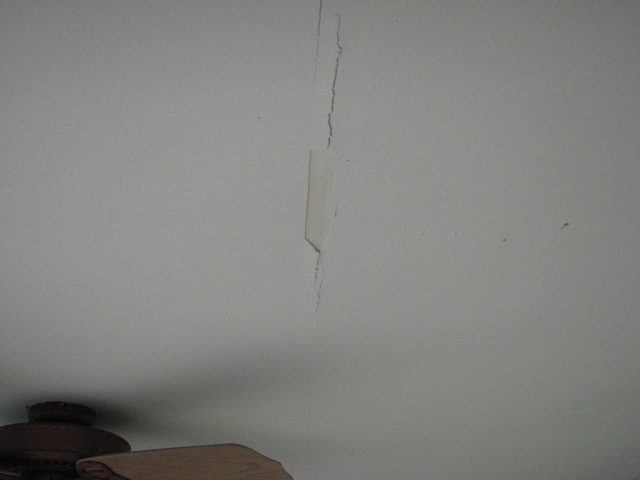
Termite Damage in Ceiling: Signs, Prevention, and Repair Solutions

Termites are among the most destructive pests, capable of causing significant damage to wooden structures in your home, including the ceiling. Understanding the implications of termite damage in ceilings is essential for homeowners, as early detection and intervention can save thousands of dollars in repairs. This article delves into the signs of termite damage, the causes behind it, prevention strategies, and the necessary steps for repair.

Termite Damage In Ceiling

What Causes Termite Damage in Ceilings?

Termite infestations usually start in the foundation or wooden parts of the house but can quickly spread to other areas, including ceilings. The main causes of termite damage in ceiling include:

  1. Moisture: Termites are attracted to moist environments. Leaks in your roof, plumbing issues, or high humidity can create the ideal conditions for termite infestations.
  2. Wooden Structures: Any wooden structures in your home, including beams, rafters, and ceiling joists, can become targets for termites.
  3. Poor Ventilation: Insufficient ventilation in attics can increase humidity levels, further attracting termites.
  4. Improper Construction: If your home was not constructed correctly, it may have gaps or weaknesses that allow termites to access the wooden parts of your ceiling.
  5. Lack of Treatment: If your home has not been treated for termites or is overdue for preventative treatments, it is more susceptible to infestations.

Read too: Shiplap Ceiling in Kitchen: A Timeless Trend for a Stylish and Cozy Space


Signs of Termite Damage in Ceilings

Detecting termite damage in ceilings early is crucial. Here are some signs to watch for:

1. Sagging Ceilings

If you notice that your ceiling appears to be sagging or bowing, it could be a sign of termite damage. The insects consume wood, weakening the structural integrity of ceiling joists and beams.

2. Hollow Sounds

When you tap on the ceiling, it should sound solid. If you hear a hollow sound, it may indicate that termites have consumed the wood inside, leaving only a thin layer intact.

3. Discolored or Stained Ceilings

Water stains or discoloration can be caused by moisture, which attracts termites. If you notice unusual stains, it’s worth investigating further.

4. Frass

Frass is the term used for termite droppings. These tiny, wood-colored pellets can accumulate under damaged areas of the ceiling. If you find frass, it’s a clear sign of an active infestation.

5. Wings and Insect Parts

Termites shed their wings after mating. Finding discarded wings near windows or ceilings can indicate a nearby colony.

6. Presence of Termites

Of course, seeing actual termites is a strong indication of an infestation. They are typically light brown and have a soft body, making them less visible than other insects.


Understanding the Types of Termites

Different types of termites can cause damage, and knowing which type is affecting your home can help you decide on the best course of action:

  1. Subterranean Termites: These are the most common types that cause damage in homes. They live underground and build mud tubes to access wooden structures. They can enter through cracks in foundations.
  2. Drywood Termites: These termites do not require contact with the soil and can infest the wood in your home directly. They are often found in wooden furniture and beams.
  3. Dampwood Termites: As their name suggests, dampwood termites thrive in moist environments. They are usually found in decaying wood and require high moisture levels to survive.

The Cost of Termite Damage Repair

Repairing termite damage in ceilings can be costly, depending on the extent of the damage and the affected areas. Here’s a breakdown of potential costs:

1. Inspection Costs

Before repairs can begin, a professional inspection is essential to assess the damage. Inspection costs can range from $100 to $300, depending on the size of your home and the company you choose.

2. Treatment Costs

The cost of termite treatments varies based on the type of treatment required and the size of the infestation. Typical costs range from $200 to $2,500 for professional extermination services, including chemical treatments and bait systems.

3. Repair Costs

The cost of repairing termite damage in ceilings can vary widely:

  • Minor Repairs: If only small sections need repair, costs can range from $200 to $600.
  • Moderate Repairs: Replacing damaged joists or beams can range from $600 to $1,500.
  • Extensive Repairs: For extensive damage requiring major structural repairs, costs can exceed $2,000.

How to Prevent Termite Damage in Ceilings

Preventing termite damage in ceilings starts with taking proactive measures in your home:

1. Regular Inspections

Schedule regular inspections with a pest control professional to identify potential issues early. Annual inspections are recommended for homes in termite-prone areas.

2. Moisture Control

Fix any leaks in your roof or plumbing promptly. Ensure proper drainage around your foundation to prevent moisture accumulation.

3. Improve Ventilation

Ensure adequate ventilation in attics and crawl spaces to reduce humidity levels. Installing vents can help circulate air and keep moisture at bay.

4. Use Termite-Resistant Materials

When building or renovating, consider using termite-resistant materials, such as treated wood or alternative materials like steel.

5. Maintain Landscaping

Keep wood mulch, firewood, and other organic materials away from your home’s foundation. Trim back trees and shrubs to prevent them from touching your house.

6. Apply Preventative Treatments

Consider applying preventative termite treatments to your home’s foundation and any wooden structures. Consult with a pest control professional for appropriate options.


Repairing Termite Damage in Ceilings

If you discover termite damage in your ceiling, it’s crucial to act quickly. Here’s a step-by-step guide to the repair process:

Step 1: Call a Professional

The first step in addressing termite damage is to contact a pest control professional. They can assess the extent of the infestation and recommend a treatment plan.

Step 2: Treatment

Once the pest control expert has treated the infestation, it’s time to start repairs. Make sure the area is free of termites before proceeding.

Step 3: Assess the Damage

Determine the extent of the damage to the ceiling. You may need to remove sections of the ceiling to evaluate the condition of the joists and beams.

Step 4: Replace Damaged Wood

Cut out and replace any damaged joists or beams. Ensure that new wood is treated to resist future termite infestations.

Step 5: Repair the Ceiling

After replacing any damaged wood, you can repair the ceiling. This may involve drywall installation, plastering, or painting to match the surrounding area.

Step 6: Prevent Future Infestations

Once repairs are complete, take steps to prevent future infestations by implementing the preventive measures mentioned earlier.


Conclusion

Termite damage in ceiling can be a serious issue that requires prompt attention. Recognizing the signs of an infestation, understanding the potential costs involved, and taking preventative measures can help protect your home from these destructive pests. If you suspect termite damage, don’t hesitate to contact a pest control professional for assistance. Early detection and intervention can save you time, stress, and money in the long run.

Unveiling the Secrets Behind Drywall Seam Cracks in Ceiling: Causes, Fixes, and Prevention Strategies

Homeowners often encounter the pesky issue of drywall seam cracks in the ceiling. The question that arises is, “How do you deal with drywall seam cracks in the ceiling?” In this comprehensive guide, we will explore the causes behind these cracks, effective solutions, and preventive measures to keep your ceiling in pristine condition.

Drywall Seam Cracks In Ceiling

Understanding Drywall Seam Cracks in Ceiling

Drywall seam cracks in ceiling are not uncommon, and they can be a source of frustration for homeowners. These cracks typically occur at the seams where two drywall sheets meet. They may start small but can gradually worsen over time, leading to aesthetic concerns and potential structural issues.

Causes of Drywall Seam Cracks in Ceiling

  1. Settling of the House: Over time, houses settle, causing shifts in the foundation. These shifts can manifest as cracks in the ceiling seams.
  2. Humidity Changes: Fluctuations in humidity levels can impact the moisture content of the drywall, leading to expansion and contraction. This continuous movement can result in seam cracks.
  3. Poor Installation: Improper installation of drywall, including inadequate taping and mudding, can contribute to seam cracks over time.
  4. Temperature Changes: Extreme temperature changes can cause the materials in the ceiling to expand and contract, creating stress on the drywall seams.

Dealing with Drywall Seam Cracks in Ceiling: Fixes and Solutions

  1. Patch and Repaint: For minor cracks, patching the affected area with joint compound and repainting can provide a quick and cost-effective solution.
  2. Re-Taping and Mudding: In cases where the cracks are more significant, re-taping and mudding the seams may be necessary. This involves removing the damaged tape, applying new tape, and adding layers of joint compound.
  3. Addressing Underlying Issues: To prevent recurring cracks, it’s crucial to address any underlying issues such as foundation problems, inadequate support, or poor installation.
  4. Professional Assistance: In severe cases, seeking professional help is advisable. A qualified contractor can assess the extent of the damage and provide a tailored solution.

Preventing Future

  1. Proper Installation: Ensure that drywall is installed by professionals using proper techniques to minimize the risk of future cracks.
  2. Humidity Control: Maintain consistent humidity levels in your home to prevent the expansion and contraction of drywall materials.
  3. Regular Inspections: Periodically inspect your ceiling for any signs of cracks or damage. Addressing issues early can prevent them from worsening.
  4. Foundation Maintenance: Addressing foundation issues promptly can prevent settling-related cracks in the ceiling.

Read too: Help! My Ceiling Is Falling Down: Understanding Causes and Solutions for a Deteriorating Ceiling

Conclusion: A Crack-Free Future for Your Ceiling

In conclusion, understanding the causes, fixes, and prevention strategies for drywall seam cracks in the ceiling is essential for maintaining the structural integrity and aesthetics of your home. Whether you opt for DIY solutions or seek professional assistance, addressing the issue promptly can save you from more extensive repairs in the long run.

Don’t let drywall seam cracks be a cause of stress. Equip yourself with the knowledge to tackle this common issue and ensure a crack-free and visually appealing ceiling for years to come.

Dream of Water Leaking From Ceiling: Meanings and Interpretations

Have you ever dreamed of water leaking from your ceiling? If so, you’re not alone. This is a common dream that can be interpreted in a variety of ways. In this article, we will explore the meanings and interpretations of dreams about water leaking from the ceiling. We will also provide some tips on how to deal with these dreams if they are causing you distress.

Dream Of Water Leaking From Ceiling

What do dreams about water leaking from the ceiling mean?

There is no one definitive answer to this question. However, there are a few common interpretations that can be drawn from these dreams.

  • Frustration or stress: Dreams about water leaking from the ceiling can be a sign of frustration or stress in your waking life. The water may represent your emotions, which are overflowing and causing problems. For example, if you are feeling stressed about work, you might dream of water leaking from the ceiling of your office.
  • Change: Dreams about water leaking from the ceiling can also be a sign of change. The water may represent new beginnings or challenges that are coming your way. For example, if you are about to start a new job, you might dream of water leaking from the ceiling of your new home.
  • Uncertainty: Dreams about water leaking from the ceiling can also be a sign of uncertainty or anxiety. The water may represent a lack of control or stability in your life. For example, if you are feeling anxious about a relationship, you might dream of water leaking from the ceiling of your bedroom.

How to interpret your dream

The best way to interpret your dream about water leaking from the ceiling is to consider the context of the dream. What was the water like? Where was it leaking from? What were you doing in the dream?

For example, if the water was clear and flowing, it could be a sign of positive change. However, if the water was dirty or stagnant, it could be a sign of negative change.

If the water was leaking from a hole in the ceiling, it could be a sign that you are feeling vulnerable or exposed. However, if the water was leaking from a pipe, it could be a sign that you are feeling stressed or overwhelmed.

How to deal with dreams about water leaking from the ceiling

If dreams about water leaking from the ceiling are causing you distress, there are a few things you can do to deal with them.

  • Talk to someone you trust: Talking to a friend, family member, or therapist can help you to process your dreams and understand their meaning.
  • Journal about your dreams: Keeping a journal of your dreams can help you to track patterns and identify themes.
  • Practice relaxation techniques: Relaxation techniques, such as meditation or yoga, can help to reduce stress and anxiety, which can contribute to nightmares.

Conclusion

Dreams about water leaking from the ceiling can be a sign of a variety of things. By understanding the context of your dream, you can gain insight into your own thoughts and feelings.

Read too: How To Paint A Basement Ceiling

Additional details

In addition to the common interpretations discussed above, there are a few other things to consider when interpreting a dream about water leaking from the ceiling.

  • The location of the leak: The location of the leak can provide additional clues about the meaning of the dream. For example, if the leak is in your bedroom, it could be a sign that you are feeling insecure or anxious about your relationships.
  • The amount of water: The amount of water can also be significant. A small leak could be a sign of a minor problem, while a large leak could be a sign of a major issue.
  • The actions you take in the dream: The actions you take in the dream can also provide insights into your subconscious thoughts and feelings. For example, if you try to fix the leak, it could be a sign that you are trying to address a problem in your waking life.

Tips for dealing with distressing dreams

If dreams about water leaking from the ceiling are causing you distress, there are a few things you can do to deal with them.

  • Try to relax before bed: Stress and anxiety can contribute to nightmares, so it is important to relax before bed. This could include taking a warm bath, reading a calming book, or listening to relaxing music.
  • Create a positive bedtime routine: A positive bedtime routine can help you to wind down and prepare for sleep. This could include reading a book, taking a warm bath, or listening to calming music.
  • Avoid caffeine and alcohol before bed: Caffeine and alcohol can interfere with sleep, so it is best to avoid them before bed.
  • See a therapist: If dreams about water leaking from the ceiling are causing you significant distress, it is important to seek professional

When Disaster Strikes Upstairs: What Causes a Toilet to Leak Through the Ceiling?

A leaking toilet can be a homeowner’s worst nightmare. It’s not just about the mess and inconvenience; when a toilet leak reaches your ceiling below, it can lead to significant damage and costly repairs. If you’re facing the distressing situation of a toilet leaking through the ceiling, it’s crucial to understand the possible causes and how to address them promptly.

What Causes Toilet To Leak Through Ceiling

Understanding the Consequences of a Toilet Leak

Before we dive into the causes, it’s essential to recognize the potential consequences of a toilet leak through the ceiling. Such leaks can lead to several issues:

  • Ceiling Damage: Water leaks can weaken the ceiling structure, cause discoloration, and even lead to mold growth if not addressed promptly.
  • Water Damage: Water can seep into the walls and floors, causing structural damage and compromising the integrity of your home.
  • Health Risks: Prolonged water exposure can result in mold growth, which can pose health risks to you and your family.

Now, let’s explore the common causes of a toilet leaking through the ceiling:

1. Faulty Wax Ring

The wax ring is a critical seal that sits between the base of the toilet and the flange on the floor. If this wax ring deteriorates or is not installed correctly, it can allow water to leak from the base of the toilet and seep into the floor, eventually making its way through the ceiling below.

2. Loose or Damaged Toilet Tank

A loose or damaged toilet tank can result in water leakage. The tank holds the water before it is released to flush the toilet. Cracks, loose connections, or damaged components in the tank can lead to water seepage.

3. Broken or Faulty Supply Line

The supply line connects the toilet tank to the water supply. If it develops a crack or a loose connection, it can leak water onto the bathroom floor, which may eventually find its way through the ceiling below.

4. Blocked or Clogged Drain Line

A blocked or clogged drain line can cause water to back up in the toilet, leading to overflow and leakage. Blockages can occur due to excessive toilet paper, foreign objects, or tree roots infiltrating the sewer line.

5. Damaged Flange

The flange is the piece that connects the toilet to the drainpipe. If it is cracked, corroded, or improperly installed, it can allow water to escape and leak through the ceiling.

6. Condensation

In some cases, condensation on the toilet tank or bowl can create the appearance of a leak. This usually occurs in humid environments. While it may not be an actual leak, it’s essential to rule out other causes of moisture on and around the toilet.

Addressing a Toilet Leak Through the Ceiling

If you’re dealing with a toilet leak through the ceiling, here are the steps to address the issue:

  1. Stop the Water Flow: Turn off the water supply to the toilet by closing the shutoff valve located behind or near the toilet.
  2. Assess the Damage: Inspect the ceiling for water damage and assess the extent of the leak.
  3. Call a Professional: Contact a licensed plumber to identify the cause of the leak and make the necessary repairs. It’s important to address the root of the problem to prevent future leaks.
  4. Address Water Damage: If the ceiling or surrounding areas have been damaged, consult a water damage restoration specialist to assess and repair the affected areas.
  5. Prevent Future Leaks: Ensure that the wax ring, supply line, flange, and other components are in good condition to prevent future leaks.

Read too: Water Leak In Ceiling From Washing Machine

Conclusion

A toilet leak through the ceiling is a stressful situation, but understanding the potential causes and taking prompt action can help mitigate the damage. Whether it’s a faulty wax ring, loose tank, damaged supply line, or any other issue, addressing the problem swiftly is key to preventing extensive damage to your home. Regular toilet maintenance and inspections can also help identify and prevent leaks before they lead to more significant issues.