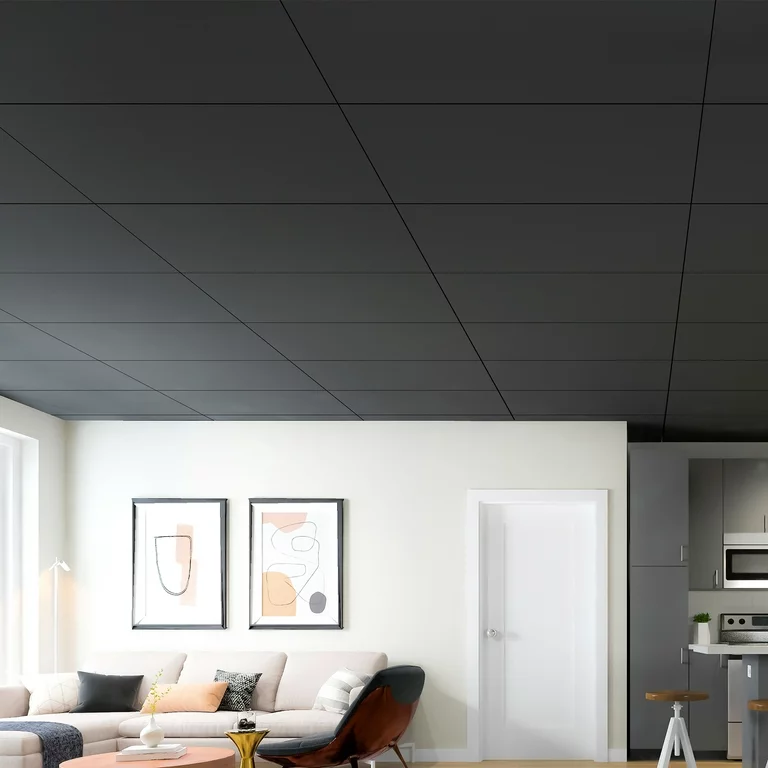
White Drop Ceiling Tiles: Enhancing Your Space with Style and Functionality

Drop ceiling tiles, also known as suspended ceilings, have been a popular choice for commercial and residential spaces for decades. They offer a simple way to cover unsightly wires, pipes, and ductwork while providing easy access for repairs. Among the many options available, white drop ceiling tiles stand out as one of the most versatile and aesthetically pleasing choices for modern interiors.

White Drop Ceiling Tiles

In this article, we will explore everything you need to know about white drop ceiling tiles, including their benefits, different styles, installation process, and maintenance tips. Whether you’re renovating your home, office, or any other space, this guide will help you understand why white drop ceiling tiles might be the perfect solution for you.

What Are White Drop Ceiling Tiles?

White drop ceiling tiles are lightweight panels typically made of materials such as mineral fiber, gypsum, metal, or vinyl. These tiles are suspended from the actual ceiling using a metal grid system. The tiles rest inside the grid, creating a false ceiling that hides utilities like electrical wiring or air ducts while maintaining a clean and organized appearance.

Read too: Exploring the Innovation and Efficiency of Ceiling Mounted Surgical Light Solutions: Illuminating Precision

White is the most common color for drop ceiling tiles, as it reflects light well, making spaces appear brighter and more open. Whether used in an office, retail store, basement, or kitchen, white drop ceiling tiles provide a neutral, minimalist look that complements virtually any décor.

Benefits of White Drop Ceiling Tiles

There are several reasons why white drop ceiling tiles have remained a popular choice for both commercial and residential properties. Below are some key benefits that make them a preferred option for many people:

1. Enhanced Aesthetic Appeal

White drop ceiling tiles offer a clean, streamlined appearance that enhances the overall look of any room. Their smooth, bright surface can make a room feel more spacious, which is especially important in areas with lower ceilings. In addition, the neutral color of white tiles can easily blend with a wide range of design schemes, from modern to traditional.

2. Light Reflection

One of the main advantages of using white tiles in a ceiling is their ability to reflect light. This can help reduce the need for additional lighting fixtures, making spaces appear brighter without consuming more energy. White drop ceiling tiles are ideal for offices, retail stores, and basements where natural light might be limited.

3. Sound Absorption

Many white drop ceiling tiles are designed to absorb sound, which is especially beneficial in noisy environments like open-plan offices or large conference rooms. These tiles help reduce echo and background noise, creating a more comfortable environment for conversations and work.

4. Easy Access for Maintenance

One of the greatest advantages of using drop ceiling tiles is the easy access they provide to important building systems. By simply lifting the tiles, you can access pipes, electrical wiring, and HVAC ducts for repairs or maintenance. This makes them an excellent choice for commercial buildings, where regular access to these systems is often required.

5. Concealment of Utilities

White drop ceiling tiles offer an elegant solution for hiding unsightly utilities like exposed wires, pipes, and ductwork. Instead of dealing with the messy appearance of these elements, drop ceiling tiles create a smooth and seamless surface, improving the room’s overall appearance.

6. Cost-Effective

Compared to other ceiling options, drop ceilings are relatively affordable. The installation process is quick and simple, reducing labor costs. Additionally, white drop ceiling tiles are available in a variety of price points, allowing you to find a solution that fits your budget without sacrificing quality.

Types of White Drop Ceiling Tiles

When choosing white drop ceiling tiles, it’s essential to understand that they come in various materials, designs, and finishes. Each type of tile offers unique features, so selecting the right one for your specific needs can make all the difference.

1. Mineral Fiber Tiles

Mineral fiber tiles are one of the most common types of drop ceiling tiles. Made from natural and synthetic materials, they are lightweight, affordable, and offer excellent sound absorption properties. These tiles are ideal for offices, classrooms, and other spaces where controlling noise levels is essential.

2. Gypsum Ceiling Tiles

Gypsum tiles are another popular option for white drop ceilings. Known for their durability and fire-resistant properties, they are a great choice for both commercial and residential spaces. Gypsum tiles tend to have a more solid and smoother surface compared to mineral fiber tiles, offering a polished look that works well in modern interiors.

3. Vinyl or PVC Tiles

Vinyl tiles are often used in areas with high moisture levels, such as basements, kitchens, or bathrooms. These tiles are water-resistant and easy to clean, making them a practical solution for spaces that require frequent maintenance. They come in a wide range of textures and patterns, adding more design flexibility.

4. Metal Ceiling Tiles

For a more industrial or contemporary look, metal ceiling tiles are an excellent choice. Metal tiles are incredibly durable, resistant to moisture and damage, and provide a sleek, modern appearance. While metal tiles can be more expensive than other materials, they offer a distinct aesthetic that works well in trendy commercial spaces or loft-style homes.

5. Acoustic Ceiling Tiles

Acoustic tiles are specifically designed to reduce noise levels in a room. They are often made from mineral fibers and feature perforations or patterns that enhance their sound-absorbing capabilities. These tiles are commonly used in theaters, offices, and music studios to improve acoustics.

How to Install White Drop Ceiling Tiles

Installing white drop ceiling tile is a relatively straightforward process, especially for DIY enthusiasts. Below is a step-by-step guide to help you install drop ceiling tiles in your home or office:

Step 1: Measure the Room

Begin by measuring the dimensions of the room to determine how many tiles and how much grid material you will need. It’s essential to account for any fixtures or obstacles in the ceiling, such as lights or vents, which may require adjustments to the grid layout.

Step 2: Install the Wall Angles

The next step is to install wall angles around the perimeter of the room. These angles serve as the support for the edges of the ceiling grid. Use a level to ensure the angles are straight, and secure them to the wall with screws or nails.

Step 3: Assemble the Grid

Once the wall angles are in place, assemble the metal grid that will hold the tiles. The grid consists of main runners, cross tees, and connectors. Follow the manufacturer’s instructions for assembling the grid, ensuring that it is level and properly aligned.

Step 4: Cut and Install the Tiles

If needed, cut the white drop ceiling tiles to fit around obstacles or along the edges of the room. Use a sharp utility knife to make clean cuts. Once the tiles are cut to size, simply drop them into place within the grid. Be careful not to damage the edges of the tiles during installation.

Step 5: Add Lighting or Fixtures

If you’re installing lights, fans, or other fixtures, ensure they are properly supported by the ceiling grid. You may need to reinforce certain sections of the grid to accommodate heavier fixtures.

Maintenance Tips for White Drop Ceiling Tiles

Maintaining your white drop ceiling tiles is essential to keep them looking clean and fresh for years to come. Here are some tips to ensure their longevity:

1. Regular Dusting

Over time, ceiling tiles can accumulate dust and dirt, especially in commercial spaces. Regularly dust your tiles using a soft cloth or vacuum with a brush attachment to keep them looking bright.

2. Clean Stains Immediately

If your white drop ceiling tiles become stained, it’s important to clean them as soon as possible. Use a mild detergent mixed with water to gently scrub the stained area. Avoid using harsh chemicals that could damage the surface of the tiles.

3. Replace Damaged Tiles

If a tile becomes cracked or discolored beyond repair, it’s best to replace it with a new one. Fortunately, drop ceiling tiles are easy to remove and replace without disturbing the rest of the ceiling.

4. Inspect for Moisture Issues

If you notice discoloration or sagging in your ceiling tiles, it could indicate a moisture problem above the ceiling. Inspect the area for leaks, and address any plumbing or roof issues promptly to prevent further damage.

Conclusion

White drop ceiling tile offer a practical and stylish solution for covering unsightly ceilings while providing easy access to utilities. Their ability to brighten up a space, combined with their sound-absorbing properties, makes them an excellent choice for both residential and commercial applications. With a wide range of materials, textures, and styles available, you can find the perfect white drop ceiling tile to suit your needs.

Whether you’re looking to improve the acoustics in your office, create a clean look in your basement, or hide imperfections in your ceiling, white drop ceiling tile provide a cost-effective and versatile option. By following proper installation and maintenance practices, you can enjoy a beautiful and functional ceiling for years to come.

Recessed Light Drop Ceiling: A Modern Lighting Solution for Your Home

Recessed Light Drop Ceiling. Lighting plays a crucial role in shaping the atmosphere and functionality of any space, and one of the most popular and aesthetically pleasing lighting options is recessed lighting. Recessed lighting offers a sleek, minimalist design, providing excellent illumination without cluttering your ceiling with bulky fixtures. When combined with a drop ceiling, it creates a clean, contemporary look that can enhance the overall ambiance of your home or office.

Recessed Light Drop Ceiling

In this article, we’ll explore everything you need to know about installing recessed light drop ceilings, from the benefits to step-by-step installation and design tips. Whether you’re renovating your home or working on a new construction project, understanding how to incorporate recessed lights into a drop ceiling will help you create a well-lit, visually appealing space.


What is a Recessed Light Drop Ceiling?

Before diving into the installation process, it’s important to understand what a recessed light drop ceiling is.

Recessed Lighting Overview

Recessed lighting, also known as can lighting or downlighting, involves installing light fixtures directly into the ceiling, so they sit flush with the surface. This type of lighting provides focused, downward illumination, often used to create a clean, modern appearance while offering versatile lighting options.

Drop Ceiling Overview

A drop ceiling, or suspended ceiling, is a secondary ceiling that hangs below the main structural ceiling. Drop ceilings are commonly used in offices, basements, and commercial spaces, but they are also becoming popular in residential settings. Drop ceilings consist of a metal grid that holds lightweight ceiling tiles, and the space between the drop ceiling and the structural ceiling can be used for wiring, ductwork, and other utilities.

Read too: Bathroom Flooded Through the Ceiling: A Comprehensive Guide

Combining Recessed Lighting with Drop Ceilings

When recessed lights are installed in a drop ceiling, the fixtures are embedded into the ceiling tiles, allowing the lights to blend seamlessly with the surface. This combination offers a sleek, modern design that maximizes overhead space while providing effective lighting.


Why Choose a Recessed Light Drop Ceiling?

There are several benefits to incorporating recessed lighting into a drop ceiling, making it an ideal choice for both residential and commercial spaces.

1. Clean and Minimalistic Aesthetic

Recessed lighting in a drop ceiling creates a smooth, uncluttered look. Unlike traditional light fixtures that hang down, recessed lights sit flush with the ceiling, creating a streamlined appearance. This is particularly important in modern and minimalist interior designs, where simplicity and elegance are key.

2. Maximizes Overhead Space

Drop ceilings naturally reduce the height of a room, so choosing recessed lighting ensures you won’t lose any more vertical space to bulky light fixtures. By recessing the lights into the ceiling tiles, you create the illusion of more space, which is especially beneficial in rooms with lower ceilings.

3. Versatile Lighting Options

Recessed lighting is highly versatile and can be used for various lighting purposes, such as general illumination, accent lighting, or task lighting. When integrated into a drop ceiling, recessed lights can be positioned strategically to highlight specific areas of the room, create mood lighting, or improve visibility for tasks.

4. Energy Efficiency

Many modern recessed lights use LED bulbs, which are more energy-efficient than traditional incandescent bulbs. LED recessed lights consume less electricity, produce less heat, and last much longer. When combined with a drop ceiling, this can help reduce energy costs, especially in large commercial spaces.

5. Concealed Wiring and Utilities

One of the main advantages of drop ceilings is the ability to conceal wiring, plumbing, and ductwork between the structural ceiling and the drop ceiling. Recessed lights can easily be integrated into this space without disrupting the clean appearance of the ceiling.


How to Install Recessed Lighting in a Drop Ceiling

Installing recessed lights in a drop ceiling may seem intimidating, but with the right tools and guidance, it can be a straightforward DIY project. Below is a step-by-step guide to help you through the installation process.

Step 1: Plan the Lighting Layout

Before beginning the installation, plan the layout of your recessed lights. Consider factors such as the size of the room, the placement of furniture, and the purpose of the lighting (general, task, or accent lighting). Mark the locations where you want to install each recessed light on the drop ceiling tiles.

Step 2: Select the Right Fixtures

Not all recessed light fixtures are suitable for drop ceilings, so it’s important to choose the right ones. Look for recessed light fixtures that are specifically designed for installation in suspended or drop ceilings. These fixtures typically have adjustable mounting brackets to secure them to the metal grid of the ceiling.

Step 3: Prepare the Ceiling Tiles

Remove the ceiling tiles where you plan to install the recessed lights. Use a template (usually included with the light fixture) to trace the outline of the fixture on the tile. Carefully cut out the hole for the light using a utility knife or a hole saw.

Step 4: Run Electrical Wiring

With the ceiling tiles removed, you can run the electrical wiring for the lights. If you’re not comfortable working with electricity, it’s best to hire a licensed electrician. If you’re confident in your skills, follow the instructions provided with the light fixture to connect the wiring properly. Be sure to turn off the power to the room before working on any electrical connections.

Step 5: Install the Recessed Light Fixtures

Once the wiring is in place, secure the recessed light fixtures to the metal grid of the drop ceiling using the mounting brackets. Ensure the fixtures are level and aligned with the grid.

Step 6: Replace the Ceiling Tiles

Carefully place the cut ceiling tiles back into the grid, ensuring the recessed lights fit snugly into the holes you cut. Once all the tiles are in place, turn the power back on and test the lights to make sure everything is working correctly.


Design Tips for Recessed Lighting in Drop Ceilings

In addition to installation, there are several design considerations to keep in mind when incorporating recessed lights in a drop ceiling. Here are a few tips to enhance the overall look and functionality of your lighting setup:

1. Use Dimmers for Versatility

Installing dimmer switches allows you to adjust the brightness of your recessed lights, giving you greater control over the ambiance of the room. Dimmers are especially useful in rooms with drop ceilings, where you may want to create different lighting moods for various activities.

2. Mix Recessed Lighting with Other Light Sources

While recessed lighting provides excellent general illumination, it can sometimes create shadows or uneven lighting if used alone. Consider combining recessed lights with other types of lighting, such as pendant lights, under-cabinet lights, or wall sconces, to create a more layered and dynamic lighting design.

3. Choose LED Recessed Lights

LED bulbs are an excellent choice for recessed lighting in drop ceilings due to their energy efficiency and long lifespan. LED lights also produce less heat, which is important for maintaining a comfortable temperature in the room.

4. Focus on Task Lighting

Recessed lighting can be used to create task-specific lighting in areas such as kitchens, offices, or bathrooms. In a kitchen with a drop ceiling, for example, you can position recessed lights directly over countertops and workspaces to ensure proper illumination while cooking or preparing food.

5. Highlight Architectural Features

If your room has unique architectural features, such as beams or an accent wall, use recessed lighting to highlight these elements. Strategically placing recessed lights in the drop ceiling can draw attention to specific areas of the room and add visual interest.


Maintenance and Troubleshooting for Recessed Light Drop Ceilings

Once you’ve installed your recessed lights in a drop ceiling, it’s important to maintain them properly to ensure they last for years to come. Here are some maintenance tips and troubleshooting advice:

1. Regular Cleaning

Recessed light fixtures can accumulate dust and grime over time, which can reduce their efficiency and brightness. Regularly dust the fixtures and wipe them down with a damp cloth to keep them clean.

2. Replace Bulbs as Needed

If one of your recessed lights stops working, it may be time to replace the bulb. LED bulbs typically last much longer than traditional incandescent bulbs, but they will eventually need to be replaced.

3. Check for Loose Fixtures

Over time, the recessed light fixtures in a drop ceiling may become loose due to vibrations or shifts in the ceiling tiles. Periodically check the fixtures to ensure they are securely fastened to the ceiling grid.

4. Troubleshoot Flickering Lights

If your recessed lights are flickering or dimming unexpectedly, there may be an issue with the wiring or the light switch. In some cases, flickering can be caused by a loose bulb or a faulty dimmer switch. If you’re unable to identify the cause, it may be best to consult an electrician.


Conclusion: Enhancing Your Space with Recessed Light Drop Ceilings

Installing recessed lighting in a drop ceiling is a great way to enhance the aesthetic and functionality of any room. This combination offers a modern, streamlined appearance while providing versatile and effective lighting options. Whether you’re upgrading a residential space or designing a commercial environment, recessed lights in a drop ceiling can transform the look and feel of the room.

By following the steps outlined in this guide, you can successfully install recessed lights in your drop ceiling and create a well-lit, stylish space that meets your needs. With proper planning, installation, and maintenance, your recessed light drop ceiling will provide years of efficient, beautiful illumination.

Ceiling Fan in a Drop Ceiling: Tips and Considerations for Optimal Airflow

Ceiling fans are a popular choice for enhancing air circulation and comfort in homes and offices alike. When it comes to installing a ceiling fan in a drop ceiling, there are specific considerations and techniques that can ensure proper functionality and efficiency. This comprehensive guide will explore the nuances of installing a Ceiling Fan in Drop Ceiling and provide valuable insights to help you make the most of your installation.

Ceiling Fan In Drop Ceiling

Key Considerations

Installing a ceiling fan in a drop ceiling involves unique challenges and considerations:

  1. Ceiling Strength: Drop ceilings, also known as suspended ceilings, consist of a lightweight grid framework. Ensure that the ceiling is capable of supporting the weight and movement of a ceiling fan. Reinforcements may be necessary for stability.
  2. Ceiling Height: Drop ceilings typically reduce the overall height of a room. Consider the clearance required for the fan blades to ensure optimal airflow without obstruction.
  3. Installation Method: There are specific methods and hardware designed for installing ceiling fans in drop ceilings. These include special mounting brackets and supports that integrate seamlessly with the ceiling grid.

Benefits of Ceiling Fans in Drop Ceilings

Ceiling fans offer several advantages when installed in drop ceilings:

  • Improved Air Circulation: Enhances airflow and ventilation in rooms with limited space.
  • Energy Efficiency: Helps in maintaining comfortable temperatures while potentially reducing heating and cooling costs.
  • Aesthetic Appeal: Adds a decorative element to the ceiling while serving a practical purpose.

Read too: Bathroom Flooded Through the Ceiling: A Comprehensive Guide

Installation Steps

Follow these steps for a successful installation:

1. Assess Ceiling Strength

Ensure that the drop ceiling can support the weight of the ceiling fans. Consult with a professional if reinforcement is needed.

2. Measure Ceiling Height

Determine the appropriate fan size and downrod length based on the reduced ceiling height caused by the drop ceiling.

3. Choose the Right Fan

Select a ceiling fan designed specifically for drop ceilings. These fans are typically lighter and have adapted mounting options.

4. Install Mounting Brackets

Use specialized mounting brackets that attach securely to the ceiling grid. These brackets provide stable support for the fan.

5. Wiring and Testing

Follow safety protocols for electrical wiring. Test the fan after installation to ensure proper functionality and balance.

Conclusion

Installing a ceiling fans in a drop ceiling requires careful planning and execution to ensure both safety and efficiency. By considering the unique challenges posed by drop ceilings and following the recommended installation steps, you can enjoy the benefits of improved air circulation and enhanced comfort in your living or working space.

Whether you’re upgrading an existing drop ceiling or planning a new installation, understanding the nuances of installing a Ceiling Fans in Drop Ceiling is essential for achieving optimal results.

Smooth Drop Ceiling Tile: Transform Your Space

Smooth drop ceiling tiles are an excellent choice for both residential and commercial spaces, providing a sleek and modern look. In this comprehensive guide, we’ll explore everything you need to know about smooth drop ceiling tile – from their benefits and installation process to design tips and maintenance.

Smooth Drop Ceiling Tiles

What Are Smooth Drop Ceiling Tiles?

Smooth drop ceiling tiles are a type of ceiling tile designed to be suspended from a metal grid system. Unlike traditional textured tiles, smooth drop ceiling tiles offer a flat, polished finish that can enhance the aesthetic appeal of any room. They are available in various materials, including mineral fiber, PVC, and gypsum.

Benefits of Smooth Drop Ceiling Tiles

Opting for smooth drop ceiling tiles comes with numerous advantages:

  • Aesthetic Appeal: Their smooth, clean finish provides a modern and sophisticated look.
  • Easy Installation: Designed to fit into a suspended ceiling grid system, making installation straightforward.
  • Acoustic Properties: Many smooth tiles offer sound-absorbing qualities, improving room acoustics.
  • Durability: Resistant to sagging and warping, ensuring a long-lasting ceiling solution.
  • Maintenance: Easy to clean and maintain, keeping your ceiling looking pristine.

Choosing the Right Smooth Drop Ceiling Tiles

When selecting smooth drop ceiling tiles for your space, consider the following factors:

Material
  • Mineral Fiber: Offers excellent acoustic properties and fire resistance.
  • PVC: Moisture-resistant and easy to clean, ideal for kitchens and bathrooms.
  • Gypsum: Provides a solid, durable surface with good sound insulation.
Size and Dimensions
  • Standard Size: Typically 24×24 inches or 24×48 inches, fitting most grid systems.
  • Custom Sizes: Available for unique ceiling layouts or design requirements.
Design and Color
  • White: The most common choice, providing a bright and clean appearance.
  • Custom Colors: Available to match specific decor themes or branding.
  • Smooth Finish: Ensures a sleek and modern look, enhancing the overall aesthetics.

Installation Process of Smooth Drop Ceiling Tiles

Installing smooth drop ceiling tiles involves several key steps:

Preparation
  1. Measure the Room: Calculate the square footage to determine the number of tiles needed.
  2. Plan the Layout: Design the grid system layout, considering any obstacles like lights or vents.
  3. Gather Tools: Ensure you have all necessary tools, including a tape measure, level, utility knife, and ladder.
Installing the Grid System
  1. Mark the Ceiling: Use a chalk line to mark where the grid system will be installed.
  2. Install Wall Angles: Attach wall angles around the room’s perimeter, ensuring they are level.
  3. Hang Main Runners: Secure main runners from the ceiling, spaced according to tile size.
  4. Install Cross Tees: Insert cross tees between main runners to create the grid pattern.
Installing the Tiles
  1. Cut Tiles to Size: Trim tiles as needed to fit around obstacles or along the edges.
  2. Place Tiles in Grid: Gently lift and place tiles into the grid system, ensuring they sit flush.
  3. Adjust and Secure: Make any necessary adjustments to ensure all tiles are level and secure.

Design Tips for Smooth Drop Ceiling Tiles

Enhance the look of your space with these design tips for smooth drop ceiling tiles:

Create Patterns
  • Grid Variations: Experiment with different grid patterns to add visual interest.
  • Accent Tiles: Use colored or textured accent tiles to create focal points.
Incorporate Lighting
  • Recessed Lights: Install recessed lighting within the grid for a seamless look.
  • LED Panels: Use LED light panels to provide even, energy-efficient lighting.
Add Decorative Elements
  • Ceiling Medallions: Incorporate decorative medallions around light fixtures for added elegance.
  • Coffered Ceilings: Create a coffered ceiling effect by adding beams or trim within the grid.

Maintenance and Care for Smooth Drop Ceiling Tiles

Keeping your smooth drop ceiling tiles in top condition is simple with these maintenance tips:

Regular Cleaning
  • Dusting: Use a soft cloth or duster to remove dust and debris regularly.
  • Spot Cleaning: Wipe away stains or marks with a damp cloth and mild detergent.

Read too: Kitchen Lighting For A Vaulted Ceiling: Illuminating Your Space with Style and Functionality

Inspection and Repairs
  • Check for Damage: Regularly inspect tiles for signs of damage or wear.
  • Replace Damaged Tiles: Promptly replace any damaged tiles to maintain the ceiling’s appearance and integrity.
Preventive Measures
  • Control Humidity: Use dehumidifiers in damp areas to prevent moisture-related issues.
  • Ensure Proper Ventilation: Maintain good ventilation to avoid condensation and mold growth.

Conclusion

Smooth drop ceiling tile offer a stylish and practical ceiling solution for various settings. By understanding the benefits, installation process, and maintenance tips, you can confidently choose and install smooth drop ceiling tiles to transform your space. Whether you are renovating a home, office, or commercial space, these tiles provide a sleek, modern look that enhances any room’s aesthetics and functionality.