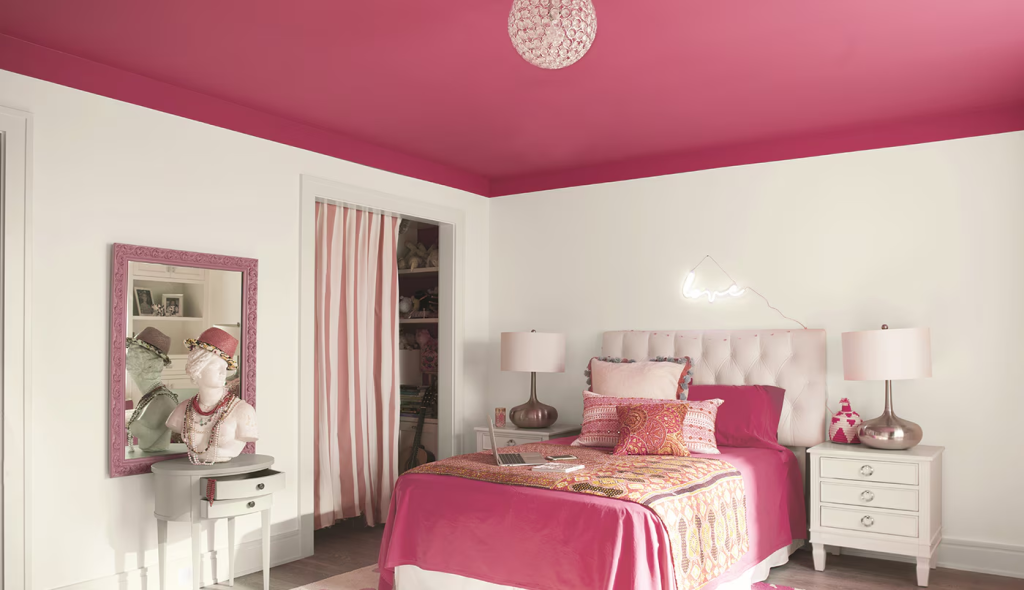
Valspar Ceiling Paint Color Changing Technology: Transform Your Space

Painting ceilings has often been regarded as one of the most challenging parts of home improvement. Ensuring an even coat and avoiding missed spots is a common struggle. Enter Valspar Ceiling Paint Color Changing—a game-changing solution designed to make painting ceilings easier and more efficient.

Valspar Ceiling Paint Color Changing

This unique product simplifies the process with innovative technology, giving homeowners and DIY enthusiasts the confidence to tackle ceiling painting projects with ease. In this article, we’ll explore the features, benefits, and application tips for Valspar Ceiling Paint Color Changing, as well as why it stands out in the crowded world of paint products.


What Is Valspar Ceiling Paint Color Changing Technology?

Valspar Ceiling Paint Color Changing is a specially formulated paint that applies in one color and dries to another, typically from pink to white. This innovative feature makes it easier to see where you’ve already painted, helping to eliminate missed spots and ensure a flawless finish.

Unlike traditional ceiling paints, this product provides visual feedback during application, making it perfect for both beginners and experienced painters.

Read too: Bathroom Flooded Through the Ceiling: A Comprehensive Guide


Why Choose Valspar Ceiling Paint Color Changing?

Painting a ceiling can be physically demanding and often involves craning your neck to reach difficult angles. This paint simplifies the task, offering several advantages:

1. Eliminates Missed Spots

The temporary color change allows you to see exactly where you’ve applied the paint, reducing the risk of uneven coverage or missed areas.

2. Dries to a Flawless White Finish

Once dried, the paint transitions to a clean, white finish that complements any room.

3. Time-Saving

Because it’s easier to track your progress, you can complete your painting project more efficiently.

4. Low Odor

Valspar’s ceiling paint is low-odor, making it safe and comfortable to use indoors.

5. Self-Priming Formula

This paint features a self-priming formula, meaning fewer coats are required for complete coverage.


Features of Valspar Ceiling Paint Color Changing

1. Color-Changing Technology

The temporary pink hue is an innovative feature that sets this paint apart. It ensures clear visibility during application.

2. Spatter-Resistant Formula

Painting overhead can be messy, but Valspar’s spatter-resistant formula minimizes drips and splashes, keeping your workspace clean.

3. Durability

Valspar Ceiling Paint is designed to provide long-lasting results, resistant to peeling, cracking, and fading over time.

4. Versatile Application

This paint can be used on a variety of ceiling surfaces, including textured ceilings.


How to Apply Valspar Ceiling Paint Color Changing

Step 1: Prepare the Room

  • Clear the room of furniture or cover it with drop cloths.
  • Use painter’s tape to protect walls, trim, and light fixtures.
  • Clean the ceiling to remove dust and debris.

Step 2: Gather Supplies

  • Paint roller with an extension pole
  • Paint tray
  • Valspar Ceiling Paint Color Changing
  • Ladder (if necessary)

Step 3: Start Painting

  • Pour the paint into a tray and load your roller evenly.
  • Begin painting in a “W” or zigzag pattern to ensure even coverage.
  • The paint will appear pink during application, helping you track your progress.

Step 4: Allow the Paint to Dry

  • Wait for the paint to dry completely. The pink color will fade as the paint transitions to white.

Step 5: Inspect and Touch Up

  • Once dried, inspect the ceiling for any missed spots and apply touch-ups as needed.

Valspar Ceiling Paint Color Changing: Key Benefits for Homeowners

1. Perfect for DIY Beginners

For those new to painting, the color-changing feature makes it easier to achieve professional-looking results.

2. Ideal for Large Spaces

When painting large ceilings, it’s easy to lose track of your progress. The temporary color ensures you don’t miss a single spot.

3. Suitable for Various Ceiling Types

Whether you have a smooth, popcorn, or textured ceiling, Valspar Ceiling Paint delivers consistent coverage.

4. Enhances Lighting

A freshly painted white ceiling reflects light, brightening the entire room and creating a more inviting atmosphere.


Valspar Ceiling Paint Color Changing vs. Traditional Ceiling Paint

FeatureValspar Ceiling Paint Color ChangingTraditional Ceiling Paint
Color-Change TechnologyYesNo
Spatter ResistanceYesLimited
Ease of ApplicationHighModerate
Time EfficiencyFasterSlower
Visibility During ApplicationClearMinimal

Common Questions

Q: How long does it take for the paint to dry completely?

A: Drying times vary depending on humidity and temperature, but the paint typically transitions to white within 1–2 hours.

Q: Can I use this paint on walls?

A: While designed for ceilings, Valspar Ceiling Paint can be used on walls if a white finish is desired.

Q: Is the paint safe for textured ceilings?

A: Yes, the spatter-resistant formula makes it suitable for textured and popcorn ceilings.

Q: How many coats are needed for full coverage?

A: In most cases, one coat is sufficient due to the self-priming formula, but highly textured surfaces may require a second coat.


Tips for Best Results with Valspar Ceiling Paint Color Changing

  1. Work in Sections
    Divide the ceiling into manageable sections to ensure even application and reduce fatigue.
  2. Maintain Consistent Pressure
    Apply even pressure with your roller to avoid streaks or uneven coverage.
  3. Use Proper Lighting
    Bright lighting can help you better assess the evenness of your paint application.
  4. Store Paint Properly
    Seal the paint can tightly to preserve the color-changing technology for future touch-ups.

The Eco-Friendly Side of Valspar Ceiling Paint

Valspar Ceiling Paint Color Changing aligns with environmentally conscious practices:

  • Low VOC Levels: The paint has minimal volatile organic compounds, making it safer for indoor use and better for the environment.
  • Durability: Long-lasting results mean fewer reapplications, reducing waste.

Where to Buy Valspar Ceiling Paint Color Changing

Valspar products are widely available at major home improvement stores, such as Lowe’s, or online retailers. Always check for discounts or bulk-buy options to save money on larger projects.


Conclusion

Painting your ceiling no longer needs to be a daunting task. Valspar Ceiling Paint Color Changing takes the guesswork out of the process, ensuring even coverage and a professional finish. With its innovative technology, spatter-resistant formula, and ease of application, this paint is a game-changer for homeowners and DIY enthusiasts alike.

Whether you’re refreshing a single room or renovating your entire home, investing in this unique ceiling paint will save you time and effort while delivering beautiful results.

Painting Suspended Ceiling Tiles: A Complete Guide to Revitalize Your Space

Suspended ceiling tiles are a practical and aesthetic choice for many homes and commercial spaces. However, over time, they may lose their charm due to discoloration, stains, or simply outdated designs. Instead of replacing them, painting suspended ceiling tiles can be a cost-effective way to breathe new life into your ceiling. This guide walks you through everything you need to know about painting suspended ceiling tiles, from preparation to finishing touches.

Painting Suspended Ceiling Tiles

Why Paint Suspended Ceiling Tiles?

Before diving into the process, let’s understand why painting these tiles might be the best option:

  • Cost-Effective Solution: Painting is significantly cheaper than replacing old tiles.
  • Customization: Choose colors or patterns that better match your interior decor.
  • Mask Imperfections: Painting can cover stains, yellowing, or minor surface blemishes.
  • Eco-Friendly: By painting instead of replacing, you reduce waste and contribute to sustainability.

Read too: Kitchen Lighting For A Vaulted Ceiling: Illuminating Your Space with Style and Functionality


Can All Suspended Ceiling Tiles Be Painted?

Not all tiles are created equal. Some materials, such as fiberglass or vinyl-coated tiles, may require specific preparation or special paints. Always check the manufacturer’s guidelines to ensure your tiles can handle paint without compromising their structural integrity.


Preparing for Painting Suspended Ceiling Tiles

Proper preparation is crucial for achieving a smooth and long-lasting finish.

1. Clean the Tiles

Before painting, clean the tiles thoroughly to remove dust, grease, and stains:

  • Use a vacuum or soft cloth to remove loose dirt.
  • For deeper cleaning, mix mild soap with water and gently scrub the tiles.
  • Let them dry completely before proceeding.

2. Remove the Tiles (Optional)

While you can paint the tiles in place, removing them can make the process easier and help avoid splatters on the surrounding grid or walls.

3. Protect Your Space

If painting in place, use painter’s tape to cover the metal grid and lay drop cloths to protect the floor.

4. Choose the Right Paint

  • Use water-based latex paint for most suspended ceiling tiles.
  • For tiles exposed to moisture, such as in bathrooms, consider mildew-resistant or moisture-resistant paint.
  • Opt for a flat or matte finish to minimize glare from overhead lighting.

Steps for Painting Suspended Ceiling Tiles

1. Prime the Tiles (If Necessary)

Certain tile materials, especially those with glossy or non-porous surfaces, may require a primer.

  • Use a stain-blocking primer to prevent discoloration from water stains or other marks.
  • Apply the primer evenly and let it dry completely.

2. Apply the Paint

You can use a brush, roller, or spray gun to paint the tiles.

Using a Brush or Roller

  • Step 1: Apply a thin coat of paint to avoid drips and uneven coverage.
  • Step 2: Let the first coat dry completely, then apply a second coat if necessary.
  • Step 3: Use a roller with a low nap to achieve a smooth finish.

Using a Spray Gun

  • Spray guns provide faster and more even coverage, especially for textured tiles.
  • Ensure proper ventilation and wear a mask when using spray paint indoors.

3. Reinstall the Tiles

Once the paint is dry, carefully reinstall the tiles into the suspended grid. Make sure the paint is completely dry to avoid smudges or damage.


Pros and Cons of Painting Suspended Ceiling Tiles

Pros

  • Affordable Makeover: A fresh coat of paint can transform your space without the cost of new tiles.
  • Quick and Easy: Painting can be completed in a day or two, depending on the size of your project.
  • Customizable: Endless color options allow you to match or contrast with your decor.

Cons

  • Time-Consuming Preparation: Cleaning, priming, and protecting your space require effort.
  • Potential for Mistakes: Uneven paint application can result in a patchy finish.
  • Durability Issues: Painted tiles may chip or peel over time, especially in high-humidity areas.

Tips for a Successful Painting Project

  1. Test a Small Area First: Before committing to painting all tiles, test a small, inconspicuous section to ensure the paint adheres well.
  2. Work in a Well-Ventilated Space: Proper ventilation is crucial to minimize exposure to fumes.
  3. Be Patient: Allow each coat of paint to dry completely before applying another layer or reinstalling tiles.
  4. Maintain Consistency: Use the same type of paint and tools throughout the project to maintain uniformity.

When to Consider Replacing Instead of Painting

While painting suspended ceiling tiles is a great option for many situations, there are cases where replacement may be more practical:

  • Severely Damaged Tiles: Cracked or heavily warped tiles might not be salvageable.
  • Fire-Rated Tiles: Painting can compromise the fire-resistance properties of some tiles, which may violate local building codes.
  • Excessive Mold or Mildew: Tiles with significant mold or mildew growth should be replaced for health reasons.

Frequently Asked Questions

1. Can you paint over textured suspended ceiling tiles?

Yes, but textured tiles may require a spray gun for even coverage, as brushes and rollers can miss crevices.

2. How long does the paint last on suspended ceiling tiles?

With proper preparation and quality paint, the finish can last several years, depending on environmental factors.

3. Do painted tiles affect acoustic performance?

Painting may slightly alter the acoustic properties of tiles, particularly if they’re designed for sound absorption.


Conclusion

Painting suspended ceiling tiles is a practical, affordable, and customizable way to rejuvenate your interior spaces. With proper preparation, the right tools, and attention to detail, you can achieve a professional-looking result that breathes new life into your ceiling.

Whether you’re looking to cover stains, update your decor, or simply extend the life of your existing tiles, this guide equips you with everything you need for a successful project. Take the leap and transform your ceiling into a feature that complements your space beautifully!

Valspar Ceiling Paint and Primer: The Ultimate Guide to Flawless Ceilings

If you’re planning to refresh your home’s interior, ceilings are often overlooked yet critical elements that can transform a room. The Valspar Ceiling Paint and Primer is a game-changer for achieving smooth, flawless ceilings while simplifying the painting process. This comprehensive guide delves into the benefits, features, and tips for using Valspar Ceiling Paint and Primer, ensuring your next painting project is a resounding success.

Valspar Ceiling Paint And Primer

Why Choose Valspar Ceiling Paint and Primer?

Painting ceilings can be challenging, but the right product makes a world of difference. Here’s why the Valspar Ceiling Paint and Primer stands out among competitors:

  1. Two-in-One Convenience
    Combining paint and primer in a single product saves time and effort. You don’t need to apply a separate primer coat, as Valspar ensures excellent adhesion and coverage.
  2. Exceptional Coverage
    Valspar’s formula is designed to cover stains, imperfections, and even previous paint colors effortlessly, leaving your ceiling smooth and pristine.
  3. Low Splatter Technology
    One of the most frustrating aspects of painting ceilings is paint drips and splatter. Valspar’s low-splatter formula minimizes mess, making the process cleaner and more enjoyable.
  4. Non-Yellowing Finish
    Over time, some ceiling paints tend to yellow, particularly in areas with minimal natural light. Valspar Ceiling Paint and Primer resists yellowing, ensuring your ceilings stay bright and fresh.
  5. Multiple Finishes
    Whether you prefer a flat, matte look or a subtle sheen, Valspar offers a range of finishes to match your aesthetic preferences.

Read too: Kitchen Lighting For A Vaulted Ceiling: Illuminating Your Space with Style and Functionality


Valspar Ceiling Paint and Primer: Key Features

One-Coat Coverage

Valspar Ceiling Paint and Primer is engineered for maximum efficiency. In most cases, a single coat is sufficient to achieve a flawless look, even on textured or previously painted ceilings.

Stain Blocking Power

The built-in primer tackles stubborn stains like watermarks, smoke, and grease, preventing them from bleeding through the paint.

Easy Application

Valspar’s paint glides smoothly onto surfaces, whether you’re using a roller, brush, or sprayer. Its quick-drying formula allows for faster project completion.

Low VOC

With a low-VOC formula, this paint is eco-friendly and emits minimal odor, making it ideal for indoor projects where ventilation may be limited.


How to Use Valspar Ceiling Paint and Primer

Proper preparation and application are key to achieving professional results. Follow these steps for the best outcome:

1. Prepare the Ceiling

  • Clean the surface to remove dust, cobwebs, and grease.
  • Repair cracks or holes with spackle, then sand for a smooth surface.
  • Use painter’s tape to protect adjacent walls and fixtures.

2. Choose the Right Tools

  • Use a high-quality roller with an extended handle for smooth application and easy reach.
  • Select a synthetic-bristle brush for cutting in around edges and corners.

3. Apply the Paint

  • Stir the paint thoroughly before use.
  • Start by cutting in around the ceiling edges with a brush.
  • Use the roller to paint the larger area, working in sections and overlapping slightly to avoid visible lines.

4. Allow to Dry

  • Let the paint dry as per the manufacturer’s recommendations before applying additional coats or removing painter’s tape.

A Versatile Option

Whether you’re tackling a new ceiling project or refreshing an old one, Valspar Ceiling Paint and Primer is versatile enough for various scenarios:

  • Textured Ceilings
    The paint’s thick consistency ensures even coverage on textured surfaces like popcorn ceilings.
  • Bathrooms and Kitchens
    Its stain-blocking properties make it perfect for areas prone to moisture and stains.
  • Living Rooms and Bedrooms
    The non-yellowing, smooth finish enhances any space, keeping ceilings bright and visually appealing.

Expert Tips for Painting Ceilings

  1. Work in Natural Light
    Paint your ceiling during the day when natural light is available. This helps you identify missed spots or uneven coverage.
  2. Use a Ladder or Platform
    For detailed work like cutting in, ensure you have a stable ladder or platform to reach all areas safely.
  3. Paint in One Direction
    Rolling in a consistent direction reduces the risk of lap marks or uneven texture.
  4. Check Humidity Levels
    Avoid painting on excessively humid days, as high moisture can affect drying time and paint adhesion.

Valspar Ceiling Paint and Primer vs. Competitors

When comparing Valspar Ceiling Paint and Primer with other brands, it’s clear why homeowners and professionals prefer it:

FeatureValsparCompetitor ACompetitor B
Paint & Primer in One
Low Splatter Formula
Non-Yellowing Finish
One-Coat Coverage
Stain Blocking

Valspar consistently outperforms competitors in terms of ease of use, durability, and finish quality.


Customer Reviews and Testimonials

Here’s what users have to say about their experience with Valspar Ceiling Paint and Primer:

  • “I loved how easy it was to use this paint. The one-coat coverage saved me hours, and there was virtually no splatter.” — Sarah T.
  • “My kitchen ceiling had water stains that wouldn’t budge, but Valspar’s stain-blocking primer covered them completely.” — James P.
  • “Valspar Ceiling Paint and Primer made my DIY project a breeze. My ceilings look professionally done!” — Emily R.

Where to Buy Valspar Ceiling Paint and Primer

Valspar products are available at major retailers, including Lowe’s and Ace Hardware, as well as online through their official website and other e-commerce platforms. Be sure to check for seasonal promotions or discounts to get the best value.


Conclusion

The Valspar Ceiling Paint and Primer is a must-have for anyone looking to achieve a flawless, professional finish with minimal effort. Its two-in-one formula, low-splatter technology, and impressive coverage make it a top choice for both DIYers and professionals. Whether you’re repainting a single room or tackling a whole-house project, Valspar ensures a smooth, bright ceiling that lasts for years.

Transform your ceilings today with Valspar Ceiling Paint and Primer—because every detail in your home deserves the best.

Ceiling Paint Goes On Pink: A Game-Changer for Flawless Home Painting Projects

Painting your ceiling is often considered one of the most challenging parts of home improvement. The process requires precision, patience, and careful planning. However, thanks to innovative products like ceiling paint that goes on pink, achieving a flawless finish has never been easier. This unique type of paint is designed to solve common ceiling painting issues, making the task simpler and more efficient.

Ceiling Paint Goes On Pink

In this article, we’ll dive deep into what makes “ceiling paint goes on pink” special, how it works, its benefits, and why it’s a must-have for your next painting project.


What is Ceiling Paint That Goes On Pink?

Ceiling paint that goes on pink is a specialized product designed to address one of the biggest challenges of ceiling painting: visibility. Traditional white or neutral-colored paints can be difficult to see against a white or light-colored surface, leading to uneven application or missed spots.

With paint that initially appears pink, the task becomes much easier. The color acts as a guide, helping you track where you’ve already painted. As the paint dries, the pink pigment fades, leaving a crisp, white finish. This color-changing technology ensures even coverage and reduces the need for touch-ups.

Read too: Bathroom Flooded Through the Ceiling: A Comprehensive Guide


How Does Ceiling Paint That Goes On Pink Work?

The secret behind this innovative paint lies in its formulation. Here’s how it works:

  1. Pigment Technology: The paint is infused with a temporary pink dye that is visible during application.
  2. Drying Process: As the paint dries, the pink color reacts with air and light, gradually fading to white.
  3. Final Finish: Once completely dry, the ceiling is left with a smooth, consistent white finish that blends seamlessly with most interiors.

This simple yet effective technology makes the painting process less stressful and ensures a professional-looking result, even for DIY enthusiasts.


Benefits of Using Ceiling Paint That Goes On Pink

1. Improved Visibility During Application

One of the standout features of this paint is the ease of application. The pink hue makes it easy to identify which areas have been painted, preventing overlaps or missed spots.

2. Reduced Time and Effort

Because the paint eliminates guesswork, you can complete your project faster and with greater accuracy. This saves both time and effort, especially for larger ceilings.

3. Professional-Quality Results

The even coverage provided by the color-change feature ensures a smooth, streak-free finish that rivals professional work.

4. Easy for DIY Projects

For those tackling home improvements without prior painting experience, this paint is a game-changer. It’s forgiving and user-friendly, making it ideal for beginners.

5. Cost-Effective

By minimizing the need for touch-ups and second coats, ceiling paint that goes on pink helps you save money on additional paint and supplies.


Why Homeowners Love Ceiling Paint That Goes On Pink

Aesthetic Appeal and Functionality

This type of paint has become a favorite among homeowners due to its practicality and visual appeal. It addresses common frustrations associated with ceiling painting, such as uneven coverage and missed areas, while ensuring a polished final look.

Versatility in Different Spaces

Whether you’re painting a bedroom, living room, or bathroom, this paint works well in any interior setting. It’s particularly useful in low-light rooms where visibility during application might be limited.

Eco-Friendly Options Available

Many brands offer eco-friendly versions of ceiling paint that goes on pink. These paints are low in VOCs (volatile organic compounds), making them safer for your family and the environment.


Tips for Painting

To maximize the benefits of this innovative product, follow these expert tips:

  1. Prepare the Surface: Clean your ceiling to remove dust and debris. Repair any cracks or imperfections to ensure a smooth surface.
  2. Use Quality Tools: Invest in high-quality brushes and rollers for even application. A roller with an extendable handle is particularly useful for ceilings.
  3. Work in Sections: Divide the ceiling into manageable sections, applying the paint systematically to avoid missed spots.
  4. Watch the Drying Process: Keep an eye on the paint as it dries to ensure the pink color fades evenly. If some areas remain pink, it may indicate a thicker application.
  5. Allow Proper Drying Time: Follow the manufacturer’s instructions for drying times before applying additional coats or decorating the room.

Choosing the Right Ceiling Paint That Goes On Pink

When shopping for this type of paint, consider the following factors:

  • Coverage Area: Check the paint can’s label to ensure it covers your ceiling size.
  • Drying Time: Some paints dry faster than others, which may be a consideration if you’re on a tight schedule.
  • Finish Options: Most ceiling paints are flat or matte to reduce glare, but confirm this aligns with your aesthetic preferences.
  • Brand Reputation: Opt for trusted brands that are known for quality and durability.

Ceiling Paint Goes On Pink: Who Should Use It?

DIY Enthusiasts

For those who enjoy taking on home improvement projects, this paint simplifies the process and helps achieve professional results.

Professional Painters

Even experienced painters can benefit from the added visibility and time-saving advantages of this product, especially when working on large-scale projects.

First-Time Painters

If you’re new to painting, ceiling paint that goes on pink is an excellent choice. It’s easy to use, and the color-change feature ensures fewer mistakes.


How to Maintain Your Freshly Painted Ceiling

After painting, proper maintenance ensures your ceiling remains pristine:

  1. Dust Regularly: Use a soft broom or vacuum with a brush attachment to remove dust.
  2. Address Stains Quickly: For minor stains, gently wipe the area with a damp cloth and mild detergent.
  3. Inspect Annually: Check for peeling or discoloration over time, and touch up as needed.

Ceiling Paint Goes On Pink vs. Traditional Ceiling Paint

Ease of Use

Unlike traditional white ceiling paint, which can be hard to see during application, the pink hue simplifies the process and ensures better coverage.

Cost-Effectiveness

Although slightly more expensive upfront, the time and materials saved by using ceiling paint that goes on pink make it a worthwhile investment.

Innovative Technology

The color-changing feature sets this paint apart from conventional options, making it ideal for modern painting needs.


Conclusion

The ceiling paint that goes on pink is a revolutionary product that transforms ceiling painting from a daunting task into an enjoyable project. Its user-friendly design, combined with its efficiency and professional results, makes it a must-have for both DIY enthusiasts and professionals alike.

Whether you’re updating a single room or tackling a full home makeover, this innovative paint ensures a smooth and hassle-free experience. Say goodbye to missed spots and uneven finishes, and say hello to a perfectly painted ceiling.

How Much Does It Cost to Prime and Paint a Ceiling?

Painting your ceiling is a great way to update the look of your home. It can also help to hide any blemishes or damage. However, before you start painting, it is important to understand the cost involved.

In this article, we will discuss the cost to prime and paint a ceiling. We will also provide tips on how to save money on your project.

Cost To Prime And Paint Ceiling

Cost Factors

The cost to prime and paint a ceiling depends on a number of factors, including:

  • The size of the ceiling: The larger the ceiling, the more paint and primer you will need. This will increase the cost of your project.
  • The type of paint and primer: The type of paint and primer you choose will also affect the cost. For example, oil-based paint is more expensive than latex paint.
  • The location of your home: The cost of labor can vary depending on the location of your home.

Cost Range

The cost to prime and paint a ceiling can range from $1 to $2 per square foot. For a 12-foot by 12-foot room, this would mean a cost of $144 to $288.

Cost to Prime

The cost to prime a ceiling is typically about half the cost of painting. For a 12-foot by 12-foot room, this would mean a cost of $72 to $144.

Cost to Paint

The cost to paint a ceiling is typically about $1 per square foot. For a 12-foot by 12-foot room, this would mean a cost of $144.

How to Save Money

There are a few things you can do to save money on your ceiling painting project:

  • Do it yourself: If you are handy, you can save money by painting your ceiling yourself.
  • Buy paint and primer in bulk: Buying paint and primer in bulk can save you money.
  • Shop around for the best prices: Compare prices from different paint retailers to find the best deal.
  • Get quotes from multiple contractors: If you are hiring a contractor, get quotes from multiple contractors to compare prices.

Conclusion

The cost to prime and paint a ceiling can vary depending on a number of factors. By understanding the cost factors and following these tips, you can save money on your project.

Read too: What Causes Water Bubble In Ceiling

Additional Information

In addition to the cost factors listed above, there are a few other things you may need to consider when budgeting for your ceiling painting project. For example, if you need to repair any damage to the ceiling before painting, this will add to the cost of your project. Additionally, if you are painting a ceiling that is difficult to access, this may also increase the cost.

If you are unsure of how much it will cost to prime and paint your ceiling, it is always a good idea to get a quote from a professional. A qualified contractor can help you to determine the cost of your project and provide you with a quote that is accurate and fair.tunesharemore_vert