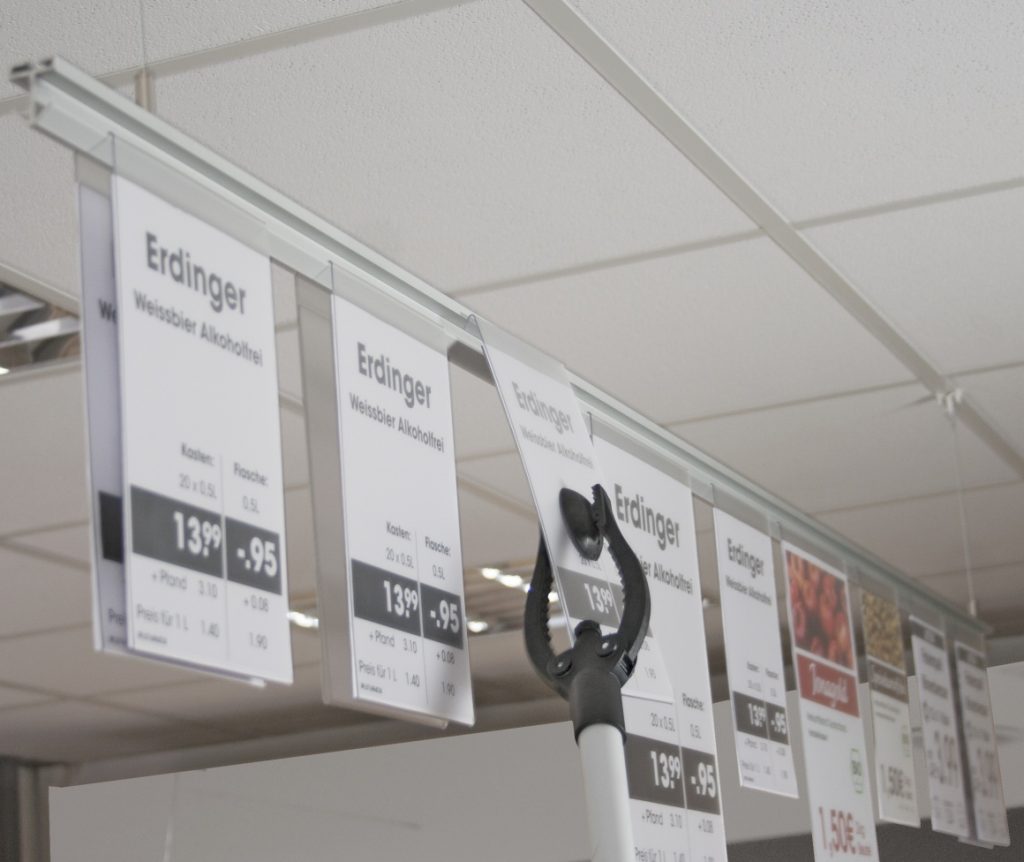
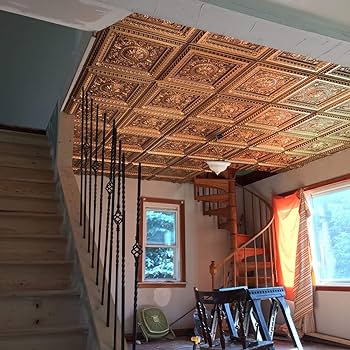
Hanging Pictures from Ceiling with Wire: Creative Tips and Techniques

Hanging pictures from your ceiling can elevate your interior decor in unique ways. Discover how to effectively use wire for hanging pictures from ceiling with wire and transform your space with personalized artwork.

Hanging Pictures From Ceiling With Wire

Understanding: Hanging Pictures From Ceiling With Wire

When traditional wall mounting isn’t feasible or you want to create a distinctive display, hanging pictures from ceiling with wire offers versatility and aesthetic appeal. Explore various methods and considerations for achieving the perfect arrangement.

Planning Your Display

  1. Choosing the Right Wire: Opt for sturdy wire suitable for the weight of your pictures. Consider stainless steel or nylon-coated wire for durability and ease of handling.
  2. Selecting Picture Frames: Decide on frames that complement your decor theme. Lightweight frames are ideal for ceiling hanging to minimize stress on the wire.
  3. Determining Placement: Plan the layout of your pictures to ensure balanced spacing and visual appeal. Use measuring tools to mark where hooks or wires will be attached to the ceiling.

Tools and Materials Needed: Hanging Pictures From Ceiling With Wire

Before you begin, gather essential tools and materials:

  • Wire cutters
  • Ceiling hooks or eye bolts
  • Picture hanging hooks or clips
  • Level for ensuring straight alignment
  • Pencil and measuring tape for accurate placement

Steps for Hanging Pictures from Ceiling with Wire

  1. Measure and Mark: Determine the placement of each picture and mark spots on the ceiling where hooks will be installed.
  2. Install Ceiling Hooks: Screw in ceiling hooks or eye bolts at marked locations. Ensure they are secure and capable of supporting the weight.
  3. Attach Wire to Pictures: Cut wire to appropriate lengths, allowing extra for adjustments. Securely attach wire to the back of each picture frame using picture hanging hardware.
  4. Hang Pictures: Hang pictures from the ceiling hooks, adjusting the wire lengths as needed to achieve desired heights and alignment.

Creative Display Ideas

  • Gallery Wall: Create a floating gallery wall by hanging multiple pictures at different heights for a dynamic display.
  • Clustered Arrangement: Arrange pictures in clusters or rows to fill specific areas of the room, such as above a staircase or in a hallway.
  • Single Statement Piece: Showcase a large artwork or photograph as a focal point by hanging it solo from the ceiling.

Maintenance and Safety Tips

Regularly inspect wire and hooks for signs of wear or loosening. Avoid overloading the wire beyond its weight capacity to prevent accidents. Clean pictures and frames periodically to maintain their appearance.

Read too: Discovering the Charm of Nautical Outdoor Ceiling Fans for Your Coastal Retreat: Sail into Style

Conclusion

Hanging pictures from the ceiling with wire opens up endless possibilities for decorating your home or office space. Whether you’re aiming for a contemporary look or a more traditional display, mastering this technique allows you to showcase your favorite artworks in a distinctive and eye-catching manner.
Ceiling Light Canopy Kits: Elevate Your Lighting Fixture with a Stylish

Transform the look of your ceiling light fixture with the addition of a sophisticated ceiling light canopy kits, enhancing both functionality and aesthetic appeal.

Ceiling Light Canopy Kit

Understanding Ceiling Light Canopy Kit

A ceiling light canopy kit is a versatile accessory that serves both practical and decorative purposes. It is used to cover and conceal the electrical wiring and junction box of a ceiling light fixture, providing a clean and polished look to the ceiling while offering support and stability to the fixture.

Exploring the Components of a Ceiling Light Canopy Kit

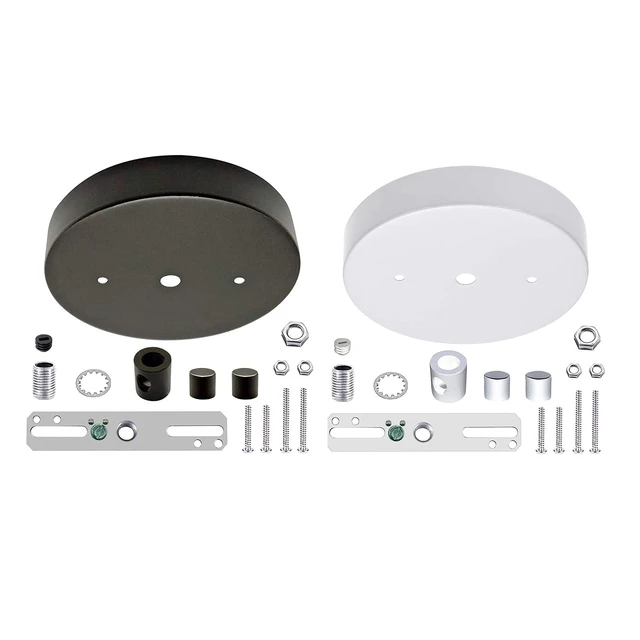
A typical ceiling light canopy kit includes the following components:

  1. Canopy: The canopy is a decorative cover that attaches to the ceiling and hides the electrical box and wiring. It comes in various shapes, sizes, and finishes to complement different styles of light fixtures and interior décor.
  2. Mounting Hardware: The kit usually includes screws, bolts, or other mounting hardware necessary for attaching the canopy to the ceiling and securing it in place.
  3. Decorative Elements: Some canopy kits may feature additional decorative elements such as rosettes, medallions, or trim pieces to further enhance the aesthetic appeal of the ceiling light fixture.

Benefits of Using a Ceiling Light Canopy Kit

Installing a ceiling light canopy kit offers several benefits:

  1. Enhanced Aesthetics: A canopy kit provides a finished and polished look to ceiling light fixtures, making them appear more attractive and visually appealing.
  2. Concealed Wiring: The canopy conceals unsightly wiring and junction boxes, creating a cleaner and more streamlined appearance on the ceiling.
  3. Added Stability: By securely attaching the canopy to the ceiling, the kit adds stability and support to the light fixture, reducing the risk of wobbling or shaking.
  4. Customization: With a wide range of canopy designs and finishes available, homeowners can customize their ceiling light fixtures to match their unique style preferences and interior décor.

Installing a Ceiling Light Canopy Kit

Follow these steps for a successful installation:

1. Turn Off Power

  • Before beginning the installation, turn off the power to the light fixture at the circuit breaker to avoid electrical hazards.

2. Remove Existing Canopy (if applicable)

  • If there is an existing canopy or ceiling medallion, remove it carefully to access the wiring and junction box.

3. Attach Mounting Bracket

  • Install the mounting bracket included in the canopy kit to the electrical box on the ceiling, ensuring it is securely fastened.

4. Connect Wires

  • Connect the wires from the ceiling to the corresponding wires on the light fixture, following the manufacturer’s instructions.

5. Secure Canopy

  • Attach the canopy to the mounting bracket using the provided screws or hardware, making sure it is level and stable.

Maintenance and Care Tips

To keep your ceiling light canopy kit looking its best, follow these maintenance tips:

  1. Regular Cleaning: Wipe the canopy and hardware with a soft, damp cloth to remove dust and debris regularly.
  2. Check for Loose Fasteners: Periodically inspect the mounting hardware and tighten any loose screws or bolts to maintain stability.
  3. Inspect for Damage: Check the canopy for any signs of damage or wear, such as cracks or discoloration, and replace it if necessary.

Conclusion

Ceiling light canopy kits enhance both appearance and functionality. They conceal wiring, add stability, and offer decorative flair. Upgrade your lighting fixtures stylishly and elevate your home’s interior design.

Read too: Flush Mount Rustic Ceiling Lights: Illuminate Your Space with Stunning

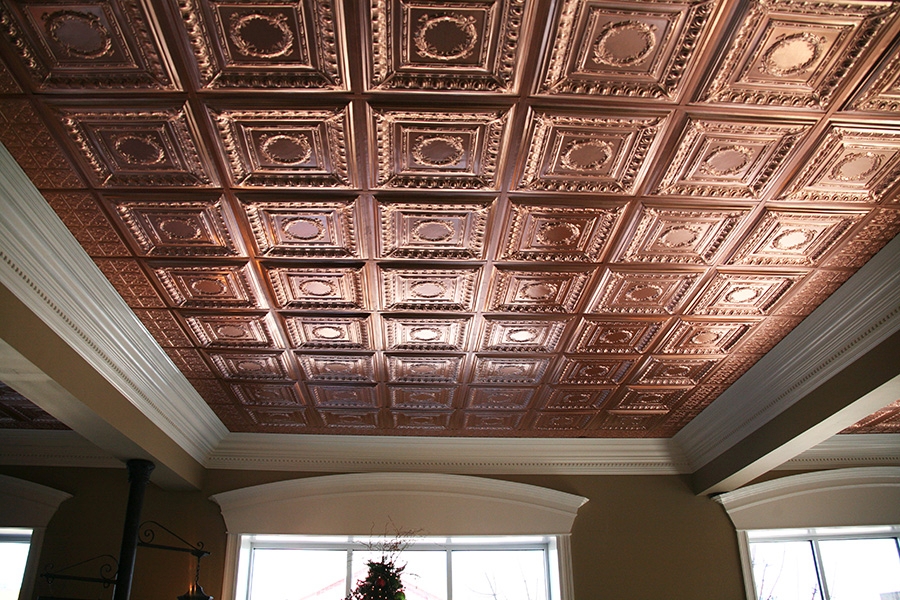
Elevate Your Space with Stunning Faux Copper Ceiling Tile: A Comprehensive Guide

Faux copper ceiling tiles are a luxurious and cost-effective way to add sophistication and charm to any space. Whether you’re looking to enhance the aesthetic appeal of your home or revamp a commercial property, these decorative tiles offer versatility, durability, and timeless beauty. In this comprehensive guide, we’ll explore everything you need to know about faux copper ceiling tile, from their design options to installation tips and maintenance.

Faux Copper Ceiling Tiles

Unveiling the Beauty of Faux Copper Ceiling Tiles

Faux copper ceiling tiles mimic the look of traditional copper tiles but are crafted from lightweight materials such as PVC or metal. These tiles are available in a variety of styles, finishes, and patterns, allowing you to achieve the desired aesthetic for your space. From classic embossed designs to modern geometric patterns, faux copper ceiling tiles offer endless possibilities for customization and creativity.

Advantages of Faux Copper Ceiling Tiles

1. Affordability: Faux copper ceiling tile are a budget-friendly alternative to genuine copper tiles, making them accessible to homeowners and businesses alike.

2. Easy Installation: With their lightweight construction and simple installation process, faux copper ceiling tiles can be easily installed by DIY enthusiasts or professionals.

3. Durability: Unlike traditional copper tiles, which may tarnish or patina over time, faux copper ceiling tiles are resistant to corrosion, moisture, and fading, ensuring long-lasting beauty and performance.

4. Versatility: Faux copper ceiling tiles are suitable for various indoor applications, including kitchens, bathrooms, living rooms, restaurants, hotels, and retail spaces, adding a touch of elegance and sophistication to any environment.

Design Options

Faux copper ceiling tiles are available in a wide range of designs and finishes to complement any decor style. Some popular design options include:

  • Antique copper: Featuring a weathered and distressed finish, antique copper tiles add rustic charm and character to any space.
  • Hammered copper: With their textured surface and hammered detailing, these tiles create a striking visual impact and enhance the depth and dimension of the ceiling.
  • Patina copper: Patina copper tiles mimic the natural aging process of copper, with rich green and blue hues that lend a sense of authenticity and heritage to the space.

Installation Tips

1. Preparation: Before installing faux copper ceiling tiles, ensure that the ceiling surface is clean, flat, and free of any debris or grease.

2. Adhesive: Use a high-quality adhesive specifically designed for ceiling tile installation to ensure secure and long-lasting adhesion.

3. Cutting: Measure and cut the tiles to fit around ceiling fixtures, vents, or other obstacles using a sharp utility knife or scissors.

4. Placement: Start by installing tiles along the perimeter of the ceiling and work your way inward, ensuring uniform spacing and alignment.

Maintenance

Maintaining faux copper ceiling tiles is relatively straightforward and requires minimal effort. Simply wipe the tiles with a soft cloth or sponge dampened with mild soap and water to remove dust, dirt, or stains. Avoid abrasive cleaners or harsh chemicals, as they may damage the finish of the tiles.

Read too: Discovering the Charm of Nautical Outdoor Ceiling Fans for Your Coastal Retreat: Sail into Style

Conclusion

Faux copper ceiling tiles offer a stylish and practical solution for enhancing the aesthetic appeal of any space. With their affordability, durability, and versatility, these decorative tiles are a popular choice for homeowners and designers seeking to create a luxurious and inviting environment. Whether you’re renovating a residential property or commercial space, consider incorporating faux copper ceiling tiles to elevate your decor and make a lasting impression.

Enhance Your Home with Stunning Oak Beams for Ceiling: Timeless Elegance and Durability

When it comes to home renovation and interior design, the ceiling often plays a pivotal role in defining the overall aesthetic and ambiance of a space. One element that can truly transform a ceiling and elevate the style of any room is the use of oak beams. Oak beams for ceiling installations bring a sense of timeless elegance, warmth, and durability that is unmatched by other materials.

Oak Beams For Ceiling

Why Choose Oak Beams for Ceiling?

  1. Natural Beauty: Oak beams exude natural beauty and character with their rich grain patterns, warm tones, and rustic appeal. They add a sense of warmth and coziness to any room, making them particularly popular in traditional and farmhouse-style homes.
  2. Durability: Oak is renowned for its exceptional durability and longevity. Oak beams for ceiling installations are sturdy and resistant to warping, cracking, and rotting, ensuring they stand the test of time and maintain their beauty for generations to come.
  3. Versatility: Whether you’re aiming for a rustic, traditional, or contemporary look, oak beams complement a variety of interior styles and architectural designs. They can be used to create rustic exposed beam ceilings, add architectural interest to vaulted ceilings, or frame focal points such as fireplaces and kitchen islands.
  4. Environmental Sustainability: Oak beams are a sustainable choice for environmentally-conscious homeowners. Oak is a slow-growing hardwood that is harvested from responsibly managed forests, making it a renewable and eco-friendly building material.

Installing Oak Beams for Ceiling

Installing oak beams for ceiling applications requires careful planning and precision to ensure a seamless and visually appealing result. Here are some key considerations:

  • Structural Integrity: Consult with a structural engineer or contractor to assess the load-bearing capacity of your ceiling and determine the appropriate size and spacing for the oak beams.
  • Installation Method: Oak beams can be installed using various methods, including direct mounting to ceiling joists, suspended from ceiling brackets, or integrated into a dropped ceiling grid. The chosen method will depend on the specific design goals and structural requirements of the project.
  • Finishing Touches: Depending on the desired aesthetic, oak beams can be left unfinished for a natural, rustic look, or they can be stained, painted, or sealed to enhance their appearance and protect them from moisture and wear.

Read too: Flush Mount Rustic Ceiling Lights: Illuminate Your Space with Stunning

Maintaining Oak Beams

Proper maintenance is essential to preserve the beauty and integrity of oak beams for ceilings installations. Here are some tips for caring for your oak beams:

  • Regularly dust the beams with a soft, dry cloth to remove surface dirt and debris.
  • Avoid using harsh chemicals or abrasive cleaners, as they can damage the wood finish.
  • Periodically inspect the beams for signs of damage or wear, such as cracks, splits, or insect infestations, and address any issues promptly to prevent further damage.

Conclusion

Oak beams for ceilings installations are a timeless choice that adds charm, character, and sophistication to any home. With their natural beauty, durability, and versatility, oak beams have long been favored by homeowners and designers alike for their ability to enhance the architectural interest and overall aesthetic of a space.

Whether you’re renovating a historic farmhouse, building a modern retreat, or simply looking to add warmth and character to your home, consider incorporating oak beams into your ceiling design for a truly timeless and elegant look that will stand the test of time.

Creative Ways to Hang Posters From Ceiling Without Damaging Walls

Are you looking for a unique way to showcase your favorite posters without damaging your walls? Hanging Posters From Ceiling is a stylish and practical solution that allows you to create eye-catching displays while preserving the integrity of your walls. In this guide, we’ll explore creative techniques and tips for hanging posters from the ceiling, whether you’re decorating a dorm room, office space, or home theater.

Hanging Posters From Ceiling

Benefits of Hanging Posters From Ceiling

  1. Maximize Space: Hanging posters from the ceiling helps you make the most of your vertical space, especially in rooms with limited wall space or awkward layouts.
  2. Versatility: Ceiling-mounted poster displays offer flexibility in arrangement, allowing you to create dynamic and customizable layouts that suit your style and preferences.
  3. Damage-Free: Unlike traditional wall-mounted displays, hanging posters from the ceiling eliminates the need for nails, screws, or adhesive hooks, minimizing the risk of wall damage.

Tools and Materials Needed

Before you begin hanging posters from the ceiling, gather the following tools and materials:

  • Poster Frames or Hangers: Choose lightweight frames or hangers designed specifically for hanging posters without damaging them.
  • Ceiling Hooks or Clips: Select sturdy ceiling hooks or clips that can support the weight of your posters and withstand movement or vibrations.
  • Fishing Line or Wire: Use transparent fishing line or wire to suspend the posters from the ceiling hooks or clips, ensuring a clean and minimalist look.
  • Measuring Tape and Level: Ensure accurate placement of ceiling hooks or clips by measuring and marking the desired locations with a measuring tape and level.

Techniques for Hanging Posters From Ceiling

  1. Grid Layout: Create a grid pattern by evenly spacing multiple posters across the ceiling, using ceiling hooks or clips to suspend them at equal intervals.
  2. Cluster Display: Group posters of varying sizes and designs together to form a visually interesting cluster, securing them to the ceiling with fishing line or wire.
  3. Single Statement Piece: Make a bold statement by hanging a large poster or artwork as a focal point in the room, using ceiling hooks or clips to ensure secure mounting.
  4. Layered Effect: Achieve depth and dimension by layering posters of different sizes and orientations, suspending them at varying heights from the ceiling.

Read too: Exploring the Innovation and Efficiency of Ceiling Mounted Surgical Light Solutions: Illuminating Precision

Tips for a Professional-Looking Display

  • Maintain Consistency: Keep the spacing and alignment of posters consistent throughout the display to create a cohesive and polished look.
  • Consider Lighting: Position the posters strategically to take advantage of natural or artificial lighting sources, avoiding glare or shadows that may detract from the display.
  • Rotate Posters Regularly: Keep your display fresh and dynamic by rotating the posters periodically or swapping them out with new ones to reflect your changing interests or decor.

Creative Ideas for Hanging Posters From Ceiling

  1. Themed Displays: Create themed displays based on your interests, hobbies, or favorite movies, using posters to tell a story or evoke a specific mood.
  2. Seasonal Decor: Switch up your poster display with the changing seasons or holidays, incorporating seasonal colors, themes, or motifs to add festive flair to your space.
  3. Interactive Elements: Enhance your poster display with interactive elements such as string lights, paper garlands, or hanging plants to add texture and visual interest.

Conclusion

Hanging posters from the ceiling is a versatile and damage-free way to showcase your favorite artwork, photographs, or movie posters while adding personality and style to your space. With the right tools, techniques, and creative ideas, you can create stunning displays that transform any room into a gallery-worthy showcase. Explore our tips and inspiration for hanging posters from the ceiling and elevate your interior decor with stylish and innovative displays.

Luxurious Gold Tin Ceiling Tiles: Elevate Your Space

Are you searching for a timeless and opulent way to elevate your interior decor? Look no further than Gold Tin Ceiling Tiles. These exquisite tiles not only add a touch of luxury to any space but also offer durability and versatility. In this comprehensive guide, we’ll delve into everything you need to know about Gold Tin Ceiling Tiles, from their history and design options to installation tips and creative uses.

Gold Tin Ceiling Tiles

Unveiling the Beauty of Gold Tin Ceiling Tiles

Gold Tin Ceiling Tiles, also known as pressed tin or metal ceiling tiles, are decorative panels made from tin-plated steel or aluminum. These tiles are embossed with intricate patterns and coated with a lustrous gold finish, creating a stunning visual impact on ceilings. Originating in the 19th century as a practical solution for concealing imperfections and providing insulation, tin ceiling tiles have evolved into a symbol of elegance and sophistication in interior design.

Why Choose Gold Tin Ceiling Tiles?

  1. Timeless Elegance: Gold Tin Ceiling Tiles exude timeless elegance and add a touch of glamour to any space, whether it’s a historic building or a modern home.
  2. Versatility: These tiles come in a variety of designs, from classic floral motifs to geometric patterns, allowing you to customize your ceiling to suit your personal style and decor theme.
  3. Durability: Constructed from high-quality materials, Gold Tin Ceiling Tile are durable and resistant to moisture, making them suitable for both indoor and outdoor applications.

Design Options and Styles

When it comes to Gold Tin Ceiling Tile, the design possibilities are endless. Here are some popular styles to consider:

  • Victorian Elegance: Embrace the ornate beauty of Victorian-era designs with intricate floral patterns and elaborate borders, perfect for adding a touch of old-world charm to your space.
  • Art Deco Glamour: Channel the glamour of the Art Deco era with geometric motifs, sleek lines, and bold, symmetrical patterns, creating a striking focal point in any room.
  • Rustic Charm: Opt for rustic-inspired tin ceiling tiles featuring distressed finishes or embossed textures, adding warmth and character to farmhouse-style interiors.

Installation Tips and Techniques

Installing Gold Tin Ceiling Tile requires careful planning and precision to achieve professional results. Here are some tips to guide you through the process:

  1. Prepare the Surface: Ensure that the ceiling surface is clean, smooth, and free of any debris or grease before installing the tiles.
  2. Measure Twice, Cut Once: Take accurate measurements of the ceiling area and carefully mark the layout of the tiles to ensure a symmetrical and balanced installation.
  3. Use the Right Tools: Invest in quality tools such as tin snips, adhesive or nails, and a level to facilitate the installation process and achieve a seamless finish.
  4. Consider Professional Installation: If you’re not confident in your DIY skills, consider hiring a professional contractor experienced in installing tin ceiling tiles to ensure optimal results.

Creative Uses for Gold Tin Ceiling Tiles

In addition to enhancing ceilings, Gold Tin Ceiling Tiles can be used in various creative ways to elevate your interior decor:

  • Accent Walls: Create a stunning focal point in any room by using tin ceiling tiles to clad an accent wall, adding texture and visual interest to the space.
  • Backsplash: Install tin ceiling tiles as a backsplash in kitchens or bathrooms to protect the walls from moisture and splashes while adding a touch of elegance to the decor.
  • Furniture Accents: Repurpose tin ceiling tiles as decorative accents for furniture pieces such as cabinet doors, tabletops, or fireplace surrounds, infusing your home with unique style and personality.

Read too: Exploring the Innovation and Efficiency of Ceiling Mounted Surgical Light Solutions: Illuminating Precision

Conclusion

Gold Tin Ceiling Tile are a timeless and luxurious addition to any interior space, offering a perfect blend of elegance, durability, and versatility. Whether you’re renovating a historic property or adding a touch of glamour to a contemporary home, these exquisite tiles are sure to make a statement. Explore our collection of Gold Tin Ceiling Tile and transform your space into a masterpiece of design and sophistication.