When it comes to home lighting, finding the right fixtures can make all the difference in creating an inviting and stylish ambiance. One timeless and versatile option is Rod Iron Ceiling Lights. These fixtures not only offer a robust and elegant look but also complement various interior design styles. In this guide, we will delve into everything you need to know about rod iron ceiling lights, including their benefits, different styles, installation tips, and maintenance advice.

Why Choose Rod Iron Ceiling Lights?
The Appeal of Rod Iron
Rod iron, also known as wrought iron, is a material known for its durability and classic aesthetic. Here are some reasons why Rod Iron Ceiling Lights might be the perfect addition to your home:
- Timeless Elegance: Rod iron lights have a timeless appeal that blends well with both traditional and modern decor. Their intricate designs and sturdy build add a touch of sophistication to any room.
- Durability: Rod iron is known for its strength and longevity. Unlike other materials, it does not easily bend or break, making it a reliable choice for ceiling lights.
- Versatility: These lights come in a wide range of styles, from vintage and rustic to sleek and contemporary, ensuring there’s an option for every taste and decor theme.
- Customization: Many rod iron lights can be customized in terms of finish, size, and design, allowing you to create a unique look tailored to your space.
Read too: Kitchen Lighting For A Vaulted Ceiling: Illuminating Your Space with Style and Functionality
Styles of Rod Iron Ceiling Lights
Classic Chandeliers
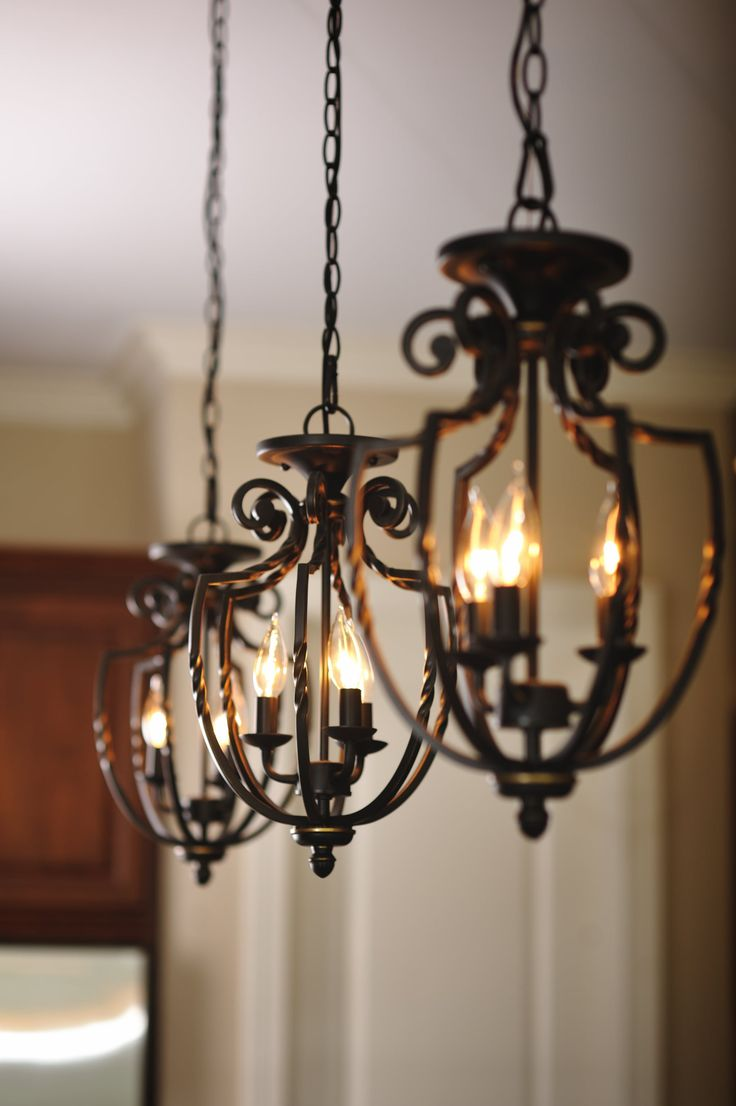
Rod Iron Ceiling Lights in the form of chandeliers are a popular choice for those looking to make a statement. These fixtures often feature intricate scrollwork and multiple arms, holding several light bulbs. They are perfect for dining rooms, living rooms, and entryways.
Rustic Pendants
For a more understated yet elegant look, rod iron pendant lights are an excellent option. These fixtures usually hang from the ceiling by a chain or rod and come in various shapes and sizes. They work well over kitchen islands, dining tables, or as accent lights in living spaces.
Modern Minimalist
Modern rod iron ceiling lights feature sleek lines and simple designs. They often incorporate elements such as glass or wood to create a contemporary look. These fixtures are ideal for modern and minimalist interiors, providing a clean and sophisticated lighting solution.
Flush Mounts
If you have a low ceiling or prefer a more streamlined look, rod iron flush mount lights are a great choice. These fixtures sit close to the ceiling and offer a subtle yet stylish lighting option for bedrooms, hallways, and bathrooms.
Installation Tips for Rod Iron Ceiling Lights
Planning Your Installation
Before installing Rod Iron Ceiling Lights, it’s essential to plan carefully. Here are some steps to follow:
- Determine the Location: Decide where you want to install the light fixture. Consider the size of the room, the height of the ceiling, and the existing decor.
- Measure the Space: Measure the area where the light will be installed to ensure the fixture fits properly. For chandeliers, ensure there is enough clearance above the heads of people walking underneath.
- Choose the Right Fixture: Select a rod iron ceiling light that complements your decor and fits the space. Consider the number of lights, the design, and the finish.
Step-by-Step Installation
- Turn Off the Power: Safety is paramount. Before starting the installation, turn off the power to the circuit at the main electrical panel.
- Prepare the Ceiling: If replacing an old fixture, remove it and inspect the electrical box. Ensure it is securely attached to a ceiling joist or support beam and can support the weight of the new rod iron fixture.
- Assemble the Fixture: Follow the manufacturer’s instructions to assemble the rod iron light fixture. This may include attaching arms, chains, or other decorative elements.
- Mount the Fixture: Attach the mounting bracket to the electrical box. Then, connect the wires from the ceiling to the corresponding wires on the fixture (usually black to black, white to white, and ground to ground). Secure the connections with wire nuts and electrical tape.
- Install the Fixture: Lift the fixture into place and secure it to the mounting bracket. Ensure it is level and properly aligned.
- Attach Bulbs and Shades: Install the light bulbs and any shades or covers that come with the fixture. Ensure all components are securely in place.
- Test the Light: Turn the power back on and test the light to ensure it is functioning correctly.
Design Tips for Using Rod Iron Ceiling Lights
Complementing Your Decor
Rod Iron Ceiling Lights can enhance various decor styles. Here are some tips on how to integrate them into your home:
- Traditional Decor: Pair rod iron chandeliers with classic furniture, rich fabrics, and ornate details to create a timeless and elegant look.
- Rustic Charm: Use rod iron pendant lights with natural materials like wood and stone. Opt for warm, earthy tones to create a cozy and inviting atmosphere.
- Modern Minimalism: Choose sleek rod iron fixtures with clean lines and minimal ornamentation. Combine them with neutral colors and simple, functional furniture for a contemporary feel.
- Industrial Style: Rod iron lights with exposed bulbs and rugged finishes work well in industrial interiors. Pair them with metal and brick elements for an urban, edgy look.
Layering Your Lighting
For the best effect, layer your lighting by combining different types of fixtures. Use rod iron ceiling lights as the primary source of illumination and supplement with wall sconces, table lamps, and floor lamps. This approach provides a balanced and well-lit space.
Maintenance Tips for Rod Iron Ceiling Lights
Regular Cleaning
Keep your Rod Iron Ceiling Lights looking their best with regular cleaning. Here’s how:
- Dusting: Use a soft cloth or feather duster to remove dust from the fixture regularly. Be gentle to avoid scratching the surface.
- Deep Cleaning: Periodically, perform a more thorough cleaning. Turn off the power, remove the bulbs, and wipe the fixture with a damp cloth. Dry immediately to prevent rust.
- Polishing: For an extra shine, use a rod iron cleaner or polish. Follow the manufacturer’s instructions for the best results.
Inspecting for Damage
Regularly inspect your rod iron fixtures for signs of damage, such as loose connections, rust, or wear. Address any issues promptly to maintain the fixture’s appearance and safety.
Replacing Bulbs
Ensure the light bulbs are compatible with the fixture and replace them as needed. Opt for energy-efficient LED bulbs to save on electricity and reduce the frequency of replacements.
Conclusion: Elevate Your Home with Rod Iron Ceiling Lights
Rod Iron Ceiling Lights offer a unique blend of durability, elegance, and versatility. Whether you prefer the grandeur of a chandelier, the simplicity of a pendant, or the modern appeal of a flush mount, these fixtures can enhance any space. By following the tips and guidelines in this guide, you can choose the perfect rod iron ceiling light for your home, install them safely, and maintain their beauty for years to come.