Upgrading your bathroom can significantly enhance your home’s comfort and value. One of the most luxurious and sought-after features is a rain shower head ceiling mount. This type of shower head mimics the experience of standing in a gentle rain, offering a relaxing and invigorating shower experience. In this comprehensive guide, we will explore the benefits, installation process, and maintenance tips for a rain shower head ceiling mount, helping you make an informed decision for your bathroom renovation.
Why Choose a Rain Shower Head Ceiling Mount?
A rain shower head ceiling mount offers numerous advantages over traditional wall-mounted shower heads. Here are some compelling reasons to consider this luxurious upgrade:
Enhanced Shower Experience
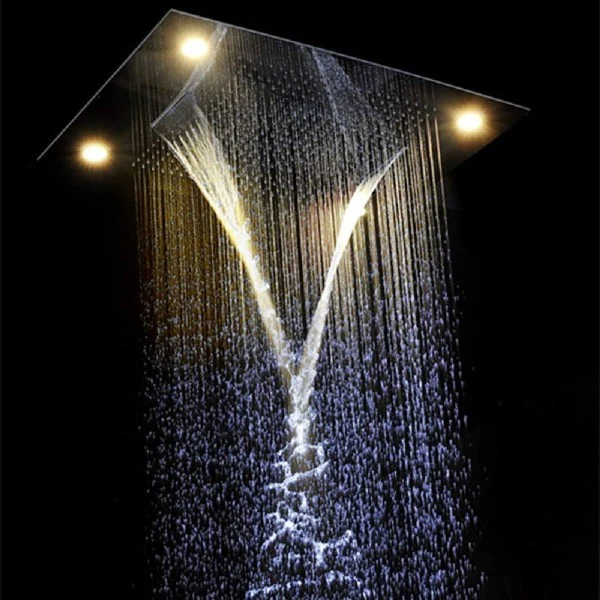
The primary benefit of a rain shower head ceiling mount is the superior shower experience it provides. The water falls directly from above, covering your entire body evenly and creating a sensation similar to natural rainfall. This can be particularly soothing and therapeutic, making your daily shower feel like a spa retreat.
Modern Aesthetics
Rain shower heads mounted on the ceiling add a sleek, modern look to your bathroom. They create a minimalist and elegant appearance, enhancing the overall design and making the space feel more open and luxurious.
Improved Water Coverage
Unlike traditional shower heads that may create uneven water distribution, a rain shower head ensures comprehensive coverage. This means you don’t have to move around to get wet, as the water envelops your entire body simultaneously.
Versatile Design Options
Rain shower heads come in various designs, sizes, and finishes, allowing you to choose one that perfectly matches your bathroom décor. Whether you prefer a classic chrome finish or a modern matte black, there’s a rain shower head to suit your style.
Increased Property Value
Investing in high-quality bathroom fixtures, such as a rain shower head ceiling mount, can increase the value of your home. Potential buyers often appreciate luxurious bathroom features, making your property more appealing on the market.
Rain Shower Head Ceiling Mount: Key Features
When selecting a rain shower head ceiling mount, consider the following key features to ensure you choose the best option for your needs:
Size
Rain shower heads come in various sizes, typically ranging from 8 inches to 20 inches in diameter. Larger heads provide more extensive water coverage, but it’s essential to choose a size that fits well within your shower space and plumbing capabilities.
Material
The material of the shower head affects both its durability and appearance. Common materials include stainless steel, brass, and ABS plastic. Stainless steel and brass are more durable and resistant to corrosion, while ABS plastic is lightweight and affordable.
Spray Settings
Some rain shower heads offer multiple spray settings, such as a gentle mist or a more powerful stream. These options allow you to customize your shower experience according to your preferences.
Water Pressure
Ensure that your home’s water pressure is compatible with the rain shower head you choose. Some models are designed to work with low water pressure, while others require higher pressure to function correctly.
Finish
The finish of the shower head should complement your bathroom’s overall design. Popular finishes include chrome, brushed nickel, oil-rubbed bronze, and matte black. Consider the existing fixtures and fittings in your bathroom when making your selection.
How to Install a Rain Shower Head Ceiling Mount
Installing a rain shower head ceiling mount may seem daunting, but with the right tools and instructions, it can be a manageable DIY project. Here’s a step-by-step guide to help you through the installation process:
Tools and Materials Needed
- Rain shower head ceiling mount kit
- Adjustable wrench
- Pipe wrench
- Teflon tape
- Ladder or step stool
- Screwdriver
- Drill (if mounting bracket is required)
- Level
Step-by-Step Installation
- Turn Off the Water Supply: Before starting the installation, turn off the water supply to the shower to prevent any leaks or water damage.
- Remove the Existing Shower Head: Use an adjustable wrench to remove the existing shower head from the wall or ceiling. If there is a shower arm attached, remove that as well.
- Prepare the Ceiling: If your new rain shower head requires a mounting bracket, use a drill to install it in the desired location on the ceiling. Ensure the bracket is level and securely attached.
- Wrap Threads with Teflon Tape: Apply Teflon tape to the threads of the shower arm or ceiling mount to create a watertight seal. This step helps prevent leaks.
- Attach the Shower Arm: Secure the shower arm to the ceiling mount or bracket using a pipe wrench. Make sure it’s tightly connected to prevent any water leaks.
- Install the Rain Shower Head: Attach the rain shower head to the end of the shower arm. Hand-tighten it initially, then use an adjustable wrench to ensure it’s securely fastened.
- Check for Leaks: Turn the water supply back on and check for any leaks around the connections. If you notice any drips, tighten the connections further or apply more Teflon tape as needed.
- Adjust the Spray Settings: If your rain shower head has multiple spray settings, adjust them to your preference. Test the water flow and ensure it’s working correctly.
Maintenance Tips for Your Rain Shower Head Ceiling Mount
Proper maintenance of your rain shower head ceiling mount is essential to ensure its longevity and optimal performance. Here are some tips to help you keep it in excellent condition:
Regular Cleaning
Clean the shower head regularly to prevent the buildup of mineral deposits and soap scum. Use a mild cleaner and a soft cloth to wipe the surface. For deeper cleaning, soak the shower head in a mixture of vinegar and water to dissolve any hard water deposits.
Check for Leaks
Periodically check the connections for any signs of leaks. If you notice any water drips, tighten the connections or reapply Teflon tape to create a watertight seal.
Inspect Spray Nozzles
Ensure that the spray nozzles are not clogged. If you notice reduced water flow or uneven spray, use a toothbrush or a needle to gently clean the nozzles.
Avoid Harsh Chemicals
Avoid using harsh chemicals or abrasive cleaners on the shower head, as they can damage the finish and cause corrosion. Stick to mild, non-abrasive cleaning solutions.
Read too: Kitchen Lighting For A Vaulted Ceiling: Illuminating Your Space with Style and Functionality
Routine Maintenance
Perform routine maintenance by removing the shower head periodically and soaking it in a vinegar solution to remove any mineral buildup. This will help maintain optimal water flow and prevent clogs.
Conclusion
A rain shower head ceilings mount is a luxurious addition to any bathroom, offering a spa-like shower experience and enhancing the overall design of your space. By understanding the benefits, key features, installation process, and maintenance tips, you can make an informed decision and enjoy the ultimate shower experience in your home. Whether you’re renovating your bathroom or building a new one, a rain shower head ceiling mount is a worthwhile investment that adds value, comfort, and style to your home.