Painting acoustic ceiling tiles can be a transformative and cost-effective way to enhance the appearance of your space. Whether you’re looking to refresh an outdated ceiling or address unsightly stains, painting offers a simple solution to update your interior décor. This guide explores the benefits, preparation, techniques, and maintenance tips for “Painting Acoustic Ceiling Tiles,” helping you achieve a professional and aesthetically pleasing result.
Why Consider Painting Acoustic Ceiling Tiles?
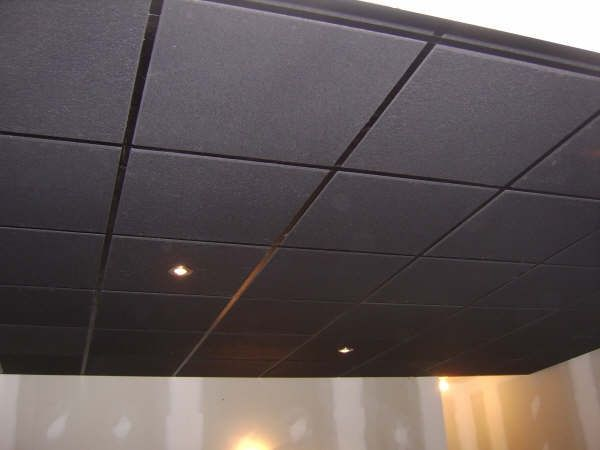
Acoustic ceiling tiles, also known as drop ceiling tiles, are commonly used in commercial and residential spaces for their sound-absorbing properties. Over time, these tiles can become discolored, stained, or outdated. Painting them offers several advantages:
Benefits of Painting Acoustic Ceiling Tiles
- Cost-Effective Upgrade: Replacing ceiling tiles can be expensive. Painting is a more affordable alternative that can rejuvenate the look of your ceiling without the high cost of new tiles.
- Aesthetic Improvement: Painting allows you to customize the color and finish of your ceiling tiles, giving your space a fresh and updated look.
- Conceals Stains and Damage: Acoustic tiles are prone to stains from water leaks or aging. Painting can cover these imperfections, restoring a clean and uniform appearance.
- Improves Light Reflection: A new coat of paint, especially in lighter colors, can enhance the reflectivity of the tiles, making your room brighter and more inviting.
- Increases Durability: Applying a quality paint can help protect the tiles from future stains and wear, extending their lifespan.
Preparing to Paint Acoustic Ceiling Tiles
Proper preparation is crucial for achieving a successful paint job. Follow these steps to prepare your acoustic ceiling tiles for painting:
1. Clean the Tiles
Before painting, it’s essential to clean the tiles thoroughly. Dust, dirt, and grease can interfere with paint adhesion. Use a vacuum with a brush attachment or a soft, dry cloth to remove surface dust. If there are any stains or grime, gently clean them with a mild detergent and water. Allow the tiles to dry completely before proceeding.
Read too: Bathroom Flooded Through the Ceiling: A Comprehensive Guide
2. Inspect for Damage
Examine the tiles for any signs of damage, such as cracks, sagging, or severe discoloration. Damaged tiles should be replaced before painting to ensure a smooth and even finish.
3. Protect the Surroundings
Cover the floor and any furniture with drop cloths or plastic sheeting to protect them from paint splatters. Use painter’s tape to mask off areas you don’t want to paint, such as walls, light fixtures, and trim.
4. Choose the Right Paint
Selecting the appropriate paint is crucial for achieving a durable and attractive finish. Opt for a water-based acrylic or latex paint specifically designed for ceiling tiles. These paints are flexible, adhere well to the tile surface, and are easy to clean.
Techniques for Painting Acoustic Ceiling Tiles
With preparation complete, you can now proceed with painting. Follow these techniques for the best results:
1. Apply a Primer
Applying a primer is essential for ensuring proper paint adhesion. Use a primer that is compatible with acoustic ceiling tiles. Apply the primer evenly with a roller or brush, and allow it to dry completely as per the manufacturer’s instructions.
2. Use the Right Tools
For painting, a high-quality roller or brush is essential. A roller with a medium nap is effective for covering large areas quickly, while a brush is useful for edges and corners. Consider using a paint tray to load the roller or brush with paint evenly.
3. Apply Paint Evenly
When painting, apply the paint in even, overlapping strokes to avoid streaks and achieve full coverage. Start from one corner of the room and work your way across, maintaining a consistent application technique. Avoid overloading the roller or brush with paint, as this can lead to drips and uneven coverage.
4. Allow Proper Drying Time
Let the first coat of paint dry completely before applying a second coat, if necessary. Follow the paint manufacturer’s guidelines for drying times to ensure that each coat adheres properly and the finish is smooth.
5. Touch Up and Clean
After the final coat of paint has dried, inspect the tiles for any missed spots or uneven areas. Touch up these areas as needed. Clean your painting tools with water or the appropriate cleaner as per the paint manufacturer’s instructions.
Maintaining Painted Acoustic Ceiling Tiles
To keep your painted acoustic ceiling tiles looking their best, follow these maintenance tips:
1. Regular Dusting
Dust the ceiling tiles regularly to prevent the buildup of dirt and debris. Use a soft brush or a vacuum with a brush attachment to gently clean the surface.
2. Address Stains Promptly
If you notice any stains or spots on the tiles, clean them as soon as possible to prevent permanent damage. Use a mild cleaning solution and a soft cloth to gently wipe the affected areas.
3. Avoid Excessive Moisture
Excessive moisture can cause the paint to peel or discolor. Ensure proper ventilation in areas prone to high humidity, and address any leaks or water issues promptly.
4. Touch Up as Needed
Over time, you may need to touch up areas that have become damaged or worn. Regular touch-ups will help maintain a consistent appearance and prolong the life of your painted tiles.
Design Ideas for Painted Acoustic Ceiling Tiles
Painting acoustic ceiling tiles offers a range of design possibilities. Here are some ideas to consider:
1. Classic White
A classic white paint is timeless and versatile. It brightens up the room and complements various interior styles, from modern to traditional.
2. Bold Colors
For a more dramatic effect, consider painting the tiles in bold colors. Shades like navy blue, deep green, or vibrant red can add a touch of personality and create a focal point in the room.
3. Patterns and Textures
Use stencils or specialized painting techniques to create patterns or textures on the tiles. This can add visual interest and make your ceiling a unique feature.
4. Metallic Finishes
Metallic paints can give your ceiling a glamorous and upscale look. Consider finishes like silver, gold, or bronze to add a touch of luxury and sophistication.
5. Accent Ceilings
Paint tiles in a contrasting color or pattern to create an accent ceiling. This design choice can draw attention and add a distinctive element to your space.
When to Seek Professional Help
While painting acoustic ceiling tiles is often a manageable DIY project, there are instances when professional assistance may be beneficial:
- Extensive Damage: If the tiles are severely damaged or require significant repair, a professional can assess and address the issues more effectively.
- Large Projects: For large-scale projects or commercial spaces, hiring professionals ensures efficient and high-quality results.
- Complex Designs: For intricate patterns or specialized finishes, professional painters can achieve a level of detail and precision that may be challenging on your own.
Conclusion
Painting acoustic ceiling tiles is a cost-effective and versatile way to enhance the appearance of your space. By following proper preparation and painting techniques, you can achieve a fresh and updated look that revitalizes your ceiling. With various design options and maintenance tips, you can enjoy a beautifully painted ceiling that complements your interior décor and lasts for years to come.