Installing a ceiling fan can be a fantastic addition to any room. It not only adds an aesthetic touch but also helps in maintaining a comfortable temperature in your home. However, many people are hesitant to embark on this DIY project due to concerns about its complexity. In this article, we will answer the question, “Is installing a ceiling fan hard?” and provide you with the information you need to confidently take on this task.
Is Installing A Ceiling Fan Hard?
You might be wondering, “Is installing a ceiling fan hard?” The answer is both yes and no. The difficulty of the task largely depends on your level of experience, tools, and the type of ceiling fan you’re dealing with. Let’s break it down step by step.
1. Assess Your Skill Level
Before you start any DIY project, it’s essential to assess your skill level. If you have experience with electrical work and have successfully completed similar projects before, installing a ceiling fan may not be as hard for you. However, if you are a beginner, it’s advisable to do thorough research and possibly seek assistance from a professional.
2. Gather the Necessary Tools
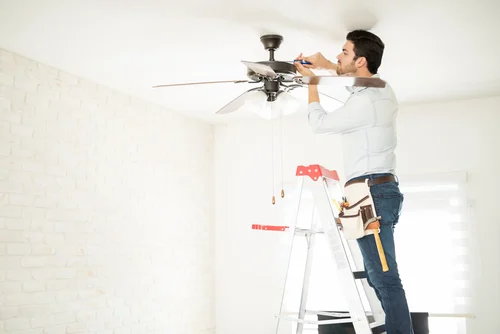
To make the installation process smoother, ensure you have the right tools. Common tools and materials needed for installing a ceiling fan include a screwdriver, pliers, wire strippers, a voltage tester, a ladder, and a ceiling fan kit. Having the appropriate tools can significantly reduce the perceived difficulty of the task.
3. Choose the Right Ceiling Fan
The type of ceiling fan you choose can also influence the level of difficulty. Basic models with simple wiring and no added features are generally easier to install. However, more complex fans with remote controls, lights, or other additional features may require a bit more effort and expertise.
4. Follow the Instructions
Most ceiling fans come with detailed installation instructions. To make the process as easy as possible, follow these instructions carefully. Pay close attention to the wiring diagram and the order of assembly. Following the manufacturer’s guidelines can help you avoid common pitfalls.
5. Turn Off the Power
Safety should be a top priority when installing a ceiling fan. Before you begin, turn off the power to the circuit you will be working on. Use a voltage tester to ensure that there is no electrical current running through the wires.
6. Wiring and Installation
This is often the step that intimidates people the most. If you have experience with electrical work, this may not be as hard for you. However, if you’re a novice, consider seeking the help of a qualified electrician. Incorrect wiring can be dangerous, so it’s better to be safe than sorry.
7. Secure the Fan
Once the wiring is in place, secure the fan to the ceiling according to the instructions. Make sure it is stable and does not wobble, as an unstable fan can be a safety hazard.
8. Test and Balance
After you’ve installed the fan, turn the power back on and test it to ensure it’s working correctly. If it wobbles or makes unusual noises, you may need to balance it. Ceiling fan balancing kits are available and can help make your fan run smoothly.
Conclusion
So, is installing a ceiling fan hard? It doesn’t have to be if you take the necessary steps and precautions. Assess your skill level, gather the right tools, choose an appropriate fan, follow the instructions, turn off the power, handle the wiring carefully, secure the fan, and test it thoroughly. If you’re unsure or uncomfortable with any part of the process, don’t hesitate to consult a professional electrician. With the right approach and a little bit of confidence, you can successfully install a ceiling fan and enjoy the benefits it brings to your home. Remember, safety always comes first when working with electrical components, so take your time and do it right.