Transform the look of your ceiling light fixture with the addition of a sophisticated ceiling light canopy kits, enhancing both functionality and aesthetic appeal.
Understanding Ceiling Light Canopy Kit
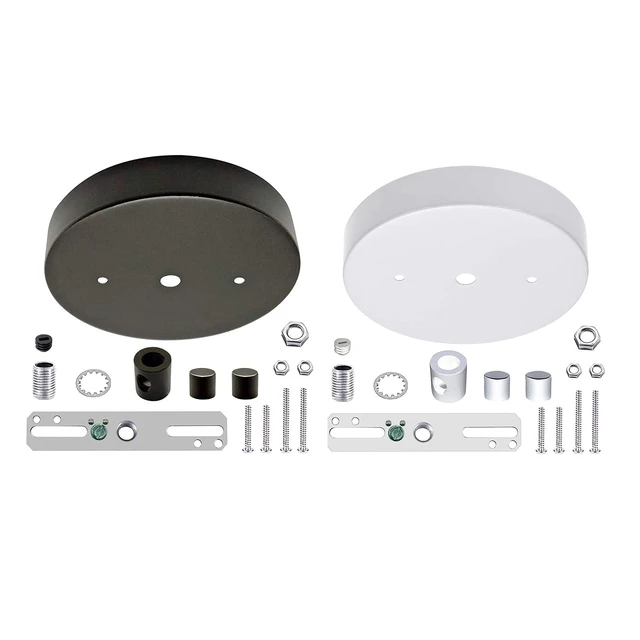
A ceiling light canopy kit is a versatile accessory that serves both practical and decorative purposes. It is used to cover and conceal the electrical wiring and junction box of a ceiling light fixture, providing a clean and polished look to the ceiling while offering support and stability to the fixture.
Exploring the Components of a Ceiling Light Canopy Kit
A typical ceiling light canopy kit includes the following components:
- Canopy: The canopy is a decorative cover that attaches to the ceiling and hides the electrical box and wiring. It comes in various shapes, sizes, and finishes to complement different styles of light fixtures and interior décor.
- Mounting Hardware: The kit usually includes screws, bolts, or other mounting hardware necessary for attaching the canopy to the ceiling and securing it in place.
- Decorative Elements: Some canopy kits may feature additional decorative elements such as rosettes, medallions, or trim pieces to further enhance the aesthetic appeal of the ceiling light fixture.
Benefits of Using a Ceiling Light Canopy Kit
Installing a ceiling light canopy kit offers several benefits:
- Enhanced Aesthetics: A canopy kit provides a finished and polished look to ceiling light fixtures, making them appear more attractive and visually appealing.
- Concealed Wiring: The canopy conceals unsightly wiring and junction boxes, creating a cleaner and more streamlined appearance on the ceiling.
- Added Stability: By securely attaching the canopy to the ceiling, the kit adds stability and support to the light fixture, reducing the risk of wobbling or shaking.
- Customization: With a wide range of canopy designs and finishes available, homeowners can customize their ceiling light fixtures to match their unique style preferences and interior décor.
Installing a Ceiling Light Canopy Kit
Follow these steps for a successful installation:
1. Turn Off Power
- Before beginning the installation, turn off the power to the light fixture at the circuit breaker to avoid electrical hazards.
2. Remove Existing Canopy (if applicable)
- If there is an existing canopy or ceiling medallion, remove it carefully to access the wiring and junction box.
3. Attach Mounting Bracket
- Install the mounting bracket included in the canopy kit to the electrical box on the ceiling, ensuring it is securely fastened.
4. Connect Wires
- Connect the wires from the ceiling to the corresponding wires on the light fixture, following the manufacturer’s instructions.
5. Secure Canopy
- Attach the canopy to the mounting bracket using the provided screws or hardware, making sure it is level and stable.
Maintenance and Care Tips
To keep your ceiling light canopy kit looking its best, follow these maintenance tips:
- Regular Cleaning: Wipe the canopy and hardware with a soft, damp cloth to remove dust and debris regularly.
- Check for Loose Fasteners: Periodically inspect the mounting hardware and tighten any loose screws or bolts to maintain stability.
- Inspect for Damage: Check the canopy for any signs of damage or wear, such as cracks or discoloration, and replace it if necessary.
Conclusion
Ceiling light canopy kits enhance both appearance and functionality. They conceal wiring, add stability, and offer decorative flair. Upgrade your lighting fixtures stylishly and elevate your home’s interior design.
Read too: Flush Mount Rustic Ceiling Lights: Illuminate Your Space with Stunning