Experiencing a “Ceiling Leaking After Shower” can be concerning and requires immediate attention. In this comprehensive guide, we’ll delve into the common causes behind ceiling leaks after a shower, offering insights on identifying, addressing, and preventing such issues. Learn about potential culprits and effective solutions to keep your bathroom dry and your ceiling intact.
Understanding the Issue: Ceiling Leaking After Shower
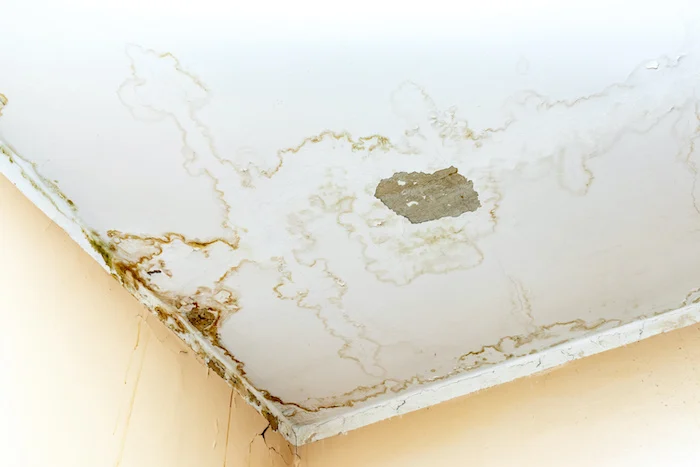
Before delving into solutions, let’s explore the phenomenon of a ceiling leaking after a shower. This occurrence is often indicative of water seeping through various layers, causing damage to the ceiling and potentially leading to more significant issues like mold growth and structural damage.
Common Causes of Ceiling Leaks After Shower
- Faulty Shower Pan: A damaged or improperly installed shower pan can allow water to penetrate the flooring and subfloor, eventually reaching the ceiling below.
- Leaking Shower Enclosure: Cracks or gaps in the shower enclosure can permit water to escape and find its way into the surrounding walls and ceiling.
- Damaged Grout and Caulking: Worn-out grout or deteriorated caulking in the shower area can result in water leakage, especially in the corners and joints.
- Blocked or Damaged Drains: If shower drains are blocked or damaged, water may accumulate and overflow, causing leaks through the ceiling below.
- Leaking Plumbing Pipes: Faulty plumbing pipes within the walls or ceiling can be a hidden source of water leaks, impacting the ceiling after each shower.
Dealing with Ceiling Leaks: Solutions and Fixes
- Inspecting and Repairing Shower Pan: If the shower pan is identified as the culprit, inspect for cracks or damage. Professional repair or replacement may be necessary to ensure a watertight seal.
- Sealing Shower Enclosure Gaps: Address any visible gaps or cracks in the shower enclosure. Apply waterproof sealant to create a barrier against water infiltration.
- Regrouting and Recaulking: Renewing grout and caulking in the shower area is essential. Remove old materials, thoroughly clean the joints, and reapply new grout and caulk for a secure seal.
- Clearing and Maintaining Drains: Regularly clean and maintain shower drains to prevent blockages. Use drain cleaners or seek professional assistance if needed.
- Professional Plumbing Inspection: If the source of the leak is suspected to be within the plumbing system, consult with a plumber for a thorough inspection. Address any damaged or leaking pipes promptly.
Preventive Measures: Avoiding Future Ceiling Leaks
- Regular Maintenance Routine: Implement a routine for inspecting and maintaining your shower, including checking for any signs of wear or damage.
- Proper Ventilation: Ensure proper ventilation in the bathroom to reduce humidity. Use exhaust fans or open windows during and after showers to allow moisture to dissipate.
- Waterproofing Materials: Invest in quality waterproofing materials during shower installations. This includes waterproof membranes and proper sealing of joints.
- Timely Repairs: Address any visible damage or wear in your bathroom promptly. Timely repairs can prevent minor issues from escalating into major problems.
Read too: Dealing with Water Damage on Your Popcorn Ceiling: Unveiling the Consequences
Conclusion
In conclusion, dealing with a “Ceiling Leaking After Shower” requires a systematic approach to identify and address the root causes. Regular maintenance, proper installation, and swift repairs are key elements in preventing and resolving this issue. By understanding the common culprits and implementing proactive measures, homeowners can enjoy a dry and damage-free environment in their bathrooms.