If you’re embarking on a project that involves suspending structures from your ceiling, one of the critical components you’ll need is a Ceiling Flange 3/8. This small yet essential hardware piece ensures that your installations are secure and stable. In this comprehensive guide, we’ll delve into what a Ceiling Flange 3/8 is, its uses, how to install it, and the benefits it offers for various applications.
Understanding
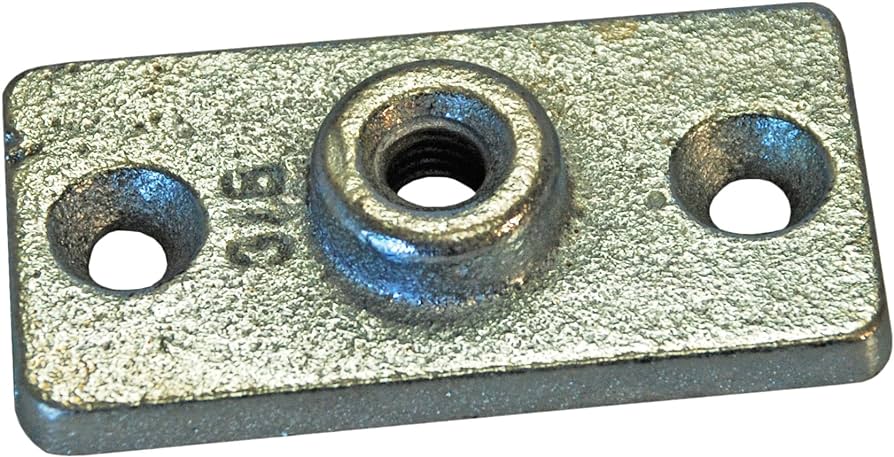
A Ceiling Flange 3/8 is a type of mounting hardware used to attach pipes, rods, or other fixtures to a ceiling. The “3/8” specification typically refers to the diameter of the pipe or rod that the flange is designed to support. These flanges are commonly used in a variety of settings, including commercial buildings, industrial facilities, and residential projects, providing a stable and reliable connection point.
Common Uses of Ceiling Flange 3/8
Lighting Fixtures
One of the most common applications for a Ceiling Flange 3/8 is in the installation of lighting fixtures. These flanges provide a sturdy anchor point for hanging lights, chandeliers, and other ceiling-mounted lighting solutions.
Pipe Support
In both commercial and residential buildings, ceiling flanges are used to support piping systems. Whether it’s for plumbing, HVAC, or sprinkler systems, these flanges ensure that pipes are securely fastened to the ceiling, reducing the risk of sagging or displacement.
Industrial Equipment
In industrial settings, ceiling flanges are often used to mount heavy equipment or machinery components. The robust construction of these flanges allows them to support significant weight, making them ideal for demanding environments.
Home Decor
For more creative applications, a Ceiling Flange 3/8 can be used in home decor projects. For example, they can be used to mount curtain rods, plant hangers, or even create unique shelving units that hang from the ceiling.
Key Features of Ceiling Flange 3/8
When selecting a Ceiling Flange 3/8, consider the following key features that contribute to its effectiveness and reliability:
Material
Ceiling flanges are typically made from durable materials such as steel, stainless steel, or cast iron. These materials offer excellent strength and corrosion resistance, ensuring long-term performance even in harsh conditions.
Design
The design of the flange includes a flat base that attaches to the ceiling and a central threaded hole that accommodates the 3/8-inch pipe or rod. Some designs also feature additional holes for screws or bolts, providing extra stability.
Load Capacity
Understanding the load capacity of your Ceiling Flange 3/8 is crucial, especially for applications involving heavy loads. Always check the manufacturer’s specifications to ensure the flange can support the intended weight.
Finish
The finish of the flange can vary, with options including galvanized, powder-coated, or painted finishes. The finish not only enhances the appearance but also provides additional protection against rust and corrosion.
Installing a Ceiling Flange 3/8
Proper installation is essential to ensure the safety and stability of your ceiling-mounted fixtures. Here’s a step-by-step guide to installing a Ceiling Flange 3/8:
Tools and Materials Needed
- Ceiling Flange 3/8
- Drill and appropriate drill bits
- Screwdriver or wrench
- Screws or bolts (as specified by the flange)
- Measuring tape
- Level
- Ladder
- Safety glasses
Step-by-Step Installation Guide
- Determine the Location: Decide where you want to install the flange. Use a measuring tape and level to ensure the placement is accurate and even.
- Mark the Drill Points: Hold the flange against the ceiling and mark the locations of the screw or bolt holes with a pencil.
- Drill Pilot Holes: Drill pilot holes at the marked locations. This will make it easier to insert the screws or bolts and prevent the ceiling material from cracking.
- Secure the Flange: Align the flange with the pilot holes and insert the screws or bolts. Tighten them securely with a screwdriver or wrench, ensuring the flange is flush against the ceiling.
- Attach the Pipe or Rod: Screw the 3/8-inch pipe or rod into the central threaded hole of the flange. Ensure it is tightly secured and level.
- Double-Check Stability: Once everything is in place, double-check that the flange and the attached fixture are stable and secure. Make any necessary adjustments.
Benefits of Using a Ceiling Flange 3/8
Versatility
A Ceiling Flange 3/8 is incredibly versatile, suitable for a wide range of applications from residential to industrial. Its ability to support various structures makes it a valuable component in many projects.
Durability
Constructed from robust materials, these flanges are designed to withstand heavy loads and harsh conditions. This durability ensures that they provide reliable support over the long term.
Easy Installation
With the right tools and a bit of know-how, installing a Ceiling Flange 3/8 is straightforward. This ease of installation makes it accessible for both DIY enthusiasts and professional contractors.
Space-Saving
By enabling ceiling-mounted installations, these flanges help save valuable floor and wall space. This is particularly beneficial in small or cluttered areas where optimizing space is crucial.
Applications of Ceiling Flange 3/8 in Different Settings
Residential
In homes, a Ceiling Flange 3/8 installs various fixtures, including ceiling fans, hanging lights, and plant hangers. These installations not only save space but also add a unique aesthetic appeal to the home.
Commercial
In commercial buildings, ceiling flanges support lighting systems, signage, and overhead storage. Their robust construction ensures that these installations remain secure and functional in high-traffic areas.
Industrial
Industrial applications often require the mounting of heavy equipment and piping systems. The strength and durability of a Ceiling Flange 3/8 make it ideal for these demanding environments, providing reliable support for essential infrastructure.
Outdoor
Ceiling flanges also install fixtures in outdoor settings, such as porch swings, outdoor lighting, and shade structures. Weather-resistant materials and finishes ensure that these installations can withstand the elements.
Maintenance Tips for Ceiling Flange 3/8
Regular maintenance ensures the longevity and performance of your Ceilings Flange 3/8 installations. Here are some tips to keep them in top condition:
Regular Inspections
Periodically check the flanges and their attachments for any signs of wear, rust, or looseness. Early detection of issues can prevent accidents and prolong the lifespan of the installation.
Tighten Loose Connections
Over time, screws and bolts may loosen due to vibrations or heavy use. Regularly tighten all connections to maintain stability and safety.
Clean and Protect
Keep the flanges clean by wiping them with a damp cloth. For outdoor installations, consider applying a protective coating to prevent rust and corrosion.
Replace When Necessary
If a flange shows signs of significant wear or damage, replace it promptly to ensure the safety and stability of the attached structure.
Conclusion
A Ceiling Flange 3/8 is a vital component for a variety of ceiling-mounted installations, offering versatility, durability, and ease of installation. Whether you’re mounting a light fixture, supporting a piping system, or creating a unique home decor project, these flanges provide reliable support and enhance the overall functionality of your space.
By understanding their features, proper installation techniques, and maintenance practices, you can ensure that your Ceilings Flange 3/8 installations remain secure and effective for years to come. Invest in high-quality flanges and follow best practices to optimize the safety and aesthetics of your ceiling-mounted projects.