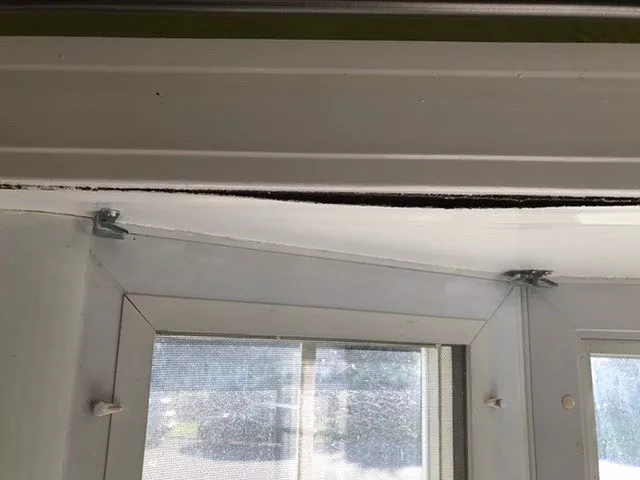
Bay windows are a beautiful addition to any home, offering expansive views, increased natural light, and added architectural interest. However, they can sometimes present challenges, particularly when it comes to leaks. If you’re dealing with a bay window ceiling leak, this guide will help you understand the causes, solutions, and preventive measures to keep your home dry and damage-free.

Understanding Bay Window Ceiling Leaks
A bay window ceiling leak can cause significant damage to your home if not addressed promptly. Leaks can lead to water stains, mold growth, structural damage, and even compromise the integrity of your home. Understanding the common causes of these leaks is the first step in effectively addressing them.
Common Causes of Bay Window Ceiling Leaks
1. Poor Installation
Improper installation is one of the leading causes of bay window ceiling leaks. If the window or its surrounding structures were not installed correctly, gaps and weaknesses can allow water to seep in. This is especially problematic during heavy rain or snow.
2. Damaged or Worn Flashing
Flashing is the material used to seal joints and seams around the window to prevent water from penetrating. Over time, flashing can become damaged or worn, leading to leaks. This is particularly common in older homes where the flashing has not been regularly inspected or maintained.
3. Roof Issues
Problems with the roof above the bay window can also cause leaks. Missing or damaged shingles, clogged gutters, and ice dams can all contribute to water infiltration. Ensuring that your roof is in good condition is essential to preventing leaks around bay windows.
4. Sealant Failure
The sealant around the bay window can degrade over time due to exposure to the elements. Cracks or gaps in the sealant can allow water to enter, leading to leaks. Regularly inspecting and maintaining the sealant is crucial to preventing leaks.
5. Structural Shifts
Homes naturally settle over time, and this can lead to shifts in the structure around the bay window. These shifts can create gaps and cracks that allow water to penetrate. Monitoring your home for signs of structural shifts can help you catch potential problems early.
Addressing a Bay Window Ceiling Leak
If you’ve identified a bay window ceiling leak, it’s important to address it promptly to prevent further damage. Here are the steps you should take:
Step 1: Identify the Source
The first step in addressing a bay window ceiling leak is to identify the source of the leak. This may require a thorough inspection of the window, roof, and surrounding areas. Look for obvious signs of damage, such as cracked or missing shingles, damaged flashing, or gaps in the sealant.
Step 2: Repair or Replace Damaged Materials
Once you’ve identified the source of the leak, repair or replace any damaged materials. This may include replacing worn or damaged flashing, repairing the roof, or reapplying sealant. If the leak is due to poor installation, you may need to have the window reinstalled by a professional.
Step 3: Dry and Repair the Ceiling
After addressing the source of the leak, it’s important to dry and repair any water damage to the ceiling. Use fans and dehumidifiers to dry the area thoroughly. Once dry, repair any damaged drywall or plaster and repaint as necessary.
Step 4: Prevent Future Leaks
Preventing future leaks involves regular maintenance and inspections. Check the flashing and sealant around your bay window periodically and address any issues promptly. Ensure your roof is in good condition and clean your gutters regularly to prevent water buildup.
Preventing Bay Window Ceiling Leaks
Prevention is always better than cure. Here are some tips to help you prevent bay window ceiling leaks:
Regular Inspections
Regularly inspect your bay window, roof, and gutters for signs of damage or wear. Address any issues promptly to prevent leaks from developing.
Proper Installation
If you’re installing a new bay window, ensure it is done by a professional with experience in proper installation techniques. This can help prevent leaks from occurring due to poor installation.
Maintain Flashing and Sealant
Check the flashing and sealant around your bay window periodically. Replace or repair any damaged or worn materials to maintain a watertight seal.
Roof Maintenance
Keep your roof in good condition by replacing missing or damaged shingles and ensuring proper drainage. Clean your gutters regularly to prevent water buildup that can lead to leaks.
Address Structural Shifts
Monitor your home for signs of structural shifts, such as cracks in the walls or ceiling. Address any issues promptly to prevent gaps and cracks that can lead to leaks.
Choosing the Right Professionals for Bay Window Ceiling Leak Repairs
When dealing with a bay window ceiling leak, it’s often best to hire a professional to ensure the repair is done correctly. Here are some tips for choosing the right professional for the job:
Check Credentials
Ensure the professional you hire is licensed, insured, and experienced in dealing with bay window repairs. Ask for references and check online reviews to ensure they have a good reputation.
Get Multiple Quotes
Don’t settle for the first quote you receive. Get multiple quotes to compare prices and services. This can help you find the best value for your money.
Ask About Warranties
A reputable professional should offer a warranty on their work. This provides peace of mind that the repair will be done correctly and that any future issues will be addressed.
Read too: A Comprehensive Mr Cool Ceiling Cassette Review: Unveiling Excellence
Conclusion
A bay window ceiling leak can cause significant damage to your home if not addressed promptly. Understanding the common causes of leaks, how to address them, and how to prevent future leaks can help you keep your home dry and damage-free. Regular inspections, proper installation, and maintenance are key to preventing leaks and ensuring the longevity of your bay windows. If you’re dealing with a leak, hiring a professional can ensure the repair is done correctly and prevent further damage.