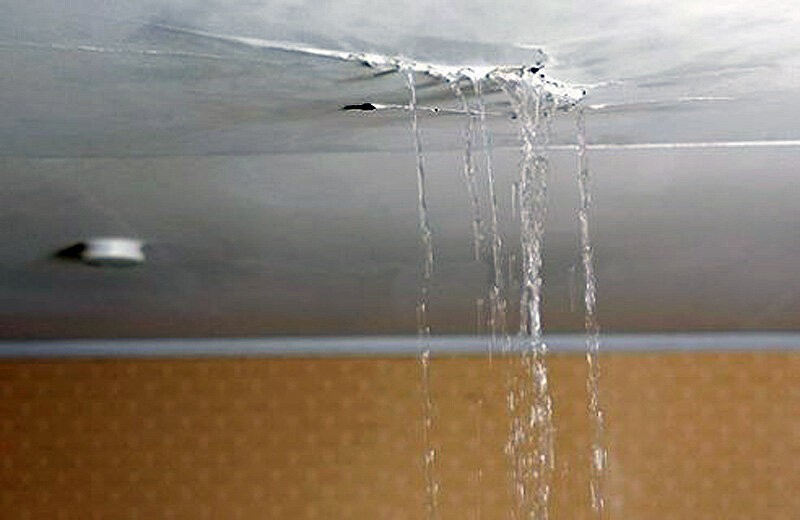
If you’ve noticed water dripping from your ceiling, it can be a troubling sight, especially if it’s coming from your air conditioning (AC) unit. An AC leaking from the ceiling is not just a minor inconvenience; it can lead to more significant issues if not addressed promptly. In this article, we will explore the common causes of this problem, the potential consequences, and effective solutions to get your AC system back in working order.
Understanding the Problem: AC Leaking from Ceiling
When you observe AC leaking from the ceiling, it is essential to act quickly. Water leaks can cause damage to your property and lead to mold growth, compromising the indoor air quality of your home. Understanding the underlying causes is the first step in diagnosing and resolving the issue effectively.
Common Causes of AC Leaking from Ceiling
- Clogged Drain Line
- The most common reason for an AC leak is a clogged condensate drain line. The drain line removes excess moisture that accumulates during the cooling process. If it becomes blocked by dirt, debris, or mold, the water has nowhere to go but back into the unit, causing it to leak out of the ceiling.
- Dirty Air Filters
- Dirty or clogged air filters restrict airflow, which can cause the evaporator coil to freeze. When the ice melts, it can overwhelm the drain pan and cause water to leak out.
- Damaged Drain Pan
- The drain pan collects water that drips from the evaporator coil. If it is cracked or rusted, it can leak water onto the ceiling instead of directing it to the drain line.
- Low Refrigerant Levels
- Low refrigerant can cause the evaporator coil to freeze, similar to the effect of dirty air filters. When the ice melts, the excess water can lead to leaks.
- Improper Installation
- If your AC unit was not installed correctly, it may not be leveled properly, causing water to flow to unintended areas.
- Faulty or Disconnected Drain Line
- If the drain line is improperly connected or has come loose, it can lead to water pooling in areas where it shouldn’t, including ceilings.
- Condensation Issues
- High humidity levels can increase the amount of condensation that forms on the AC unit. If this moisture is not managed properly, it can leak from the unit.
Read too: Shiplap Ceiling in Kitchen: A Timeless Trend for a Stylish and Cozy Space
Signs of a Leaking AC Unit
In addition to water stains or dripping from the ceiling, there are other signs that indicate your AC unit may be leaking:
- Increased Humidity: If your indoor air feels humid or damp, it might be due to a leaking AC.
- Water Stains: Dark spots or discoloration on the ceiling can indicate water damage.
- Mold Growth: Mold thrives in damp environments, so if you notice a musty smell or see mold on the walls or ceiling, it may be linked to your AC leak.
- Reduced Cooling Efficiency: If your AC unit isn’t cooling your space effectively, it could be a sign of a more significant problem.
What to Do When You Discover AC Leaking from Ceiling
If you find yourself dealing with AC leaking from the ceiling, it’s essential to address the issue as soon as possible. Here’s a step-by-step guide to help you navigate the situation:
Step 1: Turn Off the AC Unit
As soon as you notice the leak, turn off the air conditioning unit. This step will prevent further water damage and reduce the risk of electrical issues.
Step 2: Identify the Source of the Leak
To effectively resolve the issue, you need to pinpoint the cause of the leak. Here are some steps to help you investigate:
- Check the Drain Line: Look for any visible clogs or blockages in the condensate drain line. If you can access it, inspect for any buildup of dirt or debris.
- Inspect the Air Filter: Remove the air filter and check for dust and dirt accumulation. If it appears dirty, replace it with a new one.
- Examine the Drain Pan: Look for any signs of rust or cracks in the drain pan. If it’s damaged, it will need to be replaced.
Step 3: Clear the Clogs
If you find that the drain line is clogged, here are a few methods to clear it:
- Use a Wet/Dry Vacuum: If the clog is accessible, use a wet/dry vacuum to suck out any debris. Make sure to create a tight seal around the drain line to maximize suction.
- Flush with Vinegar: Pour a mixture of equal parts vinegar and water into the drain line. This natural solution helps dissolve any buildup inside the line.
- Professional Help: If you cannot clear the clog on your own, consider calling an HVAC professional to help.
Step 4: Replace Damaged Components
If you discover that the drain pan is damaged or the air filter is beyond cleaning, it’s essential to replace these components:
- Drain Pan Replacement: Purchase a new drain pan compatible with your AC unit and install it as per the manufacturer’s instructions.
- Air Filter Replacement: Change the air filter regularly (every 1 to 3 months) to prevent future clogs.
Step 5: Check Refrigerant Levels
If the problem persists, you may need to check the refrigerant levels in your AC system:
- Low Refrigerant: If levels are low, contact an HVAC technician to recharge the system, as this requires specialized equipment and expertise.
Step 6: Consider Installation Issues
If your AC unit was recently installed, improper leveling or drainage could be the issue. Ensure that your unit is installed correctly and consider seeking professional assistance if needed.
Preventing Future Leaks
Preventing leaks before they occur is always better than dealing with the aftermath. Here are some tips to help you maintain your AC unit and avoid AC leaking from the ceiling in the future:
- Regular Maintenance: Schedule routine maintenance with an HVAC professional to check for issues and clean components.
- Change Filters Frequently: Make it a habit to change your air filters regularly to ensure proper airflow and reduce the risk of clogs.
- Inspect Drain Lines: Periodically check your condensate drain lines for blockages or damage.
- Control Humidity Levels: Use dehumidifiers or adjust your thermostat settings to maintain optimal humidity levels in your home.
- Seal Ductwork: Ensure that your ductwork is properly sealed to minimize moisture buildup.
When to Call a Professional
While some issues can be addressed with DIY methods, there are instances when it’s best to call a professional:
- Complex Repairs: If the problem persists after your efforts, or if you suspect a more significant issue (like refrigerant leaks), it’s time to contact an HVAC technician.
- Safety Concerns: If you notice electrical issues, such as sparks or burning smells, turn off the unit and call a professional immediately.
Conclusion
Discovering that your AC is leaking from the ceiling can be alarming, but understanding the common causes and knowing how to address the issue can make a significant difference. By following the steps outlined in this guide, you can identify the problem, take the necessary actions to resolve it, and prevent future leaks. Always prioritize regular maintenance and stay vigilant for signs of trouble to keep your AC system in optimal condition.