When it comes to home improvement, one of the simplest yet most effective ways to refresh a space is through painting. Among the various options available in the market, Valspar Color Changing Ceiling Paint stands out for its unique ability to transform the atmosphere of a room. This innovative product not only enhances aesthetics but also adds functionality. In this article, we’ll explore what Valspar Color Changing Ceiling Paint is, its benefits, application techniques, and tips for achieving the best results.
What is Valspar Color Changing Ceiling Paint?
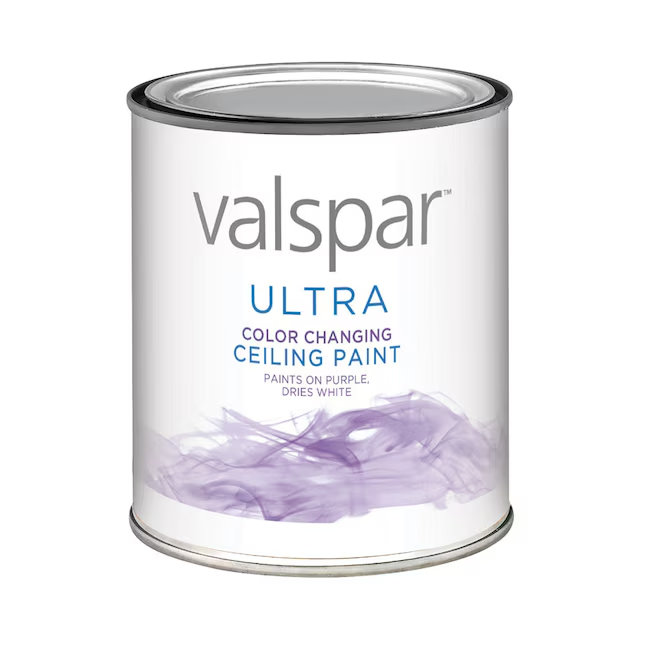
Valspar Color Changing Ceiling Paint is a specialized paint designed specifically for ceilings. It features a unique technology that allows it to change color as it dries, providing a visual cue to homeowners and professionals alike about where they have painted. This innovative feature makes the painting process more straightforward, helping users avoid missed spots and ensuring an even coat.
The paint initially goes on in a blue color, which fades to white as it dries. This two-tone system not only helps in achieving a perfect finish but also adds a level of fun to the painting experience.
Benefits of Valspar Color Changing Ceiling Paint
Using Valspar Color Changing Ceiling Paint offers several advantages:
1. Ease of Use
The color-changing feature makes it easy for both novice and experienced painters to see where they have applied the paint. This minimizes the chance of missed spots or uneven application, making the painting process smoother and more efficient.
Read too: Kitchen Lighting For A Vaulted Ceiling: Illuminating Your Space with Style and Functionality
2. High-Quality Finish
Valspar is known for its commitment to quality, and this paint is no exception. It dries to a smooth, white finish that complements any room’s decor. Whether your style is modern, traditional, or somewhere in between, this paint can enhance your ceiling without detracting from other design elements.
3. Quick Drying Time
This ceiling paint dries relatively quickly, allowing you to complete your painting project in a shorter amount of time. The quick drying time is particularly advantageous when working on large spaces or when you need to complete a project within a tight timeframe.
4. Low VOC Formula
Valspar Color Changing Ceiling Paint has a low volatile organic compound (VOC) formula, which means it emits fewer harmful chemicals into the air. This makes it a safer choice for indoor painting, especially in homes with children or pets.
5. Versatile Application
While specifically designed for ceilings, this paint can also be used on other surfaces if you’re looking for a unique finish. Its adaptability allows for creative design possibilities throughout your home.
How to Apply Valspar Color Changing Ceiling Paint
Applying Valspar Color Changing Ceiling Paint is a straightforward process, but following some tips and techniques will help you achieve the best results. Here’s a step-by-step guide to get you started:
1. Prepare the Room
Before you begin painting, it’s essential to prepare the room properly:
- Clear the Area: Remove any furniture or items that might obstruct your painting. If that’s not possible, cover them with drop cloths to protect against splatters.
- Clean the Ceiling: Dust and dirt can affect paint adhesion. Wipe down the ceiling with a damp cloth to remove any debris.
- Repair Imperfections: Inspect the ceiling for cracks or holes. Fill in any gaps with spackle or joint compound, then sand the area smooth once it’s dry.
2. Gather Your Supplies
You’ll need the following supplies:
- Valspar Color Changing Ceiling Paint
- A paint roller with an extension handle
- A paint tray
- A brush for edges and corners
- Painter’s tape for clean lines
- Drop cloths or plastic sheeting
- A ladder or step stool
3. Apply Painter’s Tape
For a clean finish, apply painter’s tape along the edges where the ceiling meets the walls. This will help prevent any paint from getting on the walls and ensure a sharp line.
4. Start Painting
- Cut In: Use a brush to paint around the edges and corners of the ceiling first. This is known as “cutting in” and helps ensure that you have a clean line where the ceiling meets the walls.
- Roll On the Paint: Once you have cut in the edges, use a roller to apply the paint to the larger areas of the ceiling. Start at one corner and work your way across the ceiling in sections.
- Watch for Color Change: As you apply the paint, keep an eye on the color-changing feature. Initially, the paint will be blue, and as it dries, it will transition to white.
5. Second Coat (if needed)
Once the first coat has dried, check if you need a second coat. If the blue color is still visible in some areas, apply a second coat following the same process.
6. Remove Painter’s Tape
After the final coat has dried, carefully remove the painter’s tape while the paint is still slightly wet to ensure clean edges.
7. Clean Up
Finally, clean your brushes and rollers with soap and water. Make sure to seal any leftover paint in its original container for future touch-ups.
Tips for Achieving the Best Results with Valspar Color Changing Ceiling Paint
To ensure your project goes smoothly and yields the best possible outcome, consider the following tips:
1. Choose the Right Time to Paint
It’s best to paint when the weather is dry and mild. High humidity or extreme temperatures can affect the drying process and the final appearance of the paint.
2. Use Proper Lighting
Ensure the room is well-lit while painting. This will help you see the color change more clearly and identify any missed spots.
3. Avoid Overworking the Paint
When using a roller, avoid going back and forth too much on the same area. This can cause the paint to lift and result in an uneven finish. Instead, roll in one direction and blend as you go.
4. Ventilation
Ensure proper ventilation while painting to dissipate any fumes. Open windows and doors, or use fans to keep the air circulating.
5. Be Patient
Allow sufficient drying time between coats. Rushing the process can lead to uneven application and a less-than-desirable finish.
Maintenance of Valspar Color Changing Ceiling Paint
After your painting project is complete, it’s essential to maintain the ceiling to keep it looking fresh:
- Regular Cleaning: Dust the ceiling periodically with a microfiber cloth or a vacuum with a brush attachment to prevent buildup.
- Spot Cleaning: For any stains or marks, use a damp cloth and a mild detergent to clean the affected area. Avoid harsh chemicals that could damage the paint.
- Touch-Ups: Keep leftover paint for touch-ups. If you notice any imperfections over time, apply a small amount of the Valspar paint to maintain the ceiling’s appearance.
Conclusion
Valspar Color Changing Ceiling Paint offers a unique blend of functionality and aesthetic appeal. Its innovative color-changing technology simplifies the painting process, ensuring a professional finish for homeowners and contractors alike. By following the steps and tips outlined in this article, you can transform your space and enjoy the benefits of a beautifully painted ceiling.