In the realm of interior design and architecture, every detail matters. From the color of the walls to the flooring, each element contributes to the overall aesthetic and functionality of a space. One often-overlooked aspect is the ceiling grid, specifically the 9 16 ceiling grid. While it may seem insignificant compared to other design elements, the ceiling grid plays a crucial role in both commercial and residential settings. In this comprehensive guide, we will delve into the world of 9 16 ceiling grids, exploring their installation process, benefits, and design possibilities.
Understanding the 9 16 Ceiling Grid
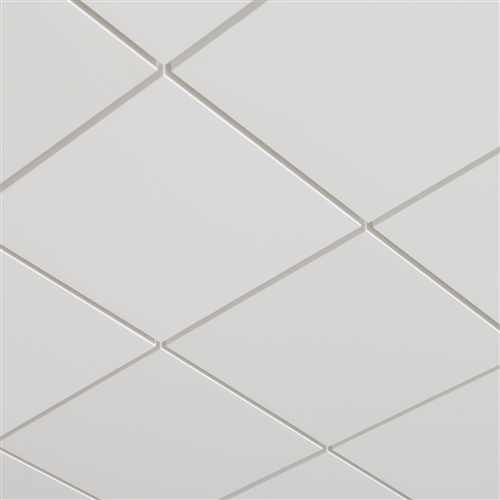
The 9 16 ceiling grid, also known as the 15/16-inch ceiling grid, refers to the standard size of ceiling grid systems commonly used in commercial and residential buildings. The term “9 16” denotes the width of the grid’s main runners, which measure 9/16 of an inch. These grids are designed to accommodate various ceiling tiles, providing a versatile solution for different spaces.
Installation Process
Installing a 9 16 ceiling grid requires careful planning and execution to ensure optimal functionality and aesthetics. Here are the basic steps involved in the installation process:
- Preparation: Before beginning the installation, assess the ceiling’s condition and ensure that it can support the weight of the grid and tiles. Clear the area of any obstacles and gather all necessary tools and materials.
- Layout and Measurement: Determine the layout of the ceiling grid, taking into account the dimensions of the space and any obstructions such as lights or vents. Use a chalk line or laser level to mark the layout on the ceiling accurately.
- Installation of Main Runners: Start by installing the main runners along the perimeter of the room, ensuring they are straight and securely attached to the ceiling. Use screws or clips to secure the runners in place, following the manufacturer’s instructions.
- Installation of Cross Tees: Once the main runners are in place, install the cross tees to create the grid pattern. Ensure that the tees are aligned correctly and securely locked into the main runners to prevent sagging.
- Placement of Ceiling Tiles: With the grid framework in place, install the ceiling tiles by inserting them into the grid openings. Ensure a snug fit to prevent any gaps or unevenness in the ceiling surface.
- Finishing Touches: Once all the tiles are in place, make any necessary adjustments to ensure a uniform appearance. Trim any excess tile edges if needed, and clean the ceiling surface to remove any dust or debris.
Benefits of 9 16 Ceiling Grid
The 9 16 ceilings grid offers several advantages that make it a popular choice for both commercial and residential applications:
- Versatility: The standard size of the 9 16 ceiling grid allows for compatibility with a wide range of ceiling tiles, giving designers flexibility in choosing the right style and material for their project.
- Ease of Installation: Compared to other ceiling grid systems, the 9 16 grid is relatively easy to install, making it a cost-effective option for both DIY enthusiasts and professional installers.
- Accessibility: The modular nature of the ceiling grid system makes it easy to access the space above the ceiling for maintenance or repairs, ensuring long-term durability and functionality.
- Aesthetic Appeal: With its clean lines and uniform grid pattern, the 9 16 ceilings grid adds a polished and professional look to any space, enhancing its overall aesthetic appeal.
Design Possibilities
Beyond its practical benefits, the 9 16 ceiling grids opens up a world of design possibilities for architects and interior designers. By combining different tile materials, colors, and patterns, designers can create custom ceiling designs that complement the overall theme of the space. Whether it’s a sleek and modern office environment or a cozy residential setting, the versatility of the 9 16 ceiling grid allows for endless creative expression.
Conclusion
In conclusion, the 9 16 ceiling grid is a versatile and practical solution for enhancing the aesthetic appeal and functionality of any interior space. From its ease of installation to its design flexibility, this standard grid size offers numerous benefits for both commercial and residential applications. Whether you’re renovating an existing space or designing a new one from scratch, consider incorporating the 9 16 ceilings grid into your project for a stylish and functional finish.
Read too: Discovering the Charm of Nautical Outdoor Ceiling Fans for Your Coastal Retreat: Sail into Style