Ceiling fans are a staple in many homes, providing both style and functionality. Among the myriad of options available, the 52 Windmill Ceiling Fan With Light stands out for its unique design and efficiency. This guide will delve into everything you need to know about this fan, from its features and benefits to installation tips and maintenance advice.
Why Choose the 52 Windmill Ceiling Fan With Light?
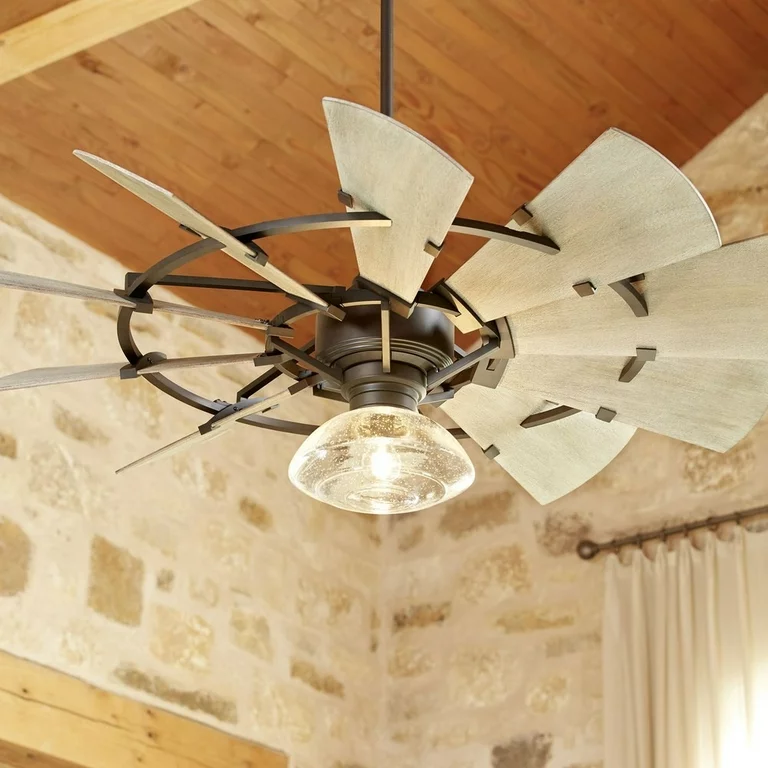
Unique Design
The 52 Windmill Ceiling Fan With Light features a design inspired by traditional windmills, offering a rustic yet contemporary look that can complement various home decors. Its large, elegantly crafted blades not only provide a striking visual appeal but also ensure efficient air circulation.
Functional Lighting
Equipped with an integrated light, this ceiling fan serves a dual purpose. It illuminates your space while keeping it cool, making it an excellent choice for living rooms, bedrooms, and even kitchens. The lighting fixture is often compatible with different types of bulbs, allowing you to choose the one that best fits your lighting needs.
Energy Efficiency
Modern ceiling fans, including the 52 Windmill Ceiling Fan With Light, are designed to be energy efficient. They consume less power compared to air conditioning units, reducing your electricity bills without compromising on comfort. Many models also come with energy-saving LED lights, further enhancing their eco-friendliness.
Key Features of the 52 Windmill Ceiling Fan With Light
Blade Span
The fan boasts a 52-inch blade span, which is ideal for medium to large rooms. This size ensures optimal air circulation, making your space feel cooler and more comfortable, even on the hottest days.
Reversible Motor
A reversible motor is a standard feature in many high-quality ceiling fans. It allows the fan to be used year-round by reversing the direction of the blades. In the summer, the blades rotate counterclockwise to create a cooling breeze. In the winter, switching the direction to clockwise circulates warm air trapped near the ceiling, improving heating efficiency.
Remote Control
Many 52 Windmill Ceiling Fans With Light come with a remote control for added convenience. You can easily adjust the fan speed, light intensity, and blade direction without having to reach for a wall switch.
Quiet Operation
Noise can be a significant concern with ceiling fans, but the 52 Windmill Ceiling Fan With Light is designed for quiet operation. Its high-quality motor and well-balanced blades minimize noise, ensuring a peaceful environment.
How to Install the 52 Windmill Ceiling Fan With Light
Preparation
Before you start the installation process, make sure you have all the necessary tools and materials. These typically include a ladder, screwdriver, wire strippers, and the installation manual provided by the manufacturer.
Step-by-Step Installation Guide
- Turn Off Power: Ensure the power to the room where you will install the fan is turned off at the circuit breaker to prevent any electrical accidents.
- Install the Mounting Bracket: Secure the mounting bracket to the ceiling. This bracket will hold the weight of the fan, so make sure it is firmly attached to a ceiling joist or other sturdy structure.
- Assemble the Fan: Follow the manufacturer’s instructions to assemble the fan. This usually involves attaching the blades to the motor housing and connecting the light fixture.
- Wire the Fan: Connect the fan’s wiring to your home’s electrical system. Typically, this involves matching the colored wires (black to black, white to white, and green to the ground wire). Use wire connectors to secure the connections.
- Attach the Fan to the Mounting Bracket: Carefully lift the fan and attach it to the mounting bracket. Ensure it is securely fastened and balanced.
- Install the Light Fixture: If your fan includes a light kit, follow the instructions to install the light bulbs and any additional components.
- Test the Fan: Turn the power back on and test the fan to ensure it operates correctly. Check the fan speed, light function, and motor direction.
Maintenance Tips for the 52 Windmill Ceiling Fan With Light
Regular Cleaning
Dust and dirt can accumulate on the fan blades and light fixture, affecting their performance. Regularly clean the blades with a soft cloth and a mild detergent. For the light fixture, use a damp cloth to wipe away any dust or grime.
Check for Loose Parts
Periodically check the fan for any loose screws or components. Tighten any loose parts to ensure the fan operates smoothly and safely.
Lubricate the Motor
Although many modern ceiling fans have maintenance-free motors, some may require occasional lubrication. Refer to the manufacturer’s instructions to determine if your fan’s motor needs lubrication and how to perform this task.
Replace Light Bulbs
If the light bulbs in your fan burn out, replace them with compatible bulbs. Always turn off the power before replacing any bulbs to avoid electrical shock.
Design Tips for Integrating the 52 Windmill Ceiling Fan With Light
Match Your Decor
The 52 Windmill Ceiling Fan With Light comes in various finishes, including brushed nickel, oil-rubbed bronze, and antique brass. Choose a finish that complements your room’s decor for a cohesive look.
Read too: Kitchen Lighting For A Vaulted Ceiling: Illuminating Your Space with Style and Functionality
Optimal Placement
For the best performance, place the fan in the center of the room. Ensure there is enough clearance from the ceiling and walls to allow for unobstructed airflow.
Layered Lighting
Integrate the fan’s light with other light sources in the room, such as floor lamps and wall sconces, to create a layered lighting effect. This enhances the room’s ambiance and provides functional lighting for different activities.
Conclusion
The 52 Windmill Ceiling Fan With Light is a versatile and stylish addition to any home. Its unique design, functional lighting, and energy efficiency make it a popular choice among homeowners. By following the installation and maintenance tips provided in this guide, you can enjoy the benefits of this fan for years to come.