Best Insulation For Garage Ceiling: A Comprehensive Guide for Homeowners

When it comes to home improvement, one area that often gets overlooked is the garage ceiling. While garages are typically not used as living spaces, insulating the garage ceiling can offer significant benefits. It helps in temperature control, energy savings, noise reduction, and even enhances the overall comfort of the home. If you’re considering upgrading your garage ceiling, you might be wondering: What is the best insulation for garage ceiling? In this article, we’ll dive into the different options available and help you decide the best fit for your home.

Best Insulation For Garage Ceiling

Why Should You Insulate Your Garage Ceiling?

Before we jump into the best insulation options, let’s first discuss why you should consider insulating your garage ceiling. Insulating your garage ceiling can have several advantages:

1. Temperature Regulation

One of the primary reasons to insulate your garage ceiling is to control the temperature in your garage and the adjacent rooms in your home. An uninsulated garage ceiling can lead to significant heat loss in winter and excessive heat buildup in summer. Insulating the ceiling helps keep the temperature inside the garage more consistent, making it more comfortable to work in or store temperature-sensitive items.

2. Energy Savings

A well-insulated garage ceiling can help lower your overall energy bills. By preventing heat from escaping through the ceiling or entering from above, your HVAC system doesn’t have to work overtime to maintain the desired temperature in the rest of the house.

3. Noise Reduction

If you use your garage as a workshop, home gym, or music studio, you may want to consider insulation for noise reduction. Insulation absorbs sound, making it an effective solution for reducing noise from activities in the garage from reaching the rest of the house.

Read too: Shiplap Ceiling in Kitchen: A Timeless Trend for a Stylish and Cozy Space

4. Pest Control

Insulating the ceiling also acts as a barrier against pests and rodents that might try to enter your garage from the attic or crawl spaces.


Types of Insulation for Garage Ceilings

There are various types of insulation materials you can choose from, each with its own set of benefits. The best insulation for garage ceiling will depend on factors like your budget, climate, and whether you want to install it yourself or hire a professional. Below are some of the most popular insulation options for garage ceilings:

1. Fiberglass Batt Insulation

Fiberglass batt insulation is one of the most common types of insulation for garage ceilings. This type of insulation consists of large, flat pieces of fiberglass material that can be installed between the ceiling joists. It comes in pre-cut panels that are easy to handle and install.

Pros:

  • Affordable
  • Easy to install for DIYers
  • Good thermal performance

Cons:

  • Not ideal for spaces with moisture issues
  • Can be difficult to cut to fit irregular spaces

Fiberglass batt insulation is a great choice if you’re looking for a cost-effective option and are comfortable with a DIY installation. However, if you live in a particularly humid or damp area, fiberglass may absorb moisture, which could lead to mold or mildew growth.


2. Spray Foam Insulation

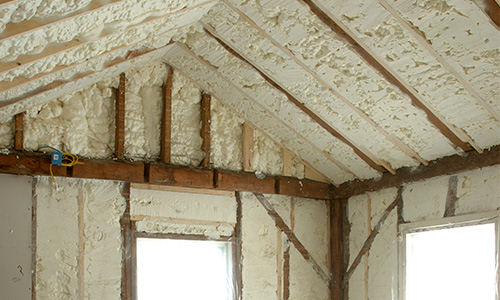
Spray foam insulation is another highly effective option for insulating your garage ceiling. This type of insulation is applied as a liquid foam, which then expands and hardens to form an airtight seal. Spray foam is available in two types: open-cell and closed-cell, with closed-cell being more commonly used in ceiling applications.

Pros:

  • Provides an airtight seal
  • Excellent for energy efficiency
  • Great at filling gaps and cracks
  • Moisture-resistant (especially closed-cell)

Cons:

  • More expensive than fiberglass
  • Requires professional installation (unless you purchase DIY kits)

Spray foam insulation is one of the best insulation for garage ceiling options if you’re willing to invest a little more for superior performance. It helps create a barrier that keeps both temperature and noise under control. However, if you’re on a budget, spray foam may not be the most affordable option.


3. Rigid Foam Board Insulation

Rigid foam board insulation consists of solid panels made from materials like polystyrene, polyisocyanurate, or polyurethane. It’s often used in areas where high moisture resistance is needed, making it ideal for areas with higher humidity levels, such as garages near water or with no ventilation.

Pros:

  • Offers high R-value (better thermal resistance)
  • Moisture resistant
  • Easy to install with simple cutting and fitting

Cons:

  • Can be more expensive than fiberglass batt insulation
  • Doesn’t offer as much soundproofing as other options

If you’re looking for insulation that can handle moisture and give you excellent thermal protection, rigid foam board may be a great choice. It’s especially helpful for homeowners who want to ensure their garage remains dry and insulated year-round.


4. Reflective or Radiant Barrier Insulation

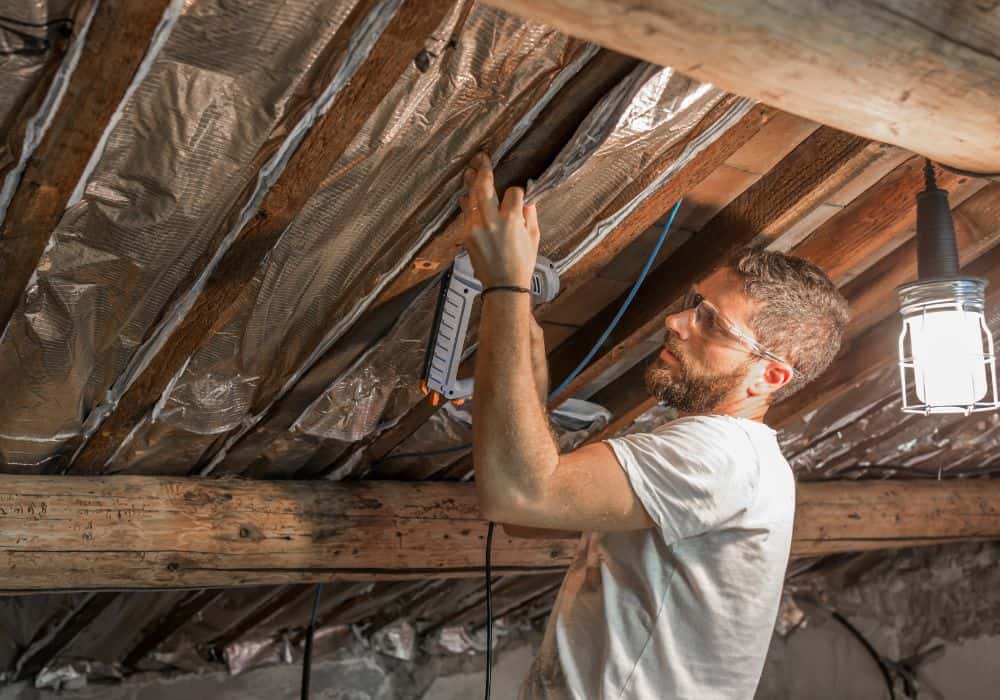
Reflective or radiant barrier insulation is primarily designed to reflect heat away from your garage in hot climates. It consists of a reflective material, such as aluminum, installed in the ceiling to prevent the absorption of radiant heat. While it is not a stand-alone solution for insulating the entire space, it can be effective when combined with other insulation types for added benefits.

Pros:

  • Reflects radiant heat
  • Ideal for hot climates
  • Cost-effective option when used with other insulation

Cons:

  • Not effective in colder climates
  • Does not provide significant soundproofing

Radiant barrier insulation is ideal for homes in warmer climates where the primary concern is keeping the garage cool. However, it is not the best option if you’re looking for insulation to manage cold weather or if you need noise reduction.


5. Cellulose Insulation

Cellulose insulation is made from recycled paper products, such as newspapers, and is treated with a fire-retardant. It can be blown into the ceiling cavity for an effective air seal.

Pros:

  • Environmentally friendly
  • Good at filling gaps and cracks
  • Provides excellent thermal and sound insulation

Cons:

  • Can settle over time, reducing its effectiveness
  • Requires professional installation

Cellulose insulation is an eco-friendly option for homeowners looking to insulate their garage ceiling without compromising on thermal efficiency. While it’s a good choice for insulating against both heat and sound, it may require professional installation due to the need for specialized equipment.


Best Insulation for Garage Ceiling: Our Top Recommendations

When choosing the best insulation for your garage ceiling, it’s important to consider your specific needs. Here are our top recommendations based on different priorities:

  1. For Maximum Energy Efficiency: Spray Foam Insulation
    If energy savings is your top priority, spray foam insulation is the best option due to its airtight seal and ability to resist air leakage.
  2. For Budget-Friendly Installation: Fiberglass Batt Insulation
    If you’re looking for a cost-effective solution and prefer a DIY approach, fiberglass batt insulation offers good thermal performance for a lower price.
  3. For Moisture Control: Rigid Foam Board Insulation
    In areas prone to high humidity, rigid foam board insulation provides excellent moisture resistance while maintaining thermal efficiency.

Conclusion

Choosing the best insulation for garage ceiling is a crucial decision that impacts both your home’s comfort and energy efficiency. Whether you prioritize budget, energy savings, or moisture resistance, there are several insulation options available to meet your needs. By considering factors such as climate, installation preferences, and the purpose of your garage, you can select the ideal insulation to keep your garage and home in top shape for years to come.

Insulated Ceiling Tiles 2X4: The Ultimate Guide to Enhanced Comfort and Efficiency

When it comes to enhancing the comfort and efficiency of your indoor spaces, insulated ceiling tiles 2×4 offer a remarkable solution. These tiles not only provide superior insulation but also contribute to the aesthetic and functional aspects of a room. This guide will explore the benefits, installation tips, design ideas, and maintenance of insulated ceiling tiles in the 2×4 size format, helping you make an informed decision for your next project.

Insulated Ceiling Tiles 2X4

What Are Insulated Ceiling Tiles 2X4?

Insulated ceiling tiles 2×4 are ceiling tiles measuring 2 feet by 4 feet, designed to provide both insulation and acoustic benefits. Typically made from materials like mineral fiber, fiberglass, or foam, these tiles are installed in suspended ceiling grids and serve multiple purposes:

  • Thermal Insulation: They help regulate indoor temperatures by minimizing heat loss or gain, which can contribute to lower energy bills.
  • Acoustic Control: These tiles absorb sound, reducing noise levels and improving room acoustics.
  • Fire Resistance: Many insulated ceiling tiles are fire-resistant, adding an extra layer of safety to your space.
  • Aesthetic Appeal: Available in various designs and finishes, they can enhance the visual appeal of your ceiling.

Benefits of Using Insulated Ceiling Tiles 2X4

1. Improved Energy Efficiency

One of the primary benefits of insulated ceiling tiles 2×4 is their contribution to energy efficiency. By providing effective thermal insulation, these tiles help maintain a stable indoor temperature, reducing the workload on heating and cooling systems. This not only leads to lower energy consumption but also helps in reducing utility bills.

2. Enhanced Acoustic Comfort

Noise reduction is a crucial aspect of creating a comfortable indoor environment. Insulated ceiling tiles with acoustic properties can absorb sound waves, reducing echo and noise levels. This is particularly beneficial in spaces such as offices, conference rooms, and educational institutions where clear communication and a quiet environment are essential.

Read too: Discovering the Charm of Nautical Outdoor Ceiling Fans for Your Coastal Retreat: Sail into Style

3. Fire Safety

Safety is a major concern in any building, and insulated ceiling tiles 2×4 can play a role in enhancing fire protection. Many of these tiles are manufactured with fire-resistant materials, which can help in containing and slowing the spread of flames in case of a fire. This added safety feature provides peace of mind and complies with building codes and regulations.

4. Aesthetic Flexibility

Insulated ceiling tiles come in a variety of styles, colors, and finishes. This allows you to choose tiles that match or complement your interior design. Whether you prefer a classic look or a modern touch, there’s an option to suit every aesthetic preference.

5. Easy Maintenance

Maintaining insulated ceiling tiles 2×4 is relatively simple. Many tiles are designed to be easy to clean and replace, ensuring that your ceiling remains in good condition with minimal effort. Regular dusting and occasional spot cleaning are typically sufficient to keep them looking their best.

Choosing the Right Insulated Ceiling Tiles 2X4

Selecting the right insulated ceiling tiles 2×4 involves considering several factors to ensure that the tiles meet your specific needs. Here are some key considerations:

1. Material

  • Mineral Fiber: Offers excellent acoustic and thermal insulation and is commonly used in commercial and residential spaces.
  • Fiberglass: Lightweight and highly effective in both thermal and acoustic insulation. It is also resistant to moisture.
  • Foam: Provides good thermal insulation and is often used in residential applications due to its ease of installation.

2. Fire Rating

Check the fire rating of the tiles to ensure they meet safety standards. Tiles with a higher fire resistance rating offer better protection and can be a requirement in certain building codes.

3. Design and Finish

Choose a design and finish that complements your space. Options include textured, smooth, and patterned finishes. Consider how the tiles will fit with your overall interior design.

4. Installation Requirements

Ensure that the tiles are compatible with your existing ceiling grid system or be prepared to make necessary adjustments. Some tiles may require professional installation, especially if they are part of a complex design or if additional insulation is needed.

Installation Tips for Insulated Ceiling Tiles 2X4

Proper installation is crucial for maximizing the benefits of your insulated ceiling tiles 2×4. Follow these tips to ensure a successful installation:

1. Preparation

Before starting the installation, measure the ceiling area to determine how many tiles you will need. Remove any existing tiles or debris from the ceiling grid to ensure a clean and even surface.

2. Cutting and Fitting

If necessary, cut the tiles to fit your ceiling grid. Use a utility knife or saw designed for the material of your tiles. Ensure that the tiles fit snugly into the grid to prevent gaps and ensure proper insulation.

3. Securing the Tiles

Place the tiles into the ceiling grid carefully, ensuring that they are level and properly aligned. Press them into place gently to avoid damaging the tiles or the grid.

4. Checking for Gaps

After installation, check for any gaps between tiles or between the tiles and the ceiling grid. Fill any gaps with appropriate sealant if necessary to maintain insulation effectiveness.

Design Ideas for Using Insulated Ceiling Tiles 2X4

Here are some creative ways to incorporate insulated ceiling tiles 2×4 into your interior design:

1. Modern Office Space

Incorporate sleek, white insulated ceiling tiles with a smooth finish to create a clean, professional look. This design is ideal for office environments where a bright and airy atmosphere is desired.

2. Home Theater

Opt for textured or patterned tiles to enhance the acoustics and create a visually appealing ceiling in your home theater. Darker colors or patterns can add a dramatic effect and improve sound quality.

3. Educational Facilities

In classrooms and lecture halls, use acoustic tiles to minimize noise and improve sound clarity. Bright, colorful tiles can also add a touch of fun and create a stimulating learning environment.

4. Residential Spaces

For living rooms or bedrooms, choose tiles with a soft texture and warm colors to add a cozy and inviting feel. Tiles with decorative patterns can also be used to make a statement in your home.

Maintenance and Care

To keep your insulated ceiling tiles 2×4 looking their best, follow these maintenance tips:

1. Regular Dusting

Dust the tiles regularly using a soft cloth or a vacuum cleaner with a brush attachment. This will help prevent the buildup of dust and maintain a clean appearance.

2. Spot Cleaning

For stains or spills, clean the affected area with a mild detergent and water. Avoid using harsh chemicals or abrasive cleaning tools that could damage the tiles.

3. Periodic Inspection

Inspect the tiles periodically for signs of damage or wear. Replace any damaged tiles promptly to ensure continued insulation and acoustic performance.

Conclusion

Insulated ceiling tiles 2×4 offer a practical and stylish solution for enhancing the comfort and efficiency of various indoor spaces. With their benefits in thermal insulation, acoustic control, and aesthetic flexibility, these tiles are a valuable addition to any home or commercial environment. By choosing the right tiles and following proper installation and maintenance practices, you can enjoy the long-lasting advantages they provide.

Exploring the Wonders of Spray Foam on Ceiling for Ultimate Insulation: Unlocking the Benefits

Spray foam insulation has become a game-changer in the world of home improvement, and its application on ceilings is gaining widespread attention. In this detailed exploration, we will delve into the advantages, considerations, and process of using “Spray Foam On Ceiling” for enhanced insulation. If you’re curious about upgrading your home’s insulation, this guide is a must-read.

Spray Foam On Ceiling

Understanding the Power of Spray Foam on Ceiling:

Spray foam insulation involves the application of a specialized material that expands and hardens, creating a seamless and airtight barrier. When applied to ceilings, this method offers a range of benefits that go beyond traditional insulation methods.

Let’s dive into the specifics of using spray foam on ceilings, exploring its advantages, considerations, and the step-by-step process for a successful application.

Advantages of Spray Foam on Ceiling:

  1. Seamless Coverage:
    • Unlike traditional insulation materials, spray foam expands to fill gaps and crevices, providing a seamless and airtight barrier. This ensures that every inch of your ceiling is effectively insulated.
  2. High R-Value:
    • Spray foam insulation boasts a high R-value, indicating its exceptional thermal resistance. This means it effectively resists heat transfer, keeping your home comfortable and energy-efficient.
  3. Moisture Resistance:
    • Spray foam creates a moisture-resistant barrier, preventing issues like mold and mildew growth. This is particularly advantageous in areas prone to high humidity levels.
  4. Longevity and Durability:
    • Once applied, spray foam insulation is known for its longevity and durability. It doesn’t settle or compress over time, maintaining its effectiveness for years.

Considerations Before Application:

Before opting for spray foam on your ceiling, there are several considerations to keep in mind to ensure a successful application.

  1. Professional Installation:
    • While some homeowners may consider DIY insulation projects, professional installation is highly recommended for spray foam. Trained technicians ensure proper application and safety.
  2. Ventilation Requirements:
    • Adequate ventilation is crucial during and after the application process. Ensure proper airflow to allow the foam to cure and release any off-gassing.
  3. Budget Considerations:
    • Spray foam insulation tends to be more expensive than traditional options. However, the long-term benefits often outweigh the initial investment. Consider your budget and the potential energy savings.

The Application Process:

Now, let’s explore the step-by-step process of applying spray foam on your ceiling for optimal insulation.

  1. Preparation:
    • Clear the area of any obstacles and ensure proper ventilation. Cover surfaces that should not receive the foam, such as windows and doors.
  2. Safety Gear:
    • Wear appropriate safety gear, including protective clothing, goggles, and a respirator, as spray foam can be irritating to the skin and eyes.
  3. Application:
    • Using specialized equipment, apply the spray foam evenly across the ceiling. Ensure uniform coverage, especially in corners and edges.
  4. Curing Time:
    • Allow the foam to cure as per the manufacturer’s instructions. During this time, proper ventilation is essential to dissipate any fumes.
  5. Inspection:
    • After the foam has cured, inspect the application to ensure even coverage. Trim any excess foam if necessary.

Read too: How Gutters Causing Ceiling Leak Can Wreak Havoc in Your Home? Unveiling the Hidden Dangers

Conclusion:

In conclusion, considering “Spray Foam On Ceiling” for insulation is a wise decision for homeowners looking to enhance energy efficiency and comfort. By understanding the advantages, considerations, and application process, you can make informed choices when it comes to upgrading your home’s insulation. Always prioritize professional installation for optimal results and long-term benefits.

Unveiling the Truth: Is R13 Insulation Good for Ceilings?

When it comes to insulating your home, choosing the right type and thickness of insulation is crucial to maintaining a comfortable and energy-efficient living environment. Insulating your ceilings is particularly important, as heat rises, and a properly insulated ceiling can significantly reduce energy bills and keep your home at a comfortable temperature. R13 insulation is a popular choice, but is it good for ceilings? In this article, we’ll explore the pros and cons of using R13 insulation for ceilings to help you make an informed decision.

Is R13 Insulation Good For Ceilings

Understanding R13 Insulation

Before we delve into whether R13 insulation is suitable for ceilings, let’s understand what R13 insulation is. R13 is a type of fiberglass insulation that is commonly used in homes to improve thermal efficiency. The “R” in R13 stands for resistance, and it measures the insulation’s ability to resist heat transfer. The higher the R-value, the better the insulation’s performance.

The Pros of Using R13 Insulation for Ceilings

  1. Cost-Effective: R13 insulation is relatively affordable, making it an attractive option for homeowners on a budget. It provides a good balance between cost and performance.
  2. Effective Thermal Resistance: R13 insulation has an R-value of approximately 3.5 per inch of thickness. While it may not be the highest R-value available, it still offers reasonable thermal resistance for most ceiling applications.
  3. Easy Installation: Installing R13 insulation is a straightforward process, making it a viable option for do-it-yourselfers. It can be easily cut to fit between ceiling joists, and it doesn’t require special tools or equipment.
  4. Sound Dampening: In addition to thermal insulation, R13 insulation can help reduce sound transmission between floors, which can be particularly beneficial in multi-story homes or apartments.

The Cons of Using R13 Insulation for Ceilings

  1. Lower R-Value: While R13 insulation provides some thermal resistance, it may not be sufficient for ceilings in extremely cold or hot climates. Higher R-values, such as R30 or R38, are often recommended for better energy efficiency.
  2. Limited Moisture Resistance: Fiberglass insulation can absorb moisture, which can reduce its effectiveness over time. In areas with high humidity or potential for moisture intrusion, alternative insulation materials may be a better choice.
  3. Possible Health Concerns: The fine fibers in fiberglass insulation can be irritating to the skin, eyes, and respiratory system. Proper protective gear, such as gloves and a mask, is recommended when handling and installing R13 insulation.

When Is R13 Insulation Good for Ceilings?

R13 insulation can be a suitable choice for ceiling insulation in certain situations:

  1. Moderate Climates: In regions with moderate temperature variations, R13 insulation can provide adequate thermal resistance to keep your home comfortable year-round.
  2. Tight Budget: If you are working with a limited budget and need to insulate your ceilings, R13 insulation offers a cost-effective solution.
  3. Soundproofing: When sound reduction is a primary concern, R13 insulation can help dampen noise transmission between floors.

Read too: How Do Rats Get In The Ceiling

When Is R13 Insulation Not Ideal for Ceilings?

There are instances when R13 insulation may not be the best choice for ceiling insulation:

  1. Extreme Climates: In areas with harsh winters or scorching summers, higher R-values are recommended to optimize energy efficiency and comfort.
  2. Moisture-Prone Areas: Ceilings in spaces prone to moisture, such as bathrooms or kitchens, may benefit from insulation materials with better moisture resistance.
  3. Health Sensitivities: If you or your household members have sensitivities to fiberglass or concerns about indoor air quality, you might want to explore alternative insulation options.

Conclusion: Is R13 Insulation Right for Your Ceilings?

The suitability of R13 insulation for your ceilings depends on your needs, budget, and local climate. While affordable and easy to install, it may not offer sufficient thermal resistance for extreme climates. Consider location, budget, and health, and consult a professional for an informed decision on your home’s comfort and energy efficiency.