When it comes to setting up a home gym, one of the most popular and effective pieces of equipment is the pull-up bar. However, traditional door-frame pull-up bars can be limiting, and if you’re looking for a more versatile option, installing a hanging pull-up bar from the ceiling is an excellent choice. This type of bar offers more space, stability, and flexibility, making it ideal for various exercises. In this guide, we will explore the benefits of hanging a pull-up bar from the ceiling, how to install it properly, and how to make the most out of your new setup.
What is a Hanging Pull Up Bar From Ceiling?
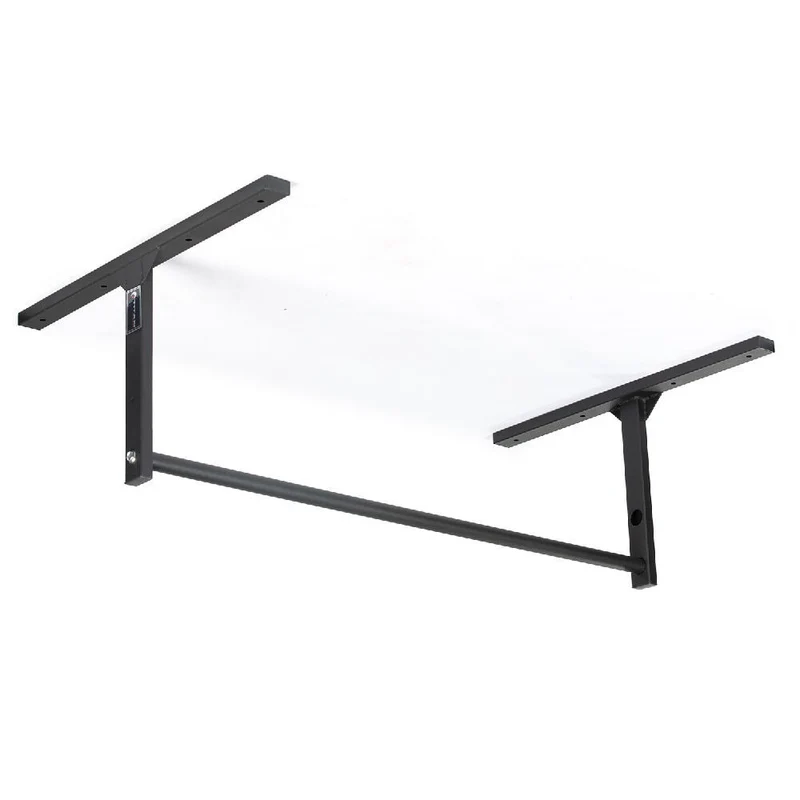
A hanging pull-up bar from the ceiling is exactly what it sounds like—a pull-up bar that is suspended from the ceiling rather than mounted to a wall or door frame. This setup is perfect for those who want more space for their exercises, particularly for movements like kipping pull-ups or muscle-ups. Hanging pull-up bars are often found in commercial gyms, but they can be easily installed in the comfort of your own home.
One of the primary benefits of a ceiling-mounted pull-up bar is that it provides a more stable structure for intense exercises. Unlike door-frame bars, which can shift or wobble, a ceiling-mounted bar is firmly anchored, offering a better overall workout experience.
Read too: Shiplap Ceiling in Kitchen: A Timeless Trend for a Stylish and Cozy Space
Benefits of a Hanging Pull Up Bar From Ceiling
There are several benefits to hanging a pull-up bar from the ceiling rather than opting for a traditional, door-mounted one. Here are some key advantages:
1. More Space and Freedom
When you mount a pull-up bar from the ceiling, you gain more space for your workouts. Ceiling-mounted bars give you more room to perform full-body exercises, like hanging leg raises, without worrying about hitting the wall or ceiling. This makes the bar a great choice for people with limited workout space.
2. Increased Stability
One of the biggest advantages of hanging a pull-up bar from the ceiling is the stability it offers. Ceiling bars are securely anchored and won’t shift or move while you perform exercises. This is especially important for more advanced movements, such as muscle-ups or kipping pull-ups, which require a stable bar.
3. Versatility
Ceiling-mounted pull-up bars are incredibly versatile, allowing you to perform a wide variety of exercises beyond just pull-ups. With this setup, you can do chin-ups, hanging leg raises, and even gymnastic-style movements like muscle-ups or rope climbs. If you’re a fitness enthusiast looking to push your limits, this type of pull-up bar is a great option.
4. Save Space
If you have limited space in your home or apartment, a hanging pull-up bar from the ceiling can save valuable floor space. Unlike large gym equipment, which can take up significant room, this type of bar is out of the way, allowing you to use the area underneath for other exercises.
5. More Challenging Workouts
Ceiling-mounted bars generally offer a higher level of challenge than wall-mounted or door-frame models. The extra space allows you to experiment with different angles and variations of pull-ups, helping you build strength and muscle more effectively.
How to Install a Hanging Pull Up Bar From Ceiling
Installing a hanging pull-up bar from the ceiling is a bit more involved than mounting one on a door frame or wall, but with the right tools and some patience, you can easily set it up yourself. Follow these steps to ensure a safe and secure installation.
Materials Needed
- Pull-up bar kit (specific to ceiling mounting)
- Ceiling joist finder (to locate the beams)
- Drill with a set of drill bits
- Measuring tape
- Level
- Screws and anchors (usually included with the pull-up bar kit)
- Wrench or screwdriver
- Ladder or step stool
Step-by-Step Installation Process
- Choose the Right Location:
- Find a suitable spot on your ceiling that offers enough clearance for your body to hang freely. Ideally, the ceiling should be at least 7-8 feet high to accommodate a full range of motion.
- Use a ceiling joist finder to locate the ceiling beams. These beams will provide the necessary support for the pull-up bar.
- Mark the Spot:
- Once you’ve located the beams, mark the exact spot where you want to mount the pull-up bar. Use a measuring tape to ensure the bar is centered and level.
- Drill the Holes:
- Drill pilot holes into the ceiling joists where you’ve marked the spot. Be sure to use the correct drill bit size according to the size of the screws or anchors included with your pull-up bar kit.
- Install the Bar:
- Attach the pull-up bar to the ceiling by securing it with screws or bolts into the pilot holes. Make sure the bar is level and properly aligned before tightening the screws.
- Double-Check the Installation:
- Before using the bar, give it a few test pulls to ensure it is securely mounted. If there is any wobbling or instability, check the screws and anchors and tighten them if necessary.
Tips for Using Your Hanging Pull Up Bar From Ceiling
Now that you’ve installed your hanging pull-up bar from the ceiling, it’s time to make the most out of it! Here are some tips to help you get the best results:
1. Warm Up Before Exercising:
Always warm up your muscles before attempting pull-ups or any other exercises. Doing dynamic stretches and mobility exercises can help reduce the risk of injury.
2. Start with Basic Movements:
If you’re new to pull-ups, begin with basic variations, like assisted pull-ups, chin-ups, or negative pull-ups. As your strength improves, you can progress to more challenging exercises like muscle-ups or kipping pull-ups.
3. Use Proper Form:
Maintain good form during pull-ups to avoid strain on your shoulders and back. Engage your core, keep your chest up, and avoid swinging your legs excessively.
4. Gradually Increase Intensity:
Don’t push yourself too hard at first. Gradually increase the intensity and difficulty of your workouts as you build strength. You can also add weights or resistance bands to make your pull-ups more challenging.
Maintenance and Safety Considerations
To ensure your hanging pull-up bar from the ceiling lasts for years, it’s important to perform regular maintenance and observe safety precautions. Here are a few key things to keep in mind:
- Check for Loose Screws: Periodically check the screws or bolts to make sure they are tight. Loose hardware can cause the bar to wobble or become unstable, increasing the risk of injury.
- Inspect the Bar: Examine the pull-up bar for any signs of wear and tear, especially if you use it frequently. If the bar shows signs of damage, it may be time to replace it.
- Follow Weight Limitations: Be aware of the weight limit for your specific pull-up bar model. Exceeding the weight limit can cause the bar to detach from the ceiling or cause other structural issues.
- Use Proper Safety Gear: If you’re performing advanced movements like muscle-ups or kipping pull-ups, consider using wrist wraps, grip gloves, or other protective gear to prevent injury.
Conclusion
A hanging pull-up bar from the ceiling is an excellent addition to any home gym setup. It offers numerous benefits, including more space for exercises, increased stability, and greater versatility. By following the installation tips and safety precautions outlined in this guide, you can set up your pull-up bar and enjoy a wide range of exercises that will help you build strength and improve your fitness level.
Whether you’re a beginner or an experienced athlete, a ceiling-mounted pull-up bar can be an invaluable tool in your workout routine.