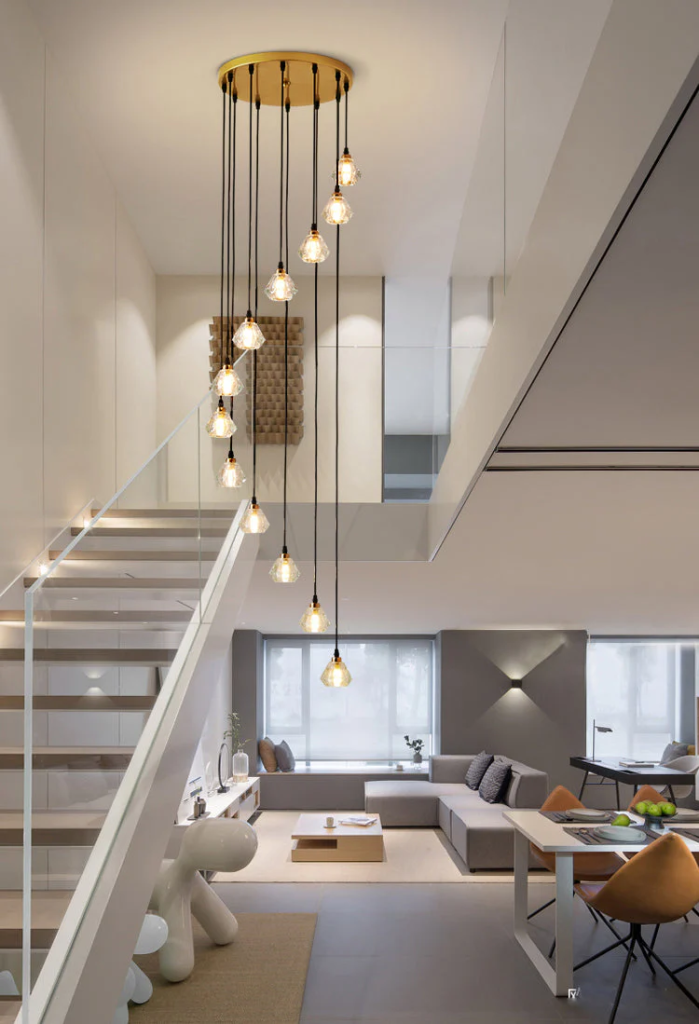
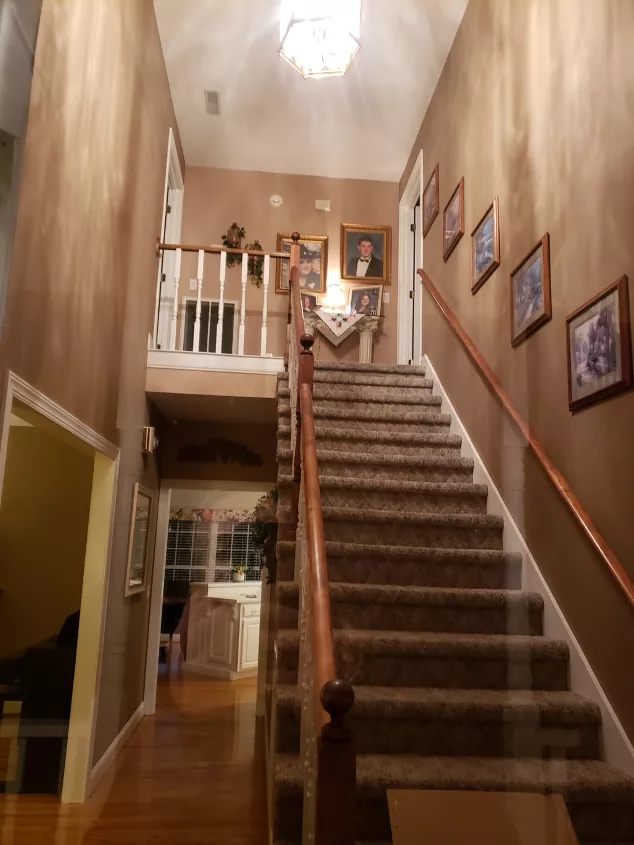
Install Chandelier on High Ceilings: A Complete Guide for Homeowners

Install Chandelier On High Ceiling. Installing a chandelier can transform any room, adding elegance and ambiance. However, installing a chandelier on high ceilings presents unique challenges that require careful planning and execution. In this comprehensive guide, we will cover everything you need to know about installing a chandelier on high ceilings, from selecting the right chandelier to safety considerations and installation techniques.
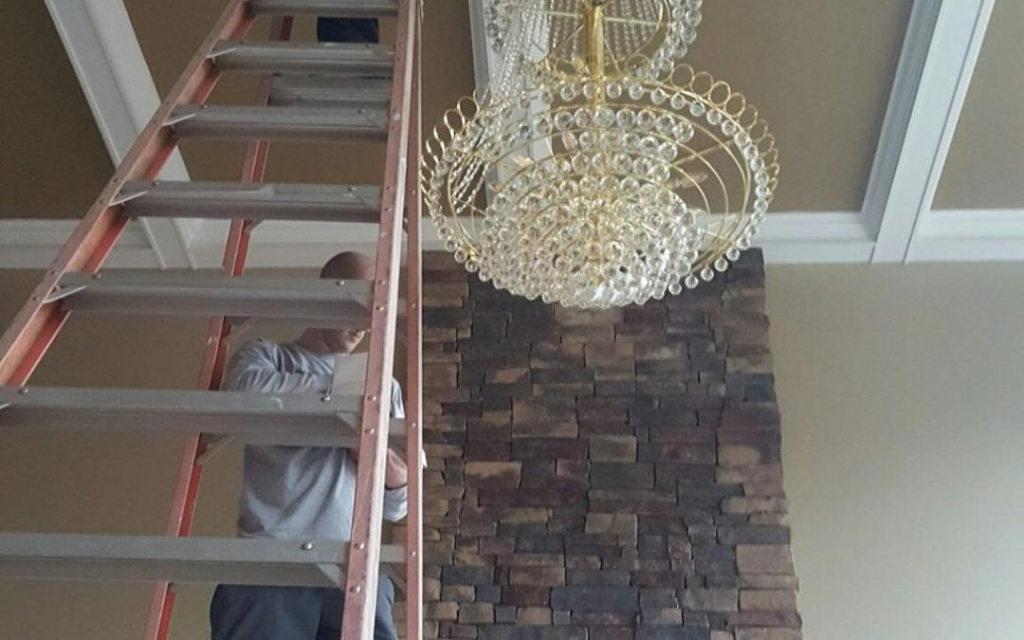
Install Chandelier On High Ceiling

Why Choose a Chandelier for High Ceilings?

Chandeliers are often the focal point of a room, drawing the eye and enhancing the overall aesthetic. When you have high ceilings, a chandelier can help fill the vertical space, making the room feel more balanced and inviting. Here are some reasons why you should consider installing a chandelier in a room with high ceilings:

  1. Aesthetic Appeal: Chandeliers come in various styles, from traditional to modern, and can significantly enhance the decor of your space.
  2. Improved Lighting: A chandelier can provide both ambient and task lighting, making the room feel brighter and more inviting.
  3. Increased Property Value: A well-placed chandelier can add to the value of your home, appealing to potential buyers who appreciate elegant lighting fixtures.
  4. Personalization: Choosing a chandelier that reflects your style can help personalize your space, making it uniquely yours.

Preparing to Install a Chandelier on High Ceilings

Before you begin the installation process, there are several important factors to consider:

1. Selecting the Right Chandelier

When selecting a chandelier for a high ceiling, consider the following:

  • Size: The size of the chandelier should be proportionate to the room. A general rule of thumb is to add the room’s dimensions (in feet) and convert that number to inches. For example, a room that is 15 feet by 20 feet would need a chandelier that is approximately 35 inches wide.
  • Height: The height of the chandelier should be appropriate for the ceiling height. Ideally, the bottom of the chandelier should be 30 to 36 inches above a table if it’s being hung above one.
  • Style: Choose a style that complements the room’s decor. Whether you prefer traditional, modern, or eclectic styles, there are countless options available.

Read too: Shiplap Ceiling in Kitchen: A Timeless Trend for a Stylish and Cozy Space

2. Tools and Materials Needed

Before starting the installation, gather the necessary tools and materials:

  • Ladder (preferably adjustable for different heights)
  • Drill and drill bits
  • Screwdriver
  • Wire cutters/strippers
  • Electrical tape
  • A helper (recommended for safety)

3. Safety Considerations

Safety should always be your top priority when installing a chandelier. Consider the following safety tips:

  • Turn Off the Power: Always turn off the power to the existing light fixture at the circuit breaker to avoid any electrical hazards.
  • Use a Stable Ladder: Ensure your ladder is stable and positioned on a flat surface. If necessary, have someone hold the ladder while you work.
  • Use Proper Safety Gear: Consider wearing safety goggles and gloves to protect yourself during the installation process.

Steps to Install a Chandelier on High Ceilings

Once you’ve gathered your tools and selected your chandelier, follow these steps to successfully install it:

Step 1: Remove the Existing Fixture

If you are replacing an existing light fixture, you’ll need to remove it first:

  1. Turn Off the Power: Go to the circuit breaker and turn off the power to the room.
  2. Remove the Old Fixture: Unscrew the old fixture from the ceiling and carefully disconnect the wiring. Make a note of how the wires are connected, as you’ll need to replicate this with the new chandelier.

Step 2: Prepare the Chandelier

Before hanging the chandelier, prepare it for installation:

  1. Assemble the Chandelier: If your chandelier requires assembly, do this according to the manufacturer’s instructions.
  2. Check the Wiring: Ensure that all wiring is intact and that there are no damaged parts.

Step 3: Attach the Mounting Bracket

The next step is to attach the mounting bracket that will hold the chandelier:

  1. Position the Bracket: Align the mounting bracket with the electrical box in the ceiling.
  2. Secure the Bracket: Use screws to secure the mounting bracket in place, ensuring it is tight and secure.

Step 4: Hang the Chandelier

Now that the bracket is in place, it’s time to hang the chandelier:

  1. Lift the Chandelier: This step may require a helper, as chandeliers can be heavy. Lift the chandelier and align it with the mounting bracket.
  2. Connect the Wires: Following the notes you made earlier, connect the chandelier wires to the electrical wires in the ceiling. Typically, you will connect:
    • Black (or red) wire from the chandelier to the black wire in the ceiling (hot).
    • White wire from the chandelier to the white wire in the ceiling (neutral).
    • Green or bare wire to the grounding wire in the ceiling.
  3. Secure the Connections: Use wire nuts to secure the connections, and wrap them with electrical tape for extra safety.
  4. Attach the Chandelier: Once the wiring is secure, carefully tuck the wires into the electrical box and attach the chandelier to the mounting bracket.

Step 5: Final Adjustments

After the chandelier is secured:

  1. Adjust the Height: If your chandelier has adjustable cables or chains, adjust them to your desired height.
  2. Check Stability: Ensure the chandelier is stable and securely attached to the ceiling.
  3. Install Light Bulbs: Insert the appropriate light bulbs into the chandelier.

Step 6: Restore Power and Test

Once everything is in place, it’s time to restore power:

  1. Turn On the Power: Go back to the circuit breaker and turn the power back on.
  2. Test the Chandelier: Turn on the switch to ensure the chandelier is functioning correctly. Check for any flickering lights or other issues.

Troubleshooting Common Issues

After installing a chandelier on a high ceiling, you may encounter some common issues. Here are a few troubleshooting tips:

1. Flickering Lights

If your chandelier flickers, it may indicate a loose connection or an incompatible bulb. Check the wiring connections and ensure you’re using the correct type of bulb.

2. Insufficient Light

If the chandelier doesn’t provide enough light, consider adding more bulbs or using higher wattage bulbs, provided they are compatible with the fixture.

3. Chandelier Sways or Moves

If your chandelier sways or feels loose, double-check that all connections are secure and that the mounting bracket is tightly fastened.

Maintenance Tips for Your Chandelier

Once your chandelier is installed, proper maintenance is key to keeping it looking its best:

  1. Regular Cleaning: Dust your chandelier regularly with a soft cloth. For crystal chandeliers, use a mixture of water and vinegar to clean the crystals without damaging them.
  2. Check the Bulbs: Periodically check the bulbs and replace any that are burnt out.
  3. Inspect Wiring: Every few months, inspect the wiring and connections to ensure everything remains secure.

When to Hire a Professional

While installing a chandelier can be a DIY project, there are times when it’s best to hire a professional:

  • Complex Installations: If your chandelier requires extensive electrical work or modifications to the existing wiring, hiring a licensed electrician is advisable.
  • Heavy Fixtures: For large and heavy chandeliers, it may be safer to have professionals handle the installation to avoid accidents.
  • Lack of Experience: If you are unsure about your skills, hiring a professional can ensure that the job is done safely and correctly.

Conclusion

Installing a chandelier on high ceilings can enhance the beauty and functionality of your space, but it requires careful planning and execution. By following the steps outlined in this guide, you can successfully install a chandelier that complements your decor and adds elegance to your home. Remember to prioritize safety and consider hiring a professional if the installation becomes too complex.
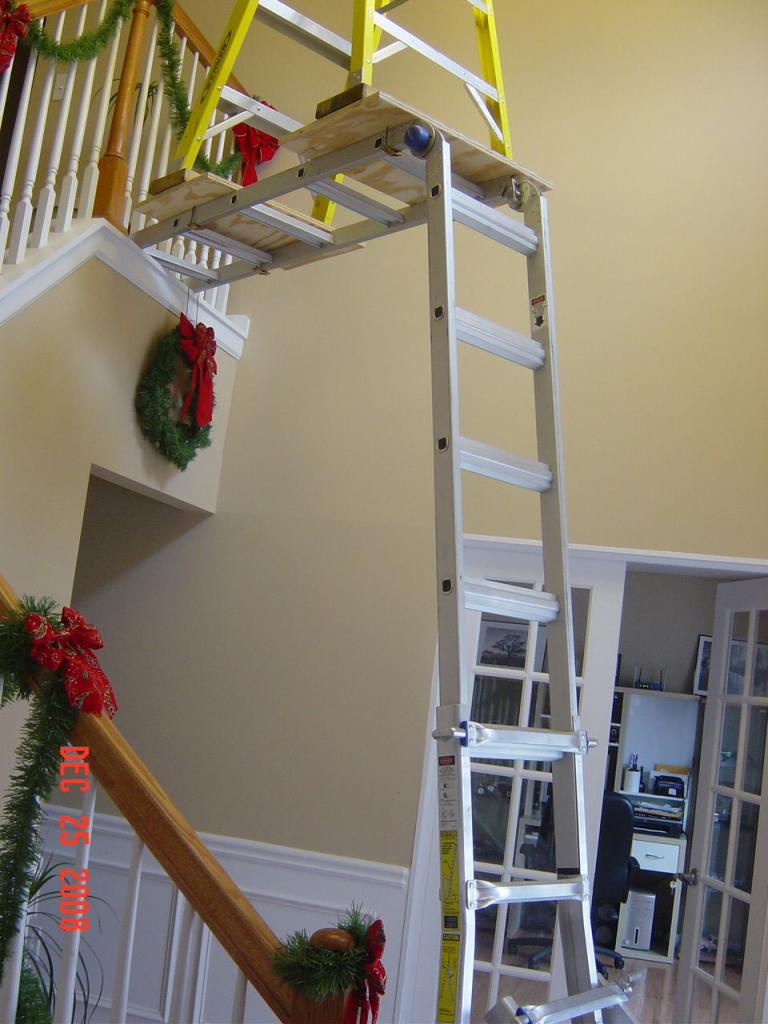
How to Change Chandelier in High Ceilings: A Step-by-Step Guide for Homeowners

Changing a chandelier can dramatically enhance the ambiance of any room, especially if you have high ceilings that call for a beautiful, eye-catching lighting fixture. However, while chandeliers can add elegance and charm, changing them—especially in rooms with high ceilings—can seem like a daunting task. If you’re wondering how to change a chandelier in high ceilings, you’ve come to the right place.

How To Change Chandelier In High Ceilings

In this article, we’ll walk you through the entire process, from preparing the space to safely installing the new fixture. Whether you’re an experienced DIY enthusiast or someone trying it for the first time, this guide will give you the essential tips and steps needed to tackle this project confidently.

Read too: Shiplap Ceiling in Kitchen: A Timeless Trend for a Stylish and Cozy Space

Why Changing a Chandelier in High Ceilings Can Be Challenging

Before diving into the step-by-step process, it’s helpful to understand why changing a chandelier in high ceilings poses unique challenges.

  1. Height and Accessibility: High ceilings often mean the fixture is located well out of reach, requiring additional equipment like a tall ladder or even scaffolding to reach it safely.
  2. Weight of the Chandelier: Many chandeliers, particularly those with intricate designs or made of materials like crystal, can be quite heavy. This can make installation a two-person job, requiring care and attention to detail.
  3. Electrical Considerations: Even though changing a chandelier may seem straightforward, it involves working with electrical wiring, which requires knowledge of safety protocols and possibly even an electrician.

Understanding these challenges will prepare you better for the task ahead and help you ensure a safe and successful chandelier replacement.

How to Change Chandelier in High Ceilings: A Step-by-Step Guide

Here’s how to safely and efficiently change a chandelier in high ceilings:

Step 1: Gather the Necessary Tools and Equipment

Before starting, make sure you have all the tools and equipment you’ll need. Here’s a checklist of what you might require:

  • Tall, sturdy ladder: Depending on the height of your ceiling, you may need a ladder that reaches up to 15 feet or more. A two-sided or extension ladder is ideal for this task.
  • Scaffolding (optional): If your ceiling is particularly high or you feel unsafe using a ladder, scaffolding may be a better choice.
  • Screwdriver and pliers: These will help with removing the old chandelier and securing the new one.
  • Voltage tester: This is essential to ensure there’s no electrical current running through the wiring before you start working.
  • Wire nuts and electrical tape: These are useful for connecting and securing the wires.
  • Assistant: It’s highly recommended to have someone assist you, especially when handling heavier chandeliers or tall ladders.
  • Safety harness: If you’re working on very high ceilings or scaffolding, a safety harness is crucial to avoid accidents.

Step 2: Turn Off the Power

Safety should always be the top priority when working with electrical fixtures. Before starting, make sure to:

  • Go to the circuit breaker and switch off the power to the room where the chandelier is located.
  • Use a voltage tester on the wires of the existing chandelier to confirm there’s no electrical current running through them.

This simple step will prevent any accidents or electrical shocks.

Step 3: Set Up Your Ladder or Scaffolding

For high ceilings, setting up the ladder or scaffolding properly is critical to ensure your safety. Position the ladder securely under the chandelier, or set up the scaffolding if the ceiling height exceeds what a ladder can safely reach. Make sure:

  • The ladder is on a stable surface and fully extended to reach the chandelier.
  • If you’re using scaffolding, ensure it’s properly assembled and safe to use.

Step 4: Remove the Existing Chandelier

Now that everything is set up, it’s time to remove the old chandelier. Here’s how:

  • Climb the ladder carefully and locate the screws or mounting bracket that holds the chandelier in place.
  • Use a screwdriver to unscrew the fixture from the ceiling.
  • Once it’s unscrewed, carefully disconnect the chandelier from the electrical wiring. The wires will likely be connected using wire nuts, so unscrew those and detach the wires.
  • If the chandelier is heavy, have your assistant hold the fixture steady while you disconnect the wiring.
  • Slowly lower the old chandelier down the ladder (or scaffolding) with the help of your assistant.

Step 5: Prepare the New Chandelier for Installation

Before installing the new chandelier, make sure it’s ready for installation by:

  • Assembling the chandelier according to the manufacturer’s instructions, if needed.
  • Ensuring the wires on the new chandelier are properly stripped and prepared for connecting to the electrical box in the ceiling.
  • Double-checking the weight of the chandelier. If it’s particularly heavy, confirm that the ceiling’s mounting box is capable of supporting it.

Step 6: Install the New Chandelier

With everything in place, you’re ready to install the new chandelier. Follow these steps:

  1. Connect the Wiring: Use your ladder or scaffolding to reach the ceiling. Attach the wires from the chandelier to the corresponding wires in the ceiling (black to black, white to white, and ground wire to ground). Secure them using wire nuts, and cover the connections with electrical tape for extra security.
  2. Mount the Chandelier: Once the wiring is connected, attach the chandelier to the mounting bracket on the ceiling. Use screws or any other provided hardware to ensure it’s securely fastened.
  3. Test the Fixture: After the chandelier is mounted, carefully climb down from the ladder or scaffolding. Go to your circuit breaker and turn the power back on. Use the light switch to ensure the chandelier is functioning properly.
  4. Finishing Touches: Once the chandelier is operational, you can adjust its height (if it’s an adjustable model) and ensure all the bulbs are securely in place. Make sure everything looks aligned and balanced.

Step 7: Clean Up and Enjoy

After installation, clean up your work area and remove any tools, ladder, or scaffolding. Finally, step back and admire your new chandelier! You’ve successfully completed the process of how to change a chandelier in high ceilings.

Tips for Changing Chandeliers in High Ceilings Safely

Changing a chandelier on high ceilings can be a bit intimidating, but with proper planning, the process becomes manageable. Here are some safety tips to ensure everything goes smoothly:

1. Use the Right Ladder or Scaffolding

For very high ceilings, like those found in entryways or great rooms, scaffolding may be the safest option. Ladders, while useful, can become unstable at extreme heights, so always ensure you’re using equipment appropriate for the ceiling height.

2. Don’t Work Alone

It’s always better to have someone assisting you when working at heights, especially when you’re handling heavy or awkwardly shaped fixtures. An assistant can also help you manage tools and ensure your ladder remains stable.

3. Wear Protective Gear

If you’re working with a chandelier made from delicate materials like glass or crystal, it’s a good idea to wear safety glasses and gloves to prevent injury from falling debris.

4. Use a Safety Harness

If working on ceilings over 15 feet high, wearing a safety harness connected to a secure point can provide an extra layer of protection.

5. Consult a Professional for Complex Installations

If the chandelier is unusually heavy or if the electrical wiring seems complicated, it might be worth consulting an electrician or professional installer. Sometimes, investing in professional help can save time and ensure that the job is done safely and correctly.

Selecting the Right Chandelier for High Ceilings

Now that you know how to change a chandelier in high ceilings, you might be wondering what kind of chandelier works best in these spaces. Here are some options that suit tall ceilings:

1. Multi-Tier Chandeliers

Multi-tier chandeliers offer an elaborate design that works well in rooms with vaulted or extra-high ceilings. Their multiple layers add depth and create a stunning focal point.

2. Linear Chandeliers

For a modern look, linear chandeliers are ideal for long dining tables or kitchen islands. Their elongated shape suits open spaces and high ceilings.

3. Candle-Style Chandeliers

Candle-style chandeliers are perfect for more traditional or rustic spaces. These fixtures often come with numerous “candles” or lights, making them ideal for larger rooms that need extra lighting.

4. Globe Chandeliers

Globe chandeliers are versatile and work in both contemporary and traditional settings. Their spherical shape makes them a striking feature in rooms with high ceilings.

Conclusion: Updating Your Space with Confidence

Knowing how to change a chandelier in high ceilings can be incredibly rewarding, especially when you see the dramatic effect a new fixture can have on your room’s ambiance. With the right tools, careful planning, and proper safety measures, this project can be a successful DIY endeavor. Whether you’re swapping out an outdated chandelier for a modern design or simply updating the style, following the steps in this guide will help you achieve a safe and professional-looking installation.

Chandelier on a Slanted Ceiling: How to Install and Style

When it comes to home décor, lighting plays a pivotal role in enhancing the aesthetic appeal and ambiance of a room. A Chandelier on Slanted Ceiling not only serves as a stunning focal point but also adds elegance and sophistication to your space. However, hanging a chandelier in a room with a slanted ceiling can pose some unique challenges. In this comprehensive guide, we will explore the best ways to install a chandelier on a slanted ceiling, discuss different styles, and provide tips on choosing the right chandelier for your home.

Chandelier On Slanted Ceiling

Why Choose a Chandelier for Your Slanted Ceiling?

1. Aesthetic Appeal

Chandeliers are synonymous with luxury and style. They can transform an ordinary room into a breathtaking space. When hung from a slanted ceiling, a chandelier can add depth and dimension, creating an eye-catching centerpiece that draws attention.

Read too: Shiplap Ceiling in Kitchen: A Timeless Trend for a Stylish and Cozy Space

2. Versatile Design

Available in various designs, sizes, and materials, chandeliers can suit any style—from modern and minimalist to traditional and ornate. A well-chosen chandelier can complement your existing décor, enhancing the overall ambiance of the room.

3. Increased Lighting

A chandelier provides abundant illumination, making it ideal for areas that require bright lighting, such as dining rooms, entryways, or living rooms. With multiple light bulbs, a chandelier can effectively brighten even the darkest corners of a room.

4. Space Definition

In open floor plans or large rooms with slanted ceilings, a chandelier can help define the space, creating a cozy atmosphere. By hanging a chandelier, you can create a distinct area for dining, relaxing, or entertaining.


Understanding Slanted Ceilings

1. What is a Slanted Ceiling?

A slanted ceiling, also known as a pitched or sloped ceiling, is characterized by an angle that varies from the standard flat ceiling. These ceilings can create a unique architectural feature in a room, adding character and charm. They are commonly found in attics, lofts, and rooms with vaulted designs.

2. Challenges of Installing a Chandelier

While slanted ceilings can be visually appealing, they also present challenges for hanging fixtures like chandeliers. The angle of the ceiling affects the height and placement of the chandelier, making it essential to carefully consider the installation process. Here are some common challenges:

  • Height Limitations: The height of the chandelier must be adjusted to accommodate the slant of the ceiling, ensuring that it hangs at an appropriate height for both aesthetics and safety.
  • Wiring Issues: The existing electrical wiring may need adjustments to accommodate the slant, especially if the chandelier is heavy or requires specific support.
  • Alignment: Ensuring the chandelier is level and centered can be tricky with slanted ceilings, requiring additional tools and techniques for proper installation.

Tips for Installing a Chandelier on Slanted Ceiling

1. Choose the Right Chandelier

When selecting a chandelier for a slanted ceiling, consider the following factors:

  • Style and Size: Choose a chandelier that fits the proportions of your room. A large chandelier can overwhelm a small space, while a small chandelier may look lost in a larger room.
  • Adjustability: Opt for adjustable or angled chandeliers designed specifically for slanted ceilings. These chandeliers often come with longer downrods or special mounting kits that accommodate the angle.

2. Determine the Ideal Height

Proper chandelier height is crucial, especially in rooms with slanted ceilings. Here are some guidelines:

  • General Rule: The bottom of the chandelier should be at least 30 inches above the dining table or any surface beneath it.
  • Adjust for Slant: Measure the angle of the slant to determine how low the chandelier needs to hang to maintain an appropriate height.

3. Use a Sloped Ceiling Adapter

A sloped ceiling adapter is an essential tool for hanging a chandelier on a slanted ceiling. This adapter allows the chandelier to hang level, regardless of the angle of the ceiling. When purchasing a chandelier, check if it includes an adapter or if you need to buy one separately.

4. Leveling the Chandelier

To ensure your chandelier hangs straight, use a level during installation. This will help you adjust the angle of the chandelier so that it looks aesthetically pleasing and functions correctly. If using a long downrod, ensure it’s securely fastened to the ceiling.

5. Adjust the Wiring

Depending on the height and angle of the slant, you may need to extend or adjust the electrical wiring. If you’re not comfortable doing this yourself, hiring a qualified electrician is advisable.


Styling Your Chandelier on Slanted Ceilings

1. Choosing the Right Location

When installing a Chandelier on Slanted Ceiling, the location is as important as the design. Consider the following:

  • Focal Points: Position the chandelier above key areas, such as a dining table, coffee table, or entryway, to create a focal point in the room.
  • Room Layout: Ensure the chandelier does not obstruct pathways or become a hazard for taller individuals.

2. Pairing with Other Light Sources

To create a layered lighting effect, pair your chandelier with other light sources:

  • Wall Sconces: Install wall sconces at different heights to complement the chandelier, adding depth to your lighting scheme.
  • Table Lamps: Use table or floor lamps to provide additional lighting and enhance the overall ambiance of the room.

3. Color and Material Coordination

To create a cohesive look, ensure that the chandelier’s color and material complement the existing décor:

  • Matching Finishes: Choose a chandelier that matches other fixtures, such as cabinet hardware or door knobs, to create a unified design.
  • Material Harmony: If your furniture features wood, metal, or glass, select a chandelier that incorporates these materials for a harmonious aesthetic.

4. Adding Decorative Elements

Enhance the beauty of your chandelier by incorporating decorative elements:

  • Drapes and Fabrics: Pair the chandelier with soft drapery or textiles that add warmth and texture to the room.
  • Artwork and Accessories: Hang artwork or display decorative accessories nearby to draw attention to the chandelier and create a well-rounded design.

Common Styles of Chandeliers for Slanted Ceilings

When selecting a Chandelier on Slanted Ceiling, consider the various styles available to find the perfect match for your interior design:

1. Traditional Chandeliers

Traditional chandeliers often feature intricate designs with crystal accents and ornate details. They can add a classic touch to any room, making them perfect for formal dining areas or grand entryways.

2. Modern Chandeliers

Modern chandeliers embrace clean lines, geometric shapes, and minimalistic designs. They work well in contemporary spaces and can serve as striking focal points that exude elegance and sophistication.

3. Rustic Chandeliers

Rustic chandeliers typically incorporate natural materials such as wood and wrought iron, providing a warm and inviting atmosphere. These chandeliers are ideal for country-style or farmhouse interiors.

4. Industrial Chandeliers

Industrial chandeliers combine raw materials like metal and glass, offering an edgy and urban feel. They can complement modern lofts or spaces with an industrial aesthetic.

5. Crystal Chandeliers

Crystal chandeliers add glamour and luxury to any space. They can reflect light beautifully and are suitable for both formal and casual settings.


Conclusion

Installing a Chandelier on Slanted Ceiling can enhance the aesthetic appeal and functionality of your space. By following the tips outlined in this guide, you can choose the perfect chandelier, ensure proper installation, and style it to create a stunning focal point in your home. With careful consideration and planning, your chandelier will not only provide ample lighting but also elevate the overall ambiance of your room.

Modern Chandelier for High Ceiling: Transform Your Space

Lighting is one of the most critical aspects of home design, especially when it comes to high ceilings. If you’re lucky enough to have tall ceilings, choosing the right chandelier can truly elevate your space. A Modern Chandelier for High Ceiling not only adds functional lighting but also serves as a striking centerpiece that can dramatically impact the atmosphere and design of your home.

Modern Chandelier For High Ceiling

In this article, we’ll explore how to choose the right modern chandelier for your high ceiling, the types of chandeliers available, and essential tips for installation and maintenance. Whether you’re looking for sleek, minimalistic designs or bold, statement-making fixtures, we’ve got you covered.

Read too: Bathroom Flooded Through the Ceiling: A Comprehensive Guide

Why Choose a Modern Chandelier for High Ceilings?

High ceilings are a luxury in any home, making a room feel more spacious, airy, and grand. However, they also present unique design challenges, particularly when it comes to lighting. The right chandelier can bring balance, style, and sufficient lighting to such a large area.

A Modern Chandelier for High Ceiling is not just a light fixture, it’s a design element that enhances the room’s visual appeal. With modern chandeliers, you can choose from a variety of designs that complement your interior, whether it’s a minimalist, industrial, or luxurious aesthetic.

Benefits of Modern Chandeliers for High Ceilings

  1. Visual Impact: A chandelier can become the focal point of any room, especially one with high ceilings. It draws the eye upwards, enhancing the architectural height and adding drama to the space.
  2. Adequate Lighting: Tall ceilings require lighting that can spread throughout the entire room. A chandelier designed for high ceilings will ensure that the room is well-lit from top to bottom, without creating dark spots.
  3. Customization: Modern chandeliers come in various sizes, designs, and finishes, allowing you to customize the look based on your personal style and the room’s architecture.
  4. Energy Efficiency: Many modern chandeliers now incorporate LED technology, offering bright lighting while keeping energy consumption low.

Types of Modern Chandeliers for High Ceilings

There are various types of Modern Chandeliers for High Ceilings that cater to different interior styles and functional needs. Here’s a look at some of the most popular styles to consider:

1. Tiered Chandeliers

A tiered chandelier is an excellent option for large spaces with high ceilings. These chandeliers have multiple layers or “tiers” of lights, which cascade downwards, creating a dramatic and visually impressive effect. Tiered chandeliers are often used in grand entryways, foyers, or living rooms, where they can fill the vertical space beautifully.

2. Sputnik Chandeliers

Inspired by mid-century modern designs, Sputnik chandeliers have a starburst shape with multiple arms extending outward, often featuring bulbs on each arm. These chandeliers are perfect for adding a retro-modern touch to any room with high ceilings. They work particularly well in dining rooms or living areas where you want to make a statement while keeping the overall look sleek and minimal.

3. Linear Chandeliers

Linear chandeliers are ideal for modern or contemporary spaces, especially when placed above a long dining table or kitchen island. The elongated design complements high ceilings by creating a horizontal focal point, balancing the vertical height of the room. These chandeliers often feature geometric shapes and clean lines, making them perfect for minimalist interiors.

4. Drum Chandeliers

For those who prefer a softer, more understated look, drum chandeliers offer a modern twist on the classic design. These chandeliers have a cylindrical or drum-shaped shade that diffuses light, creating a warm and inviting ambiance. Drum chandeliers are versatile and can work in both casual and formal spaces with high ceilings, including bedrooms, living rooms, or dining areas.

5. Crystal Chandeliers

While crystal chandeliers are often associated with traditional or opulent designs, modern interpretations have reimagined them with sleek, minimalist elements. A Modern Crystal Chandelier can add a touch of elegance to a room with high ceilings without feeling overly ornate or old-fashioned. These chandeliers are perfect for entryways, dining rooms, or even bathrooms where you want to add a bit of sparkle.

6. Ring Chandeliers

Ring chandeliers are a popular choice for contemporary homes with high ceilings. They feature one or more circular rings of lights that create a modern, geometric aesthetic. Some designs include adjustable rings, allowing you to customize the angle and layout of the chandelier to suit your space. This type of chandelier works well in open-concept living spaces, hallways, or loft-style apartments.

How to Choose the Right Modern Chandelier for High Ceilings

Selecting the perfect Modern Chandelier for High Ceiling requires more than just picking a design you like. There are several factors to consider to ensure that the chandelier complements your space and functions effectively.

1. Proportion and Scale

The first rule when choosing a chandelier for high ceilings is to ensure that it’s proportionate to the room. A chandelier that’s too small will get lost in the space, while one that’s too large can overwhelm the room. For high ceilings, you need a chandelier that’s appropriately scaled to fill the vertical space without dominating the room.

A general rule of thumb is to add the length and width of the room in feet. For example, if your room is 20 feet long by 15 feet wide, your chandelier should be around 35 inches in diameter. Additionally, if you have ceilings higher than 10 feet, you may want to choose a chandelier that has a longer drop or adjustable chain to hang at the right height.

2. Height of Installation

Proper height is key when hanging a chandelier in a room with high ceilings. For rooms with very tall ceilings (above 10 feet), the chandelier should be positioned so that the bottom hangs between 7 to 8 feet from the floor. In dining rooms, the chandelier should be 30 to 36 inches above the dining table to ensure adequate light without obstructing the view.

3. Lighting Needs

While chandeliers are often chosen for their aesthetic appeal, it’s important to consider their functionality as well. If your chandelier will be the primary light source in a room with high ceilings, make sure it has enough light output to adequately illuminate the space. Consider models with dimmable features so you can adjust the brightness based on the time of day or mood.

4. Style and Material

The style of your chandelier should complement the overall design of your home. Modern chandeliers come in various materials, including metal, glass, crystal, and wood. Metal finishes like matte black, brushed nickel, or brass are popular for modern designs. Glass or crystal elements can add a touch of elegance and sparkle, while wood or natural materials offer a more organic and earthy feel.

Installation Tips for Modern Chandeliers in High Ceilings

Installing a Modern Chandelier for High Ceiling requires careful planning and the right tools. Here are some tips to ensure a successful installation:

1. Hire a Professional

For high ceilings, it’s best to hire a professional electrician to install your chandelier. Working at height can be dangerous, and a professional will have the necessary equipment and experience to safely install the chandelier, connect the wiring, and ensure that it’s securely mounted.

2. Use Adjustable Chains or Rods

Most modern chandeliers come with adjustable chains or rods, allowing you to customize the height of the fixture. Make sure to measure the ceiling height and room dimensions beforehand so you can choose the appropriate length for the chain or rod.

3. Use a Ceiling Medallion for Added Elegance

For an extra touch of elegance, consider adding a ceiling medallion around the base of the chandelier. This decorative feature can enhance the chandelier’s appearance and make it stand out even more in rooms with high ceilings.

4. Consider Remote-Controlled or Smart Lighting

If your chandelier is installed in a room with particularly high ceilings, you may want to consider installing remote-controlled or smart lighting features. This allows you to control the brightness, dimming, or even the color of the chandelier without needing to reach for a switch.

Maintaining Your Modern Chandelier for High Ceilings

To keep your chandelier looking its best, regular maintenance is essential. Dust and dirt can accumulate on the chandelier over time, especially in rooms with high ceilings. Use a microfiber cloth or a duster with an extendable handle to clean the fixture regularly. If the chandelier includes glass or crystal elements, use a gentle glass cleaner to keep it sparkling.

Conclusion

A Modern Chandelier for High Ceiling is an excellent investment that adds style, sophistication, and proper lighting to your home. By selecting the right size, style, and installation height, you can transform any room into a beautifully lit space. Whether you’re drawn to sleek, minimalist designs or bold, statement-making fixtures, modern chandeliers offer endless possibilities for elevating your high-ceilinged home.

Best Chandeliers for High Ceilings: Elevate Your Space with Style

When dealing with high ceilings, selecting the right chandelier can dramatically enhance the aesthetics and functionality of your space. High ceilings provide a grand backdrop for chandeliers, allowing them to become a focal point that adds both elegance and visual interest to a room. This comprehensive guide will explore the best chandeliers for high ceilings, providing insights into design options, installation tips, and maintenance considerations to help you make an informed decision for your home.

Best Chandeliers For High Ceilings

Understanding the Importance of Chandeliers in High Ceilings

Chandeliers are more than just lighting fixtures; they are statement pieces that can transform the look and feel of a room. In spaces with high ceilings, the chandelier’s scale and design play a crucial role in achieving the desired visual impact. Here’s why choosing the right chandelier is essential for high ceilings:

1. Visual Impact

  • Description: High ceilings offer the opportunity for dramatic design elements that a standard chandelier may not achieve. A well-chosen chandelier can enhance the grandeur of the space and create a striking visual focal point.
  • Benefit: Adds elegance and character to the room, making it feel more cohesive and thoughtfully designed.

2. Lighting Effectiveness

  • Description: Chandeliers not only serve as decorative elements but also as primary light sources. For high ceilings, the chandelier needs to provide adequate illumination while complementing the overall lighting scheme.
  • Benefit: Ensures that the space is well-lit and inviting, enhancing both functionality and ambiance.

Read too: Striped Schoolhouse Ceiling Light Fixtures: Unveiling the Timeless Charm

3. Proportional Balance

  • Description: The scale of the chandelier should be proportionate to the height and size of the ceiling. A chandelier that is too small can appear insignificant, while one that is too large may overwhelm the space.
  • Benefit: Achieves a balanced and harmonious look that enhances the architectural features of the room.

Best Chandeliers for High Ceilings

Choosing the best chandelier for high ceilings involves considering various factors such as design, size, and installation requirements. Here’s a guide to some of the best chandelier styles and designs that work exceptionally well in high-ceiling spaces:

1. Multi-Tier Chandeliers

  • Description: Multi-tier chandeliers feature multiple layers or tiers of lights, which can be arranged in various configurations. They are ideal for high ceilings as they create a dramatic and cascading effect.
  • Design Tips: Opt for designs with intricate details and high-quality materials to enhance the grandeur of the space.
  • Example: A crystal multi-tier chandelier can add opulence and sparkle, making it a perfect centerpiece for a grand entryway or dining area.

2. Linear Chandeliers

  • Description: Linear chandeliers have an elongated design, making them suitable for high ceilings and large spaces. They often feature a row of lights or pendants arranged in a straight line.
  • Design Tips: Choose a linear chandelier with adjustable height settings to customize the drop and achieve the desired visual effect.
  • Example: A modern linear chandelier with sleek, geometric lines can complement contemporary interiors while providing focused illumination.

3. Cascading or Hanging Chandeliers

  • Description: Cascading chandeliers, also known as hanging chandeliers, feature multiple pendant lights or crystals suspended at varying lengths. They are perfect for creating a cascading effect that draws the eye upward.
  • Design Tips: Ensure that the chandelier is adjustable to accommodate the height of the ceiling and maintain a comfortable viewing distance.
  • Example: A cascading chandelier with crystal drops or glass pendants can create a stunning focal point in a double-height living room or atrium.

4. Large-Scale Chandeliers

  • Description: Large-scale chandeliers are designed to make a bold statement and are often used in expansive spaces with high ceilings. They come in various styles, including ornate, contemporary, and traditional.
  • Design Tips: Choose a chandelier with a substantial presence and ensure that it complements the architectural features of the room.
  • Example: An oversized wrought iron chandelier can add a touch of rustic charm or grandeur to a spacious foyer or ballroom.

Tips for Choosing the Perfect Chandelier for High Ceilings

Selecting the ideal chandelier involves more than just picking a design you like. Here are some tips to ensure you choose the best chandelier for your high ceilings:

1. Consider the Room’s Size and Style

  • Tip: Measure the dimensions of the room and consider the overall style of the space before selecting a chandelier.
  • Why: Ensures that the chandelier complements the room’s proportions and enhances its aesthetic appeal.

2. Choose the Right Size

  • Tip: For high ceilings, choose a chandelier that is proportionate to the room’s height and width. A general rule is that the chandelier’s diameter should be about one-half to two-thirds of the room’s width.
  • Why: Achieves a balanced look and ensures that the chandelier makes a significant visual impact.

3. Check the Drop Length

  • Tip: Ensure that the chandelier’s drop length is adjustable to accommodate the height of the ceiling. A chandelier that hangs too low or too high can affect both its appearance and functionality.
  • Why: Provides flexibility in achieving the desired visual effect and ensures that the chandelier is positioned at the optimal height for illumination.

4. Match the Design to the Room’s Decor

  • Tip: Select a chandelier that complements the room’s existing decor and architectural features. Consider the materials, finishes, and overall style to ensure a cohesive look.
  • Why: Enhances the room’s aesthetic appeal and ensures that the chandelier blends seamlessly with the decor.

5. Ensure Proper Lighting

  • Tip: Choose a chandelier that provides adequate illumination for the space. Consider the type of bulbs, wattage, and light distribution to ensure that the chandelier meets your lighting needs.
  • Why: Ensures that the room is well-lit and functional while enhancing the chandelier’s visual impact.

Installation Tips for Chandeliers in High Ceilings

Installing a chandelier in a high ceiling space requires careful planning and attention to detail. Here are some installation tips to ensure a successful installation:

1. Hire a Professional

  • Tip: Consider hiring a licensed electrician or professional installer to ensure that the chandelier is installed safely and correctly.
  • Why: Ensures that the chandelier is securely mounted and wired according to electrical codes and safety standards.

2. Use a Ceiling Hook or Mount

  • Tip: Ensure that the chandelier is mounted using a secure ceiling hook or mount that can support its weight.
  • Why: Provides stability and prevents the chandelier from becoming dislodged or falling.

3. Adjust the Height

  • Tip: Adjust the chandelier’s height to achieve the desired visual effect and ensure that it is positioned at a comfortable viewing level.
  • Why: Enhances the chandelier’s appearance and ensures that it provides adequate illumination for the space.

4. Test the Lighting

  • Tip: Test the chandelier’s lighting to ensure that it provides the desired level of illumination and complements the room’s lighting scheme.
  • Why: Ensures that the chandelier meets your lighting needs and enhances the overall ambiance of the space.

Maintenance and Care for Chandeliers

To keep your chandelier looking its best and functioning properly, regular maintenance and care are essential. Here are some tips for maintaining and cleaning your chandelier:

1. Regular Dusting

  • Tip: Dust the chandelier regularly to prevent the buildup of dirt and grime. Use a soft, dry cloth or a feather duster to clean the surfaces.
  • Why: Keeps the chandelier looking clean and ensures that it remains visually appealing.

2. Periodic Cleaning

  • Tip: Clean the chandelier’s glass or crystal components periodically using a gentle glass cleaner or a solution of mild soap and water. Avoid using abrasive cleaners or cloths.
  • Why: Maintains the chandelier’s shine and prevents the accumulation of dust and residue.

3. Check for Loose Components

  • Tip: Regularly inspect the chandelier for any loose or damaged components and tighten or repair them as needed.
  • Why: Ensures that the chandelier remains securely mounted and functional.

4. Replace Bulbs as Needed

  • Tip: Replace any burnt-out or damaged bulbs promptly to ensure that the chandelier provides adequate illumination.
  • Why: Maintains the chandelier’s lighting effectiveness and overall appearance.

Conclusion

Selecting the best chandelier for high ceilings involves considering factors such as design, size, and installation requirements. Whether you prefer a multi-tier chandelier, a linear design, a cascading style, or a large-scale statement piece, choosing the right chandelier can elevate the look and feel of your space. By following the tips and recommendations in this guide, you can make an informed decision and enjoy a stunning chandelier that enhances your high-ceilinged room with style and elegance.

Chandelier for High Ceilings: Illuminate Your Space with the Perfect

Choosing the right lighting for a home with high ceilings can transform a space, adding elegance, warmth, and a focal point that draws the eye upward. A chandelier for high ceilings not only provides necessary illumination but also enhances the architectural beauty of the room. In this comprehensive guide, we will explore everything you need to know about selecting and installing the perfect chandelier for your high ceilings.

Chandelier For High Ceilings

Why Choose a Chandelier for High Ceilings?

Chandeliers are more than just light fixtures; they are statement pieces that can elevate the style of any room. High ceilings provide the perfect opportunity to install a chandelier that can be appreciated in its full glory. Here’s why you should consider a chandelier for your high ceilings:

1. Aesthetic Appeal

A chandelier adds a touch of elegance and sophistication to any room. For high ceilings, it creates a grand and dramatic effect that can significantly enhance the room’s ambiance.

Read too: Striped Schoolhouse Ceiling Light Fixtures: Unveiling the Timeless Charm

2. Improved Lighting

High ceilings often require more light to adequately illuminate the space. Chandeliers can provide ample light, especially those designed with multiple bulbs or tiers, ensuring the room is well-lit.

3. Focal Point

A chandelier serves as a central focal point, drawing attention and adding visual interest to the room. It can anchor the space and tie together other design elements.

Selecting the Right Chandelier for High Ceilings

Choosing the right chandelier involves several considerations to ensure it complements the room and functions effectively.

1. Size and Scale

The size of the chandelier should be proportional to the room’s dimensions. For high ceilings, larger chandeliers with multiple tiers or extended designs are ideal. A general rule of thumb is to add the room’s length and width (in feet) and convert that total to inches. For example, a room that is 20 feet by 15 feet would require a chandelier that is approximately 35 inches in diameter.

2. Style and Design

The style of the chandelier should match the room’s decor. Whether you prefer a modern, minimalist design or a classic, ornate piece, there are chandeliers available to suit every taste. Consider materials like crystal, metal, and glass, as well as the overall design to ensure it fits with your room’s aesthetic.

3. Hanging Height

The height at which the chandelier hangs is crucial. For rooms with high ceilings, it’s important to ensure the chandelier is low enough to be visually connected with the space but high enough to allow for adequate clearance. A good starting point is to hang the chandelier about 8 feet above the floor, but this can vary based on personal preference and room height.

Types of Chandeliers for High Ceilings

There are various types of chandeliers that work well for high ceilings, each offering a unique look and feel:

1. Crystal Chandeliers

Crystal chandeliers are timeless and elegant, perfect for adding a touch of luxury to any room. They are especially effective in formal settings such as dining rooms and entryways.

2. Modern Chandeliers

Modern chandeliers often feature sleek lines, minimalist designs, and innovative materials. They are ideal for contemporary spaces and can provide a striking contrast in rooms with traditional architecture.

3. Rustic Chandeliers

Rustic chandeliers, made from wood, wrought iron, or other natural materials, add a cozy and inviting feel to the room. They are perfect for homes with a farmhouse or cabin aesthetic.

4. Candle Chandeliers

Candle chandeliers mimic the look of traditional candlelight, providing a warm and romantic glow. They are suitable for a variety of settings, from rustic to classical.

Installation Tips for Chandeliers on High Ceilings

Installing a chandelier on high ceilings can be challenging. Here are some tips to ensure a safe and effective installation:

1. Hire a Professional

Due to the height and complexity of the installation, it’s often best to hire a professional electrician. They can ensure the chandelier is securely mounted and properly wired.

2. Use an Adjustable Chain or Rod

Many chandeliers come with adjustable chains or rods, allowing you to customize the hanging height. This feature is particularly useful for high ceilings, providing flexibility during installation.

3. Consider a Winch System

For very high ceilings, a winch system can be installed to raise and lower the chandelier for cleaning and bulb replacement. This system can save time and effort in the long run.

Maintaining Your Chandelier

Regular maintenance is essential to keep your chandelier looking its best and functioning properly:

1. Cleaning

Dust and clean your chandelier regularly to maintain its sparkle. Use a soft cloth and a gentle cleaner to avoid damaging the materials. For crystal chandeliers, consider using a special crystal cleaner.

2. Bulb Replacement

Replace bulbs as needed to ensure adequate lighting. Opt for LED bulbs for energy efficiency and longevity.

3. Check for Stability

Periodically check that the chandelier is securely mounted and that all components are stable. This ensures safety and prevents damage.

Enhancing Your Room with Complementary Lighting

While a chandelier can be the centerpiece, complementary lighting enhances the overall effect:

1. Wall Sconces

Wall sconces provide additional lighting and can complement the chandelier. They are especially useful in larger rooms where more light is needed.

2. Recessed Lighting

Recessed lighting provides ambient light and can help to highlight the chandelier. It also ensures that the room is evenly lit.

3. Floor and Table Lamps

Floor and table lamps add task lighting and create a layered lighting effect. They can be used to highlight specific areas or provide additional light for reading and other activities.

Conclusion

Choosing the right chandelier for high ceilings can transform a space, adding elegance and functionality. By considering factors such as size, style, and hanging height, you can find the perfect chandelier to complement your room. Regular maintenance and complementary lighting ensure that your chandelier remains a stunning focal point for years to come. Whether you prefer a modern, rustic, or classic look, there is a chandelier that will enhance your high-ceilinged space beautifully.

How To Hang A Chandelier From A 20 Foot Ceiling: Tips and Techniques for Elegant Lighting Solutions

How To Hang A Chandelier From A 20 Foot Ceiling? Hanging a chandelier in a room with a 20-foot ceiling requires careful planning and the right tools. Whether you’re renovating your home or decorating a new space, installing a chandelier can add a touch of elegance and sophistication. This guide will walk you through the steps and considerations necessary to properly install a chandelier at such a height, ensuring both safety and aesthetic appeal.

How To Hang A Chandelier From A 20 Foot Ceiling

Understanding Your Space

Before diving into the installation process, it’s crucial to assess your ceiling height and the type of chandelier you want to install. A 20-foot ceiling provides ample space for a striking centerpiece like a chandelier, but it also presents unique challenges compared to standard ceiling heights. Factors such as the weight of the chandelier, the stability of the ceiling structure, and the accessibility for maintenance should all be taken into account.

Choosing the Right Chandelier

Selecting the perfect chandelier is not just about its design and aesthetic compatibility with your space; it’s also about practicality and functionality. For a 20-foot ceiling, consider a chandelier that has a significant vertical presence without overwhelming the room. Opt for designs that complement your overall interior theme while ensuring that the chandelier’s size is proportionate to the room dimensions.

Necessary Tools and Materials

Gathering the right tools and materials is essential for a smooth installation process. Here are some items you may need:

  • Ladder or Scaffold: To safely reach and work at the ceiling height.
  • Ceiling Brace or Support: Ensures the chandelier’s weight is adequately supported.
  • Wire Cutters and Strippers: For handling electrical connections.
  • Voltage Tester: To ensure electrical safety during installation.
  • Chandelier Lift: Facilitates raising and lowering the chandelier during installation and maintenance.

Steps to Install a Chandelier

Step 1: Turn Off Power

Before you begin any work, turn off the electricity to the area where you’ll be working. This can usually be done at the circuit breaker panel.

Step 2: Determine the Hanging Height

For a 20-foot ceiling, the ideal height for hanging a chandelier is typically around 7 to 8 feet from the floor. This allows the chandelier to be visible and appreciated without being too close to eye level.

Step 3: Install the Ceiling Brace

If your ceiling does not have a suitable junction box or support for the chandelier, you’ll need to install a ceiling brace or support system. Follow manufacturer instructions carefully to ensure proper installation.

Step 4: Assemble the Chandelier

Assemble the chandelier according to the manufacturer’s instructions. This may involve attaching arms, bulbs, and crystals (if applicable).

Step 5: Wiring and Hanging

Carefully wire the chandelier according to the provided instructions, ensuring all connections are secure and safe. You may need assistance to safely lift and hang the chandelier from the ceiling brace.

Step 6: Test and Adjust

Once the chandelier is hung, restore power and test its functionality. Make any necessary adjustments to the height or positioning to achieve the desired aesthetic and lighting effect.

Safety Considerations

Installing a chandelier from a 20-foot ceiling requires adherence to safety protocols:

  • Use Proper Equipment: Ensure ladders or scaffolds are stable and appropriate for the height.
  • Secure Connections: Double-check all electrical connections to prevent accidents.
  • Professional Help: Consider consulting a professional if you are unsure about any aspect of the installation process.

Maintenance Tips

Maintaining a chandelier on a 20-foot ceiling may require periodic cleaning and bulb replacement. Consider using a chandelier lift for easier maintenance access.

Read too: Striped Schoolhouse Ceiling Light Fixtures: Unveiling the Timeless Charm

Conclusion

How To Hang A Chandelier From A 20 Foot Ceiling? Hanging a chandelier from a 20-foot ceiling is a rewarding project that can elevate the ambiance of any room. By following these steps and guidelines, you can achieve a stunning and safely installed lighting fixture that enhances your home’s interior. Remember to prioritize safety, choose the right chandelier, and enjoy the transformative impact of a beautifully illuminated space.