Troubleshooting Water Coming Through Vent in Ceiling: Causes and Solutions

The last thing any homeowner wants to discover is water seeping through a vent in the ceiling. This unexpected issue can lead to significant damage and stress. In this article, we will delve into the problem of “Water Coming Through Vent in Ceiling” and provide essential insights to help you identify the causes and effective solutions to tackle this concerning situation.
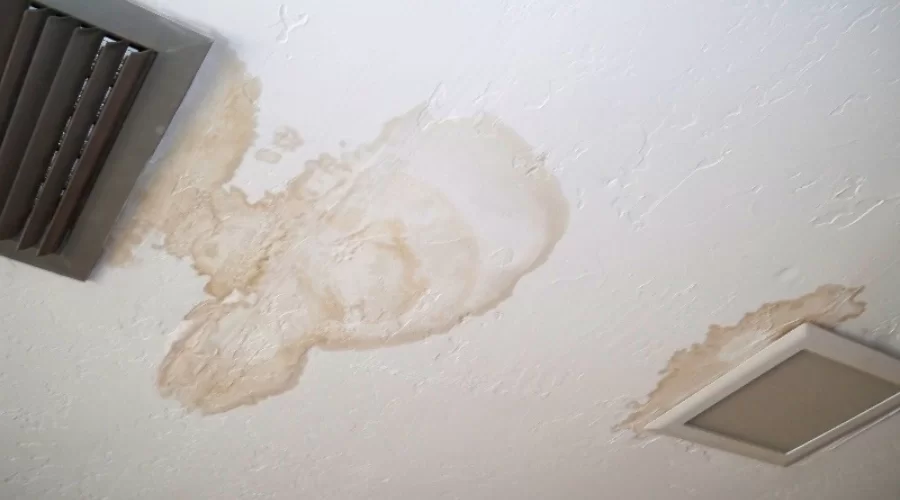
Water Coming Through Vent In Ceiling

Understanding the Dilemma of Water Through Ceiling Vents

Experiencing water infiltrating your home through a ceiling vent is unsettling, to say the least. To resolve this issue effectively, let’s first explore the potential reasons behind it:

1. Roof Leaks

Roof leaks are one of the primary culprits when water makes its way into your home through a ceiling vent. Damaged roofing materials, such as missing or cracked shingles, deteriorated flashing, or poorly sealed roof vents, can lead to water infiltration.

2. Plumbing Issues

Leaky plumbing within the structure of your home can be another cause. Water supply lines, drain pipes, or even HVAC condensate lines can leak and send water into your ceiling.

3. Condensation

In some cases, condensation can accumulate within the vent and eventually drip down into your home. This is more common in areas with high humidity or when warm, moist air meets a cooler surface.

4. Blocked Vents

Blocked or clogged vents can also cause water to back up and enter your home. This blockage could be due to debris, leaves, or even bird nests in the vent.

Addressing Water Through Ceiling Vents

If you’re facing the issue of water seeping through a ceiling vent, it’s crucial to take action promptly. Here are the steps to help you address the problem:

1. Identify the Source

The first step is to identify the source of the issue. Is it a roof leak, plumbing problem, condensation, or blocked vents? Thoroughly inspect your ceiling and attic to pinpoint the problem’s origin.

2. Roof Repairs

If a roof leak is the culprit, it’s advisable to contact a professional roofer. They can assess the extent of the damage and recommend the necessary repairs, which may include fixing the damaged area, replacing shingles, or sealing roof vents.

3. Plumbing Repairs

For plumbing-related issues, a plumber can determine the source of the leak and repair the damaged pipes, connections, or fixtures accordingly.

4. Vent Maintenance

Proper maintenance of the vent is essential to prevent blockages and condensation issues. Regularly clean and inspect your vents to ensure they are free from obstructions.

Prevention is Key

Preventing water from infiltrating your home through ceiling vents is the best approach. Here are some proactive measures to minimize the risk:

  1. Regular Roof Inspections: Schedule routine roof inspections to catch and address any potential issues early.
  2. Plumbing Maintenance: Keep plumbing systems in good working order and promptly address any leaks or issues.
  3. Proper Vent Maintenance: Regularly clean and inspect vents to ensure they remain free from blockages or condensation.

Conclusion

“Water Coming Through Vent in Ceiling” is a distressing issue for homeowners. By understanding the potential causes and taking proactive measures, you can safeguard your home from this unexpected problem. If you find yourself facing this issue, acting promptly to identify and address the source of the problem is crucial to prevent further damage. Don’t let water through your ceiling vents disrupt your peace of mind; take action to keep your home dry and secure.
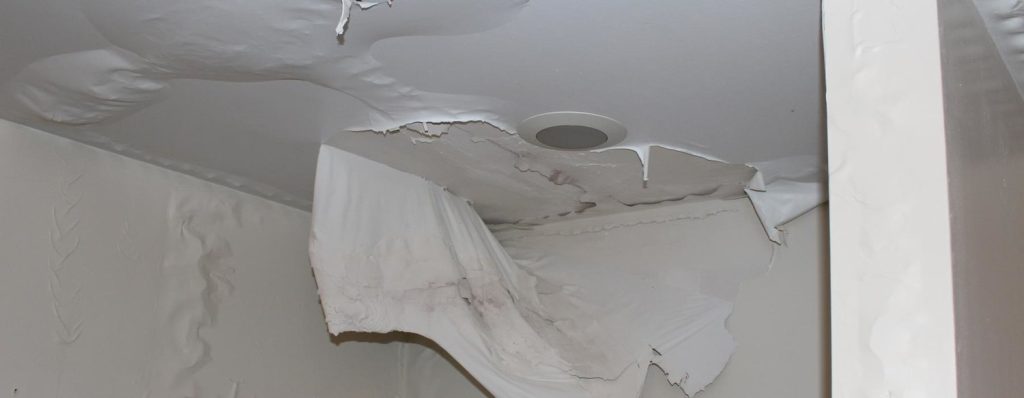
Salvaging Your Sanctuary: How To Dry Water Leak In Ceiling

Discovering a water leak in your ceiling can be a distressing experience. Whether it’s caused by a burst pipe, a leaking roof, or other sources, addressing the issue promptly is crucial to prevent further damage and mold growth. In this article, we’ll explore how to dry a water leak in your ceiling effectively, so you can restore your home to its safe and comfortable state.

How To Dry Water Leak In Ceiling

The First Steps

Upon discovering a water leak in your ceiling, it’s essential to take immediate action to minimize damage and prevent potential hazards.

Identify and Address the Source

  1. Shut Off the Water Supply:
    • If the leak is caused by a plumbing issue, turn off the water supply to the affected area or the entire house to prevent further water from entering the ceiling.
  2. Inspect the Roof:
    • If the leak is due to a damaged roof, assess the roof’s condition to determine the cause of the leak. Missing shingles, damaged flashing, or clogged gutters are common culprits.
  3. Check for Damaged Pipes:
    • Inspect the plumbing system to identify damaged pipes, connections, or fixtures that may be causing the leak.

Safety Precautions

Before you start drying the water leak, it’s crucial to ensure safety:

  1. Turn Off Electricity:
    • To avoid electrical hazards, turn off the power to the affected area, especially if there are light fixtures or electrical outlets in the vicinity of the leak.
  2. Wear Protective Gear:
    • Put on gloves, safety goggles, and a mask to protect yourself from potential contaminants in the water.

Drying the Ceiling

To dry a water leak in your ceiling, follow these steps:

  1. Remove Excess Water:
    • Use a bucket, towels, or a wet/dry vacuum to remove as much standing water as possible from the affected area.
  2. Create Ventilation:
    • Open windows and doors to promote air circulation, aiding in the drying process.
  3. Use Dehumidifiers:
    • Place dehumidifiers in the room to extract excess moisture from the air.
  4. Fans and Air Movers:
    • Position fans and air movers strategically to direct air towards the wet area, expediting the drying process.
  5. Remove Wet Materials:
    • If the ceiling materials are extensively damaged, such as sagging drywall or insulation, it may be necessary to remove and replace them.

Monitor for Mold

Even after drying the ceiling, it’s essential to monitor for any signs of mold growth, as it can develop quickly in damp conditions. If you notice any mold or mildew, it’s crucial to address it promptly.

Preventative Measures

To prevent future water leaks in your ceiling, consider these steps:

  1. Regular Maintenance:
    • Schedule routine inspections of your roof, plumbing, and ceiling to catch potential issues before they become major problems.
  2. Seal Leaks and Cracks:
    • Seal any gaps, leaks, or cracks in your roof, walls, or plumbing to prevent water intrusion.
  3. Insulate Pipes:
    • Insulate pipes to prevent freezing in cold weather, which can lead to pipe bursts and leaks.

Conclusion

Drying a water leak in your ceiling is a process that requires immediate attention and the right approach to prevent further damage and mold growth. By taking quick and effective action, you can protect your home and ensure that it remains a safe and comfortable space for you and your family. Regular maintenance and preventive measures are key to reducing the risk of future ceiling leaks.