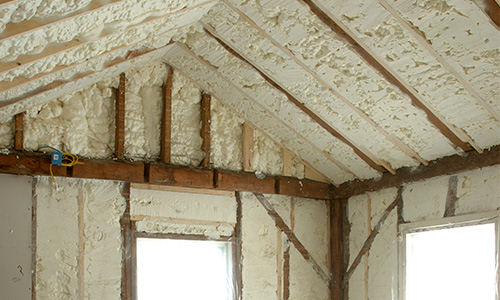
Spray foam insulation has become a game-changer in the world of home improvement, and its application on ceilings is gaining widespread attention. In this detailed exploration, we will delve into the advantages, considerations, and process of using “Spray Foam On Ceiling” for enhanced insulation. If you’re curious about upgrading your home’s insulation, this guide is a must-read.

Understanding the Power of Spray Foam on Ceiling:
Spray foam insulation involves the application of a specialized material that expands and hardens, creating a seamless and airtight barrier. When applied to ceilings, this method offers a range of benefits that go beyond traditional insulation methods.
Let’s dive into the specifics of using spray foam on ceilings, exploring its advantages, considerations, and the step-by-step process for a successful application.
Advantages of Spray Foam on Ceiling:
- Seamless Coverage:
- Unlike traditional insulation materials, spray foam expands to fill gaps and crevices, providing a seamless and airtight barrier. This ensures that every inch of your ceiling is effectively insulated.
- High R-Value:
- Spray foam insulation boasts a high R-value, indicating its exceptional thermal resistance. This means it effectively resists heat transfer, keeping your home comfortable and energy-efficient.
- Moisture Resistance:
- Spray foam creates a moisture-resistant barrier, preventing issues like mold and mildew growth. This is particularly advantageous in areas prone to high humidity levels.
- Longevity and Durability:
- Once applied, spray foam insulation is known for its longevity and durability. It doesn’t settle or compress over time, maintaining its effectiveness for years.
Considerations Before Application:
Before opting for spray foam on your ceiling, there are several considerations to keep in mind to ensure a successful application.
- Professional Installation:
- While some homeowners may consider DIY insulation projects, professional installation is highly recommended for spray foam. Trained technicians ensure proper application and safety.
- Ventilation Requirements:
- Adequate ventilation is crucial during and after the application process. Ensure proper airflow to allow the foam to cure and release any off-gassing.
- Budget Considerations:
- Spray foam insulation tends to be more expensive than traditional options. However, the long-term benefits often outweigh the initial investment. Consider your budget and the potential energy savings.
The Application Process:
Now, let’s explore the step-by-step process of applying spray foam on your ceiling for optimal insulation.
- Preparation:
- Clear the area of any obstacles and ensure proper ventilation. Cover surfaces that should not receive the foam, such as windows and doors.
- Safety Gear:
- Wear appropriate safety gear, including protective clothing, goggles, and a respirator, as spray foam can be irritating to the skin and eyes.
- Application:
- Using specialized equipment, apply the spray foam evenly across the ceiling. Ensure uniform coverage, especially in corners and edges.
- Curing Time:
- Allow the foam to cure as per the manufacturer’s instructions. During this time, proper ventilation is essential to dissipate any fumes.
- Inspection:
- After the foam has cured, inspect the application to ensure even coverage. Trim any excess foam if necessary.
Read too: How Gutters Causing Ceiling Leak Can Wreak Havoc in Your Home? Unveiling the Hidden Dangers
Conclusion:
In conclusion, considering “Spray Foam On Ceiling” for insulation is a wise decision for homeowners looking to enhance energy efficiency and comfort. By understanding the advantages, considerations, and application process, you can make informed choices when it comes to upgrading your home’s insulation. Always prioritize professional installation for optimal results and long-term benefits.