Mobile Home Ceiling Repair: Tips, Tools, and Techniques for a Perfect Fix

Mobile homes come with unique maintenance needs, especially when it comes to ceiling repair. Common issues like water damage, sagging, or cracked ceiling panels can detract from your home’s appearance and even lead to further problems if not addressed promptly. Fortunately, mobile home ceiling repair is achievable with the right tools, materials, and a bit of guidance. This article will walk you through everything you need to know about repairing a mobile home ceiling, from identifying issues and selecting materials to executing the repair and preventing future damage.

Mobile Home Ceiling Repair

Common Issues with Mobile Home Ceilings

Mobile homes often experience ceiling issues that are unique due to their design, materials, and exposure to weather elements. Here are some of the most common issues homeowners face:

1. Water Damage

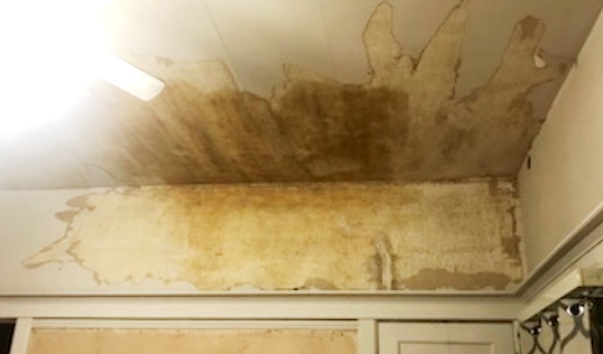
Water damage is one of the most common and challenging problems in mobile home ceilings. It can occur due to leaks in the roof, poor insulation, or condensation buildup. This damage often appears as dark spots, sagging, or even mold growth if the water damage is extensive.

2. Sagging Ceilings

Over time, some ceilings may begin to sag due to age, moisture, or poor installation. Sagging is most common in older mobile homes with ceilings made of gypsum or other soft materials that are prone to wear and tear.

3. Cracks and Holes

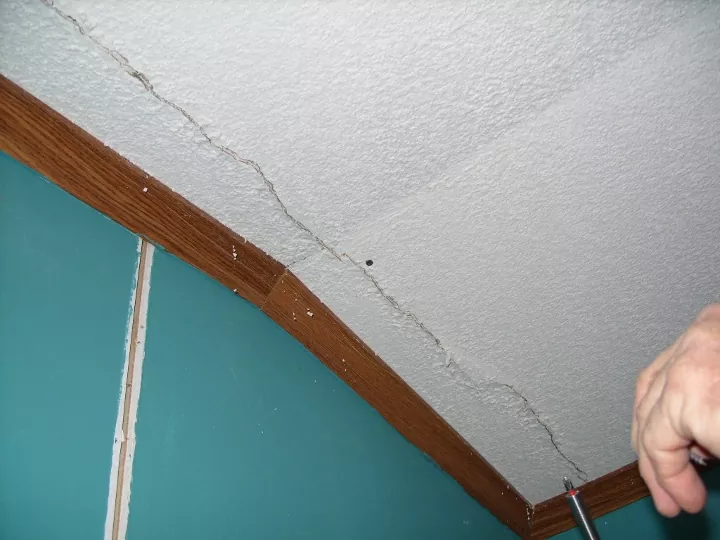
Cracks or holes in a mobile home ceiling can result from impact, settling, or even temperature changes that cause the materials to expand and contract. These issues not only affect the appearance of the ceiling but can also lead to further structural damage if left unattended.

4. Stains and Discoloration

Whether caused by smoke, water, or age, stains and discoloration are common issues that make ceilings look worn out. Though they may seem minor, these stains can be difficult to cover without the right materials and techniques.

5. Peeling or Blistering Paint

Humidity and poor ventilation can cause the paint on mobile home ceilings to peel or blister. This is especially common in kitchens and bathrooms where moisture levels are high. Not only does this affect the look of the ceiling, but it can also make it more susceptible to other forms of damage.

Read too: Kitchen Lighting For A Vaulted Ceiling: Illuminating Your Space with Style and Functionality


Mobile Home Ceiling Repair: A Step-by-Step Guide

Step 1: Identify the Source of Damage

Before starting any ceiling repair, it’s essential to determine the cause of the damage. For example, if you’re dealing with water damage, you’ll need to locate and fix the source of the leak first. This could be a roof leak, plumbing issue, or condensation buildup. Addressing the root cause will prevent future issues and ensure your repairs are long-lasting.

Step 2: Gather Necessary Materials and Tools

The next step is gathering the right materials and tools for your repair. Here’s a list of items you might need, depending on the type of repair:

  • Ceiling tiles or panels (for replacements)
  • Putty knife or spackle
  • Joint compound
  • Drywall screws
  • Sandpaper
  • Paint and primer
  • Caulk gun and caulk (for sealing)
  • Protective gear (gloves, dust mask)

Step 3: Prepare the Ceiling for Repair

Before working on the ceiling, make sure to protect your furniture and floors by covering them with plastic sheets or drop cloths. If there are sagging areas, remove the affected panels or tiles carefully. For water-damaged sections, be sure to dry out the area completely before beginning repairs.

Step 4: Fix the Ceiling Based on the Issue

Here’s a look at specific repair techniques based on common ceiling issues in mobile homes.

Repairing Water-Damaged Ceilings

  1. Dry Out the Area: Use a fan or dehumidifier to remove any remaining moisture in the damaged area.
  2. Remove Damaged Material: If the damage is extensive, remove the affected ceiling panel or tile and replace it with a new one.
  3. Apply Joint Compound: For smaller areas, apply a joint compound to cover any stains or discoloration after the area is dry. Sand it down once it’s set.
  4. Prime and Paint: To finish, apply primer and paint to match the rest of the ceiling.

Fixing Sagging Ceilings

  1. Tighten the Panels: Use drywall screws to reattach the ceiling panel to the frame. Space the screws evenly to distribute support.
  2. Add Additional Support: If the panel is still sagging, add a furring strip or ceiling joist for additional support.
  3. Refinish: Once secure, apply joint compound and paint as needed to create a seamless look.

Patching Cracks and Holes

  1. Apply Patch Material: Use a putty knife to fill cracks or holes with joint compound or spackle.
  2. Sand Smooth: Once the patch material is dry, sand it down to create a smooth, even surface.
  3. Prime and Paint: Finish by applying primer and paint to blend the patched area with the rest of the ceiling.

Handling Stains and Discoloration

  1. Use Stain-Blocking Primer: Apply a stain-blocking primer to cover the discolored area. This will prevent the stain from showing through the paint.
  2. Paint Over: Once the primer is dry, paint over the area to match the rest of the ceiling.

Preventing Future Ceiling Issues in Mobile Homes

Taking preventive measures can help protect your mobile home ceiling from future issues. Here are a few tips to keep your ceiling in good shape:

1. Maintain Proper Ventilation

Poor ventilation can lead to moisture buildup, which can cause various ceiling issues. Use exhaust fans in the kitchen and bathroom to prevent humidity buildup, and consider a dehumidifier if you live in a particularly humid area.

2. Inspect the Roof Regularly

Many ceiling problems stem from roof leaks. Regularly inspect your mobile home roof for signs of damage, such as missing shingles or cracked seals, and make repairs as necessary.

3. Use Water-Resistant Materials

In areas prone to moisture, such as bathrooms or kitchens, consider using water-resistant materials like vinyl ceiling panels. These materials are less likely to absorb moisture and can prevent long-term water damage.

4. Seal Cracks Promptly

If you notice small cracks or gaps in your ceiling, address them quickly. Use caulk or joint compound to fill cracks before they expand and cause more significant issues.


Choosing the Right Ceiling Materials for Mobile Home Ceiling Repair

When repairing a mobile home ceiling, selecting the right materials is essential for a lasting fix. Here are some of the best options:

1. Drywall Panels

Drywall panels are a common choice for ceiling repair because they are affordable, easy to install, and provide a smooth finish. However, they are susceptible to water damage, so they may not be ideal for high-moisture areas.

2. Vinyl Ceiling Panels

Vinyl panels are water-resistant, durable, and easy to clean, making them an excellent choice for bathrooms and kitchens. They also come in a variety of finishes to suit different design preferences.

3. Acoustic Tiles

Acoustic ceiling tiles are designed to reduce noise and provide a clean, modern look. They are ideal for living areas where sound control is essential, and they can be installed directly onto the existing ceiling frame.

4. Wood Panels

Wood panels can add warmth and character to a mobile home. However, wood is prone to warping in high-humidity areas, so it may require regular maintenance to prevent damage.


DIY vs. Professional Mobile Home Ceiling Repair

Deciding between DIY and professional repair depends on the complexity of the ceiling damage. Here’s a quick comparison:

  • DIY: Ideal for minor repairs, such as small cracks, stains, or holes. DIY repair is cost-effective and allows you to work at your own pace.
  • Professional: Recommended for extensive water damage, structural issues, or major sagging. Professional contractors have the experience and tools necessary to handle larger repairs safely and efficiently.

Conclusion

Mobile home ceiling repair doesn’t have to be a daunting task. With the right materials, tools, and techniques, you can effectively restore your ceiling and improve the appearance and functionality of your mobile home. Whether you’re dealing with water damage, cracks, or sagging, following the steps outlined in this guide will help you achieve a successful repair. Remember to address any underlying issues first, such as leaks or poor ventilation, to ensure your repairs last. By staying proactive with maintenance and repairs, you can enjoy a safe and beautiful ceiling in your mobile home for years to come.

Cleaning Suspended Ceiling Tiles: Tips and Techniques for a Fresh Look

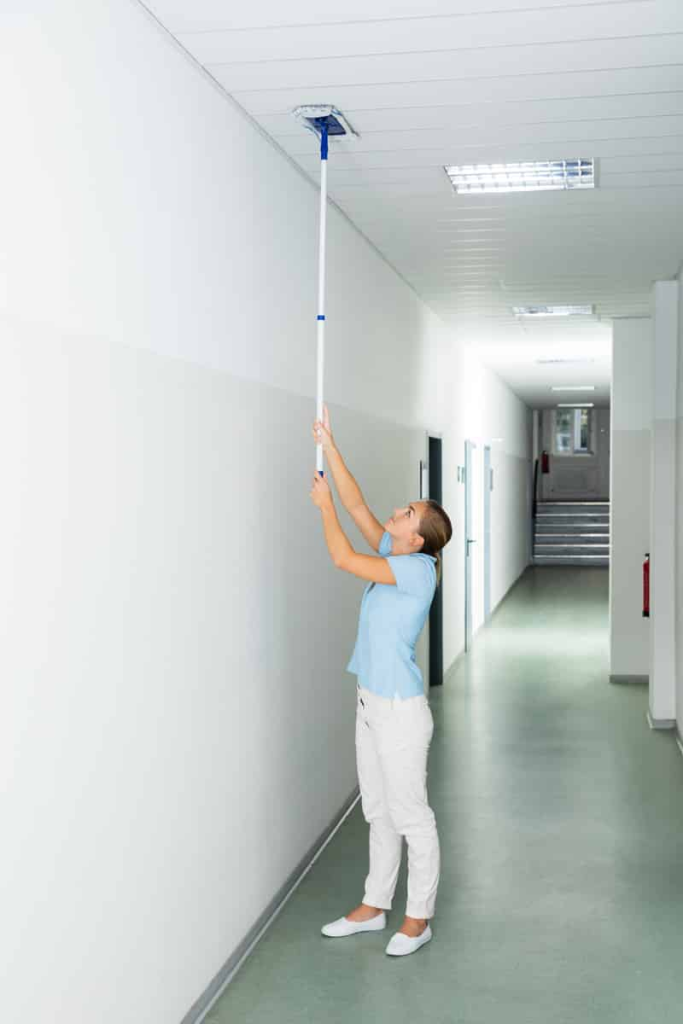
Suspended ceiling tiles are an excellent choice for many commercial and residential spaces. They offer acoustic benefits, aesthetic appeal, and can hide unsightly wiring and ductwork. However, over time, dust, dirt, and stains can accumulate on these tiles, detracting from their appearance and overall cleanliness. If you’re looking for effective methods to keep your suspended ceiling tiles looking new, this guide will provide valuable insights and practical tips for Cleaning Suspended Ceiling Tiles.

Cleaning Suspended Ceiling Tiles

Understanding Suspended Ceiling Tiles

What Are Suspended Ceiling Tiles?

Suspended ceiling tiles, also known as drop ceiling tiles, are lightweight panels that hang below the structural ceiling. They are typically made from materials like mineral fiber, metal, or PVC, and are installed in a grid system. This design allows for easy access to the space above the ceiling, making it an ideal choice for offices, schools, and homes.

Read too: Shiplap Ceiling in Kitchen: A Timeless Trend for a Stylish and Cozy Space

Benefits of Suspended Ceiling Tiles

  1. Acoustic Control: Many suspended ceiling tiles are designed to absorb sound, making them ideal for offices and conference rooms where noise control is essential.
  2. Aesthetic Variety: They come in a wide range of designs, colors, and finishes, allowing you to customize your space according to your style.
  3. Easy Access: The grid system allows for easy removal of tiles, providing convenient access to plumbing, wiring, and ductwork above the ceiling.
  4. Cost-Effective: Installing suspended ceiling tiles is often more affordable than other ceiling options, and they can be replaced individually if damaged.
  5. Insulation: Some tiles also provide thermal insulation, helping to maintain temperature and reduce energy costs.

Why Clean Suspended Ceiling Tiles?

Over time, suspended ceiling tiles can accumulate dust, grime, and stains, making them look dull and unappealing. Regular cleaning is essential for several reasons:

  • Aesthetic Appeal: Clean tiles enhance the overall appearance of your space, creating a welcoming atmosphere for employees and visitors.
  • Health and Hygiene: Dust and allergens can build up on ceiling tiles, potentially affecting indoor air quality. Cleaning helps minimize these health risks.
  • Longevity: Regular maintenance can extend the lifespan of your ceiling tiles, preventing the need for premature replacement.
  • Cost Efficiency: Keeping your tiles clean can reduce long-term maintenance costs and improve the efficiency of your HVAC system.

Cleaning Suspended Ceiling Tiles: Step-by-Step Guide

1. Gather Your Cleaning Supplies

Before you start the cleaning process, gather the necessary supplies:

  • Soft-bristle broom or vacuum with a brush attachment
  • Mild detergent or all-purpose cleaner
  • Bucket
  • Warm water
  • Sponge or soft cloth
  • Ladder (if necessary)
  • Protective gear (gloves, mask)

2. Prepare the Area

  1. Clear the Space: Remove any furniture or items under the area you will be cleaning to provide clear access.
  2. Dust the Tiles: Use a soft-bristle broom or a vacuum with a brush attachment to gently remove dust and cobwebs from the surface of the tiles. Be careful not to damage the tiles during this process.

3. Create a Cleaning Solution

  1. Mix the Cleaner: In a bucket, mix a mild detergent or all-purpose cleaner with warm water. Avoid harsh chemicals that can damage the tiles or leave residues.
  2. Test the Solution: Before applying the solution to the entire surface, test it on a small, inconspicuous area of the tile to ensure it does not cause discoloration or damage.

4. Clean the Tiles

  1. Wipe the Tiles: Using a sponge or soft cloth, dip it in the cleaning solution and wring it out to remove excess liquid. Wipe the tiles gently, working in small sections to avoid saturating them.
  2. Rinse the Tiles: After cleaning, rinse the sponge or cloth in clean water and wipe the tiles again to remove any soapy residue.
  3. Dry the Tiles: Use a dry cloth to wipe down the tiles and remove any moisture. This step is crucial to prevent mold or mildew growth.

5. Address Stains

  1. Identify the Stain: Different stains may require different cleaning approaches. Common stains include water marks, smoke stains, and grease.
  2. Tackle Stubborn Stains: For tough stains, you may need to use a specialized cleaner or a mixture of vinegar and water. Apply the solution to the stained area, let it sit for a few minutes, then gently scrub with a soft brush.
  3. Repeat as Necessary: If the stain persists, repeat the process until it is removed. Be patient, as some stains may take multiple attempts to eliminate completely.

6. Inspect and Replace

After cleaning, inspect your tiles for any signs of damage, such as cracks or water stains. If you notice any severely damaged tiles, consider replacing them to maintain the appearance and integrity of your ceiling.

Maintenance Tips for Suspended Ceiling Tiles

Regular Dusting

To minimize the buildup of dirt and dust, regularly dust your suspended ceiling tiles using a soft broom or vacuum. This will make your deep cleaning sessions easier and less frequent.

Monitor Humidity Levels

High humidity can lead to mold and mildew growth. Keep an eye on humidity levels in your space, and use dehumidifiers if necessary to maintain a dry environment.

Inspect for Leaks

Check for water stains or leaks from above the ceiling tiles. Address any plumbing or roofing issues promptly to prevent damage to the tiles.

Use Ceiling Tile Protectants

Consider applying a ceiling tile protectant that can help repel dust and moisture, making future cleaning easier.

Professional Cleaning Services

If your suspended ceiling tiles require extensive cleaning or if you are unsure about the cleaning process, consider hiring professional cleaning services. They have specialized tools and techniques to restore your tiles effectively.

Conclusion

Cleaning suspended ceiling tiles may seem daunting, but with the right approach and tools, it can be a straightforward task. Regular maintenance and cleaning will not only enhance the appearance of your space but also improve indoor air quality and extend the life of your tiles. By following the tips and techniques outlined in this guide, you can ensure that your suspended ceiling tiles remain clean, fresh, and inviting for years to come.

Mold on Ceiling Tiles: Causes, Prevention, and Solutions

Mold on ceiling tiles can be a significant issue in both residential and commercial spaces. It not only affects the aesthetics of your environment but can also pose health risks and structural damage if not addressed promptly. In this comprehensive guide, we will explore the causes of mold on ceiling tiles, effective methods for removal, and preventative measures to keep your space mold-free.

Mold On Ceiling Tiles

Understanding Mold on Ceiling Tiles

What Is Mold and Why Does It Grow on Ceiling Tiles?

Mold is a type of fungus that thrives in moist, warm environments. It can grow on various surfaces, including ceiling tiles, if the conditions are right. Here’s why mold might develop on your ceiling tiles:

  • Moisture: Mold needs moisture to grow. Ceiling tiles can become a breeding ground if there are leaks, high humidity, or condensation.
  • Poor Ventilation: Insufficient ventilation can lead to high humidity levels, which in turn can encourage mold growth.
  • Temperature: Warm temperatures combined with moisture can accelerate mold growth.
  • Organic Material: Ceiling tiles, particularly those made from materials like fiberglass or mineral fiber, can provide nutrients for mold spores..

Read too: Bathroom Flooded Through the Ceiling: A Comprehensive Guide

Identifying Mold on Ceiling Tiles

Mold on ceiling tiles may not always be immediately visible. It can appear as:

  • Discoloration: Dark spots or patches, often green, black, or brown.
  • Musty Odor: A persistent, unpleasant smell in the room.
  • Texture Changes: The surface of the tiles may become fuzzy or slimy.

Causes of Mold on Ceiling Tiles

To effectively address mold issues, it’s essential to understand the underlying causes. Here are some common contributors to mold on ceiling tiles:

1. Water Leaks

Leaking pipes or roof leaks can introduce moisture to ceiling tiles, creating an environment conducive to mold growth.

  • Plumbing Issues: Check for leaks in the plumbing above the ceiling. Even small leaks can contribute to mold.
  • Roof Damage: Inspect the roof for damage or missing shingles that could allow water to infiltrate.

2. High Humidity

High indoor humidity levels can contribute to mold growth. This is often caused by:

  • Inadequate Ventilation: Rooms without proper ventilation, such as bathrooms or kitchens, can retain excess moisture.
  • Cooking and Showering: Activities that produce steam can increase humidity levels.

3. Condensation

Condensation occurs when warm, moist air comes into contact with a cooler surface. On ceiling tiles, this can happen due to:

  • Poor Insulation: Inadequate insulation can cause temperature differentials that lead to condensation.
  • Temperature Fluctuations: Frequent changes in temperature can exacerbate condensation problems.

4. Flooding

Flooding or water damage from storms or plumbing failures can lead to extensive mold issues on ceiling tiles.

  • Immediate Action: After a flood, it’s crucial to address water damage quickly to prevent mold growth.

How to Remove Mold from Ceiling Tiles

Removing mold from ceiling tile requires careful handling to ensure that the mold is effectively eradicated and does not return. Here’s a step-by-step guide:

1. Safety Precautions

Before starting the removal process, take necessary safety precautions:

  • Protective Gear: Wear gloves, a mask, and goggles to protect yourself from mold spores and cleaning agents.
  • Ventilation: Ensure the area is well-ventilated to avoid inhaling mold spores or fumes from cleaning products.

2. Identify the Extent of the Problem

Determine how widespread the mold is:

  • Small Areas: For minor mold issues, cleaning the affected tiles may suffice.
  • Extensive Growth: If mold covers a large area or if the tiles are heavily contaminated, they may need to be replaced.

3. Cleaning Solutions

For cleaning mold off ceiling tiles, use one of the following solutions:

  • Vinegar Solution: Mix equal parts white vinegar and water. Apply to the affected area, let it sit for 10 minutes, and then scrub with a brush.
  • Bleach Solution: Mix 1 cup of bleach with 1 gallon of water. Apply to the affected area, let it sit for 15 minutes, and then scrub with a brush. Note: Ensure proper ventilation when using bleach.
  • Commercial Cleaners: Use mold-specific commercial cleaners available in hardware stores.

4. Cleaning Method

  • Scrubbing: Use a brush or sponge to scrub the affected areas, ensuring that you remove all visible mold.
  • Rinsing: Rinse the tiles with clean water to remove any cleaning solution residue.
  • Drying: Thoroughly dry the area to prevent mold from returning. Use fans or dehumidifiers to speed up the drying process.

5. Replacement

If cleaning is not effective or if the tiles are severely damaged:

  • Remove and Replace: Remove the affected tiles and replace them with new ones.
  • Inspect the Area: Ensure that the underlying issue is resolved before installing new tiles.

Preventing Mold on Ceiling Tiles

Prevention is key to avoiding mold problems. Here are some effective strategies:

1. Address Moisture Issues

  • Fix Leaks: Regularly inspect and repair any leaks in the roof, plumbing, or walls.
  • Control Humidity: Use dehumidifiers or air conditioners to maintain indoor humidity levels below 60%.

2. Improve Ventilation

  • Install Vents: Ensure proper ventilation in high-humidity areas such as bathrooms and kitchens.
  • Use Exhaust Fans: Install exhaust fans to reduce moisture buildup from cooking and showering.

3. Insulate Properly

  • Insulation: Ensure that your home is adequately insulated to prevent condensation on ceiling tiles.
  • Seal Gaps: Seal any gaps or cracks in windows, doors, and walls to prevent warm air from coming into contact with cold surfaces.

4. Regular Inspections

  • Routine Checks: Regularly inspect your ceiling tiles and other areas prone to mold for early signs of moisture or mold.
  • Professional Assessment: Consider periodic professional inspections, especially if you have had previous mold issues.

Conclusion: Maintaining a Mold-Free Environment

Mold on ceiling tiles can be a significant concern, but with proper understanding and proactive measures, it’s manageable. By addressing moisture issues, improving ventilation, and performing regular inspections, you can prevent mold growth and maintain a clean, healthy environment.

Should you encounter mold on your ceiling tile, following the recommended cleaning and maintenance steps will help restore your space and prevent future issues. Remember, if mold problems persist or are extensive, consulting a professional mold remediation specialist is advisable to ensure that all mold is effectively removed and underlying issues are addressed.

How to Fix a Mobile Home Ceiling Like a Pro? Expert Guide

Mobile homes offer convenience and flexibility, but like any structure, they require maintenance and occasional repairs. Among the common issues homeowners may encounter is ceiling damage. Knowing how to fix a mobile home ceiling can save you time and money, ensuring your living space remains comfortable and safe. This comprehensive guide provides step-by-step instructions and expert tips for addressing ceiling problems in mobile homes effectively.

How To Fix A Mobile Home Ceiling

Introduction

The ceiling of a mobile home serves both functional and aesthetic purposes. It provides insulation, soundproofing, and support for fixtures while contributing to the overall look and feel of the interior. Over time, factors such as water leaks, structural movement, and wear and tear can lead to ceiling damage. Learning how to fix a mobile home ceiling empowers homeowners to tackle these issues promptly, preserving the integrity of their living space.

Identifying Common Ceiling Problems

Before diving into repairs, it’s essential to identify the specific issues affecting your mobile home ceiling. Common problems include:

  1. Water Damage: Leaks from the roof or plumbing fixtures can cause water stains, sagging, and mold growth on the ceiling.
  2. Cracks and Holes: Structural settling or impact damage may result in cracks, holes, or bulges in the ceiling surface.
  3. Sagging Panels: Over time, ceiling panels may become loose or sag due to inadequate support or moisture absorption.
  4. Insulation Issues: Damage to insulation materials can compromise energy efficiency and indoor comfort.

How to Fix a Mobile Home Ceiling

  1. Assess the Damage: Begin by inspecting the ceiling carefully to determine the extent of the damage. Take note of any water stains, cracks, or sagging areas.
  2. Address Water Leaks: If water damage is present, identify and repair the source of the leak before proceeding with ceiling repairs. This may involve fixing roof leaks, sealing plumbing connections, or addressing condensation issues.
  3. Repair Cracks and Holes: Use a suitable patching compound to fill in cracks and holes in the ceiling. Smooth the surface with sandpaper once the compound has dried, then apply a coat of primer to ensure proper adhesion.
  4. Reinforce Sagging Panels: For sagging ceiling panels, install additional support beams or braces to provide structural reinforcement. Secure loose panels in place using construction adhesive or screws.
  5. Replace Damaged Panels: If ceiling panels are beyond repair, carefully remove them and replace them with new ones of the same size and style. Be sure to match the existing materials for a seamless finish.
  6. Insulate as Needed: Address any insulation issues by adding or replacing insulation materials above the ceiling panels. This helps improve energy efficiency and maintains a comfortable indoor environment.

Conclusion

In conclusion, knowing how to fix a mobile home ceiling empowers homeowners to address common issues and maintain the integrity of their living space. By identifying and addressing problems promptly, you can prevent further damage and ensure a comfortable and safe environment for you and your family.

Read too: Exploring the Efficiency of Radiant Ceiling Heater Electric: A Comprehensive Guide

Understanding and Tackling Ceiling Brown Water Stains for a Pristine Home Environment: Unveiling the Mystery

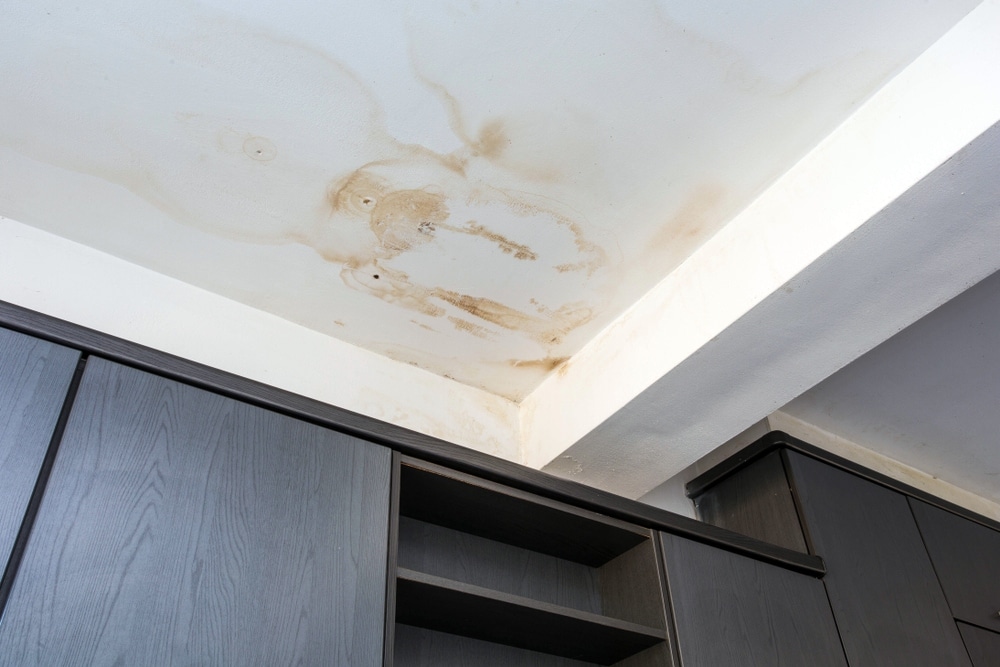
Brown water stains on the ceiling can be an alarming sight, hinting at potential water damage and underlying issues. In this comprehensive guide, we delve into the intricacies of “Ceiling Brown Water Stains,” exploring their causes, implications, and effective strategies for prevention and remediation. Arm yourself with knowledge to restore your ceiling and maintain a healthy living space.

Ceiling Brown Water Stains

Introduction: Decoding the Signs of Trouble – Ceiling Brown Water Stains

Brown water stains are not just unsightly; they often indicate a more significant issue within your home. This article aims to demystify the presence of these stains, offering insights into the various factors that contribute to their appearance and the steps homeowners can take to address the root causes.

Understanding

Brown water stains are often the result of water infiltrating the structure of your home. Identifying the source of the water intrusion is crucial in effectively addressing and preventing these stains. From roof leaks to plumbing issues, understanding the potential causes is the first step towards a stain-free ceiling.

Common Causes

To combat the issue of brown water stains, it’s essential to identify the underlying causes. Roof leaks, burst pipes, condensation, and even faulty plumbing can contribute to the formation of these stains. We explore each potential cause in detail, empowering homeowners to troubleshoot and take preventative measures.

Implications of Neglecting Ceiling Brown Water Stains

Ignoring brown water stains can lead to more significant problems, including structural damage, mold growth, and compromised indoor air quality. This section emphasizes the importance of addressing the issue promptly to avoid escalating damages and costly repairs.

Effective Strategies for Removing Ceiling Brown Water Stains

Remediation is a crucial aspect of dealing with brown water stains. From assessing the extent of the damage to choosing the right cleaning solutions, this section provides practical steps for homeowners to undertake the stain removal process. Additionally, we discuss when it might be necessary to seek professional help for more complex cases.

Preventive Measures for a Stain-Free Ceiling

Prevention is key in maintaining a stain-free ceiling. Simple maintenance practices, regular inspections, and prompt repairs can significantly reduce the risk of water stains. This section offers practical tips to help homeowners safeguard their ceilings and prevent water-related issues.

DIY vs. Professional Assistance: Making Informed Choices

While some cases of brown water stains may be manageable through do-it-yourself methods, others require professional intervention. This section helps homeowners assess the severity of the issue and make informed decisions on whether to tackle the problem independently or seek the expertise of professionals.

Read too: Understanding and Addressing a Leaky Ceiling in Your Apartment: Navigating the Drips

Conclusion: Restoring Your Ceiling to Pristine Condition

In conclusion, understanding and addressing ceiling brown water stains are crucial for maintaining a healthy and aesthetically pleasing home environment. By recognizing the signs, identifying causes, and implementing effective remediation and prevention strategies, homeowners can ensure their ceilings remain free from unsightly brown water stains.

Unveiling the Mystery of Small Brown Spots on Ceiling: Causes and Solutions

Small brown spots on the ceiling can be an unwelcome sight, leaving homeowners and tenants concerned about their origins and implications. In this comprehensive guide, we will delve into the various causes behind these spots and provide insights into how to address and prevent them, ensuring the health and integrity of your living space.

Small Brown Spots On Ceiling

Potential Causes

Water Stains

  1. Roof Leaks: One of the most common causes of brown spots on the ceiling is a leaky roof. These stains are often accompanied by dampness and can worsen during rain or snow.
  2. Plumbing Leaks: Leaky pipes or plumbing issues can lead to water stains on the ceiling. These stains may appear brown, particularly if they contain rust or sediment.

Mold and Mildew Growth

  1. Excessive Moisture: High humidity or moisture in the air can lead to mold and mildew growth on the ceiling, resulting in brown spots. Proper ventilation is crucial in preventing this issue.

Smoke or Soot Residue

  1. Smoking: If smoking has occurred indoors, it can leave behind brown spots on the ceiling due to the accumulation of smoke and soot.
  2. Fireplace Use: Fireplaces, wood-burning stoves, or candles can release soot into the air, leading to brown spots on the ceiling above.

Aging and Wear and Tear

  1. Age-Related Stains: Over time, ceilings may develop brown spots as a natural consequence of aging and wear and tear. These spots can result from material degradation or exposure to environmental factors.

Small Brown Spots on Ceiling: How to Address Them

Identifying the Cause

  1. Inspect for Leaks: Check the roof, plumbing, and any potential sources of moisture to determine if water stains are causing the brown spots. Address any leaks promptly.
  2. Ventilation Improvement: Improve ventilation in areas prone to mold and mildew growth. Use dehumidifiers or exhaust fans to reduce excess humidity.

Cleaning and Remediation

  1. Cleaning: Remove soot or smoke residue using appropriate cleaning products. For water stains, clean the affected area to prevent further damage.
  2. Mold Removal: If mold or mildew is the cause, it’s essential to remove it safely to prevent health issues. Wear protective gear and follow proper remediation procedures.

Ceiling Repainting*

  1. Repainting: In many cases, repainting the ceiling can cover brown spots effectively. Use a high-quality stain-blocking primer before applying paint to prevent the spots from bleeding through.

Small Brown Spots on Ceiling: Prevention Strategies

  1. Roof Maintenance*. Regular Roof Inspections: Schedule regular roof inspections to identify and address leaks before they lead to brown spots.
  2. Plumbing Maintenance*. Leak Prevention: Periodically check plumbing for leaks and address any issues promptly. Replacing old pipes can also prevent future leaks.
  3. Humidity Control*. Ventilation: Ensure proper ventilation in areas with high humidity, such as bathrooms and kitchens. Use exhaust fans and dehumidifiers as needed.
  4. Fireplace and Candle Use*. Soot Control: When using fireplaces or candles, be mindful of proper ventilation and cleaning to minimize soot accumulation on the ceiling.

Read too: How Much To Paint Basement Ceiling

Conclusion

Small brown spots on the ceiling may be a common issue, but understanding their causes and addressing them promptly is essential to maintain a healthy and appealing living space. By identifying the source of the spots, employing effective cleaning and remediation techniques, and implementing preventive strategies, you can ensure that your ceiling remains spot-free and in excellent condition for years to come.