Ceiling Height for Fan: How to Choose the Right Height for Optimal Performance

When it comes to installing a ceiling fan, one of the most critical factors to consider is the ceiling height. The right ceiling height for your fan can significantly impact its performance, efficiency, and even safety. In this comprehensive guide, we’ll explore the optimal ceiling height for ceiling fans, how to determine the best height for your specific situation, and other important considerations to ensure that your ceiling fan works effectively.

Ceiling Height For Fan

Why Ceiling Height Matters for Ceiling Fans

The height at which a ceiling fan is installed can affect its ability to circulate air efficiently. Fans that are too close to the ceiling may not provide adequate airflow, while those installed too low can pose safety risks and aesthetic issues. Proper installation ensures that the fan operates at its best, providing maximum comfort and efficiency.

Key Factors Influencing Ceiling Height for Fans

Several factors influence the ideal ceiling height for a ceiling fan, including the type of fan, room size, and ceiling style. Understanding these factors will help you make an informed decision about the best height for your fan.

  1. Type of Fan: Different types of ceiling fans have varying requirements for installation height. For example, standard ceiling fans, low-profile fans, and high-ceiling fans each have specific height recommendations.
  2. Room Size: The size of the room plays a crucial role in determining the appropriate ceiling height for your fan. Larger rooms may require fans to be installed at different heights compared to smaller rooms to ensure effective air circulation.
  3. Ceiling Style: The style and design of your ceiling, whether it is flat, vaulted, or sloped, can also impact the ideal installation height for your ceiling fan.

Read too: Bathroom Flooded Through the Ceiling: A Comprehensive Guide

Ceiling Height for Fan: Installation Guidelines

1. Standard Ceiling Heights

For standard ceiling heights, typically ranging from 8 to 9 feet, the general recommendation is to install the ceiling fan so that the blades are approximately 7 to 9 feet above the floor. This height allows for optimal air circulation and ensures that the fan is out of reach, reducing the risk of accidental contact.

  • Blade Height: The fan blades should be at least 7 feet from the floor to ensure safe operation and efficient airflow.
  • Clearance: Maintain a minimum clearance of 12 to 18 inches between the blades and the ceiling to avoid obstructed airflow.

2. Low-Profile Ceilings

If you have a low-profile ceiling, typically under 8 feet, consider using a low-profile or hugger ceiling fan. These fans are designed to be mounted closer to the ceiling, minimizing the distance between the blades and the ceiling.

  • Blade Height: For low-profile ceilings, the fan blades should still be at least 7 feet from the floor.
  • Installation: Ensure that the fan is installed as close to the ceiling as possible while maintaining adequate clearance for airflow.

3. High Ceilings

For rooms with high ceilings, typically above 10 feet, you may need to use a downrod extension to ensure that the fan blades are at the optimal height for effective air circulation. A downrod helps lower the fan to a suitable height while maintaining clearance from the ceiling.

  • Blade Height: The blades should be at least 7 to 9 feet from the floor.
  • Downrod Length: Choose an appropriate downrod length to achieve the ideal blade height based on your ceiling’s height.

4. Vaulted or Sloped Ceilings

Installing a ceiling fan on a vaulted or sloped ceiling requires special consideration. A ceiling fan with an angled mounting bracket or a sloped ceiling adapter can help achieve the proper installation height and ensure effective airflow.

  • Blade Height: Ensure that the blades are still at least 7 feet from the floor, regardless of the ceiling angle.
  • Mounting: Use an angled mounting bracket or adapter to accommodate the slope and maintain proper blade height.

Additional Considerations for Ceiling Fan Installation

1. Room Layout and Furniture

Consider the layout of your room and the placement of furniture when installing a ceiling fan. Ensure that the fan’s airflow is not obstructed by large pieces of furniture or other objects.

  • Airflow Path: Position the fan centrally to maximize airflow throughout the room.
  • Furniture Clearance: Ensure that the fan is installed in a location where it does not interfere with the furniture or other fixtures.

2. Fan Size and Blade Span

The size of the ceiling fan and the span of its blades can also influence the ideal installation height. Larger fans with wider blade spans may require different height considerations compared to smaller fans.

  • Fan Size: Choose a fan size that is appropriate for the room’s dimensions and ceiling height.
  • Blade Span: Ensure that the blade span is suitable for the room’s size and allows for effective air circulation.

3. Safety and Compliance

Follow safety guidelines and local building codes when installing a ceiling fan. Ensure that the fan is securely mounted and that all electrical connections are properly made.

  • Mounting: Use appropriate hardware and follow manufacturer instructions for secure mounting.
  • Electrical Connections: Ensure that electrical connections are safe and comply with local codes.

Conclusion

Selecting the right ceiling height for your ceiling fan is essential for optimal performance, comfort, and safety. By considering factors such as ceiling height, room size, fan type, and ceiling style, you can make an informed decision and ensure that your ceiling fan operates efficiently. Whether you have a standard, low-profile, high, or sloped ceiling, following the guidelines outlined in this article will help you achieve the best results for your ceiling fan installation.

Shower Curtain to Ceiling Designs: Elevate Your Bathroom Style

A shower curtain to ceiling design is a chic and functional upgrade that can transform your bathroom’s appearance and functionality. By extending the curtain all the way to the ceiling, you not only enhance the look of your space but also improve its practicality. This guide will explore the benefits of shower curtain to ceiling installations, provide tips for choosing the right materials and designs, and offer installation and maintenance advice.

Shower Curtain To Ceiling

The Benefits of a Shower Curtain to Ceiling Design

Choosing a shower curtain to ceiling design offers several advantages over traditional shower curtains. Here’s why this design is a great option for your bathroom:

1. Enhanced Privacy

Extending the shower curtain to the ceiling ensures complete privacy while you shower. Unlike shorter curtains, which can leave gaps, a ceiling-length curtain provides full coverage, keeping your personal space more secure.

2. Improved Aesthetics

A shower curtain to ceiling design creates a more streamlined and elegant look. By covering the entire wall, it eliminates unsightly gaps and seams, offering a polished appearance that enhances your bathroom’s overall decor.

Read too: Kitchen Lighting For A Vaulted Ceiling: Illuminating Your Space with Style and Functionality

3. Better Water Containment

A ceiling-height shower curtain effectively contains water within the shower area, reducing the likelihood of water splashing onto the bathroom floor. This helps keep your bathroom cleaner and reduces the risk of mold and mildew growth.

4. Increased Functionality

With a shower curtain to ceiling design, you can incorporate additional features like built-in shelves or towel bars. This setup can maximize your bathroom’s functionality and storage options.

5. Enhanced Light Control

By extending the curtain to the ceiling, you can also control the amount of natural light that enters the shower area. This is especially beneficial in bathrooms with large windows or skylights.

6. More Modern Look

A ceiling-height curtain adds a modern touch to your bathroom. It gives the space a contemporary feel and can make the room appear taller and more spacious.

Choosing the Right Shower Curtain for Ceiling Installation

When opting for a shower curtain to ceiling design, selecting the right curtain material and style is crucial. Here are some factors to consider:

1. Material

Choose a curtain material that suits your needs and preferences. Common materials for ceiling-height shower curtains include:

  • Fabric: Fabric curtains are available in a range of colors and patterns. They add a luxurious touch but may require more maintenance to keep them clean and free from mildew.
  • Vinyl: Vinyl curtains are durable, water-resistant, and easy to clean. They are a practical choice for high-moisture environments.
  • Polyester: Polyester curtains combine durability with a range of design options. They are resistant to water and easy to care for.

2. Design and Style

Select a design that complements your bathroom decor. Options include:

  • Solid Colors: Simple and elegant, solid-colored curtains can blend seamlessly with your bathroom’s color scheme.
  • Patterns and Prints: Patterns and prints can add visual interest and personality to your bathroom.
  • Textured Fabrics: Textured fabrics, like faux linen or velvet, can enhance the overall look and feel of your space.

3. Size and Dimensions

Measure your bathroom carefully to determine the appropriate size for your ceiling-height curtain. Consider the width of your shower area and the height from the floor to the ceiling to ensure a proper fit.

4. Rod and Hardware

Choose a sturdy curtain rod and hardware that can support the weight of a ceiling-height curtain. Options include:

  • Tension Rods: Easy to install without drilling, tension rods are ideal for renters or those looking for a simple solution.
  • Fixed Rods: Fixed rods are more durable and can be installed with brackets for a secure fit.

Installation Tips for Shower Curtain to Ceiling

Proper installation is key to achieving a successful shower curtain to ceiling design. Follow these tips for a smooth installation process:

1. Measure Carefully

Accurate measurements are crucial for a proper fit. Measure the height from the floor to the ceiling and the width of your shower area to determine the correct size for your curtain and rod.

2. Choose the Right Hardware

Select a curtain rod and hardware that can support the weight of your chosen curtain material. For heavier fabrics, use a sturdy metal rod and secure brackets.

3. Install the Rod

If using a fixed rod, install the brackets at the desired height and ensure they are level. Mount the rod securely to prevent sagging or falling.

4. Hang the Curtain

Attach the curtain to the rod using rings or hooks. Ensure that the curtain is evenly distributed and hangs straight from the ceiling.

5. Adjust the Length

If necessary, adjust the length of the curtain to ensure it reaches the floor or the desired height. Some curtains may require hemming or adjustments to fit perfectly.

6. Check for Gaps

After installation, check for any gaps or areas where water might escape. Make adjustments as needed to ensure a snug fit and complete coverage.

Maintenance and Care for Ceiling-Height Shower Curtains

To keep your shower curtain to ceiling in good condition, follow these maintenance tips:

1. Regular Cleaning

Clean your shower curtain regularly to prevent mold and mildew buildup. Fabric curtains can often be machine-washed, while vinyl and polyester curtains can be wiped down with a damp cloth.

2. Inspect for Damage

Periodically check the curtain and hardware for signs of wear or damage. Replace any broken rings, hooks, or rods to ensure continued functionality.

3. Dry Properly

After washing, allow the curtain to dry completely before rehanging it. This helps prevent mold growth and keeps the curtain in good condition.

4. Prevent Mildew

Ensure proper ventilation in your bathroom to reduce moisture buildup. Use an exhaust fan or open a window to help keep the area dry and prevent mildew growth.

5. Store Properly

If you need to remove the curtain for any reason, store it in a dry, clean area to prevent damage or mildew.

Conclusion

A shower curtain to ceiling design offers a stylish and functional upgrade to your bathroom. By providing enhanced privacy, improved aesthetics, and better water containment, this design can transform your space and make it more practical. With the right materials, careful installation, and regular maintenance, you can enjoy the benefits of a ceiling-height shower curtain for years to come. Whether you’re updating your existing shower setup or starting fresh, a ceiling-height curtain is a smart choice for modern bathrooms.

How Much Ceiling Height Do You Need for a Treadmill?

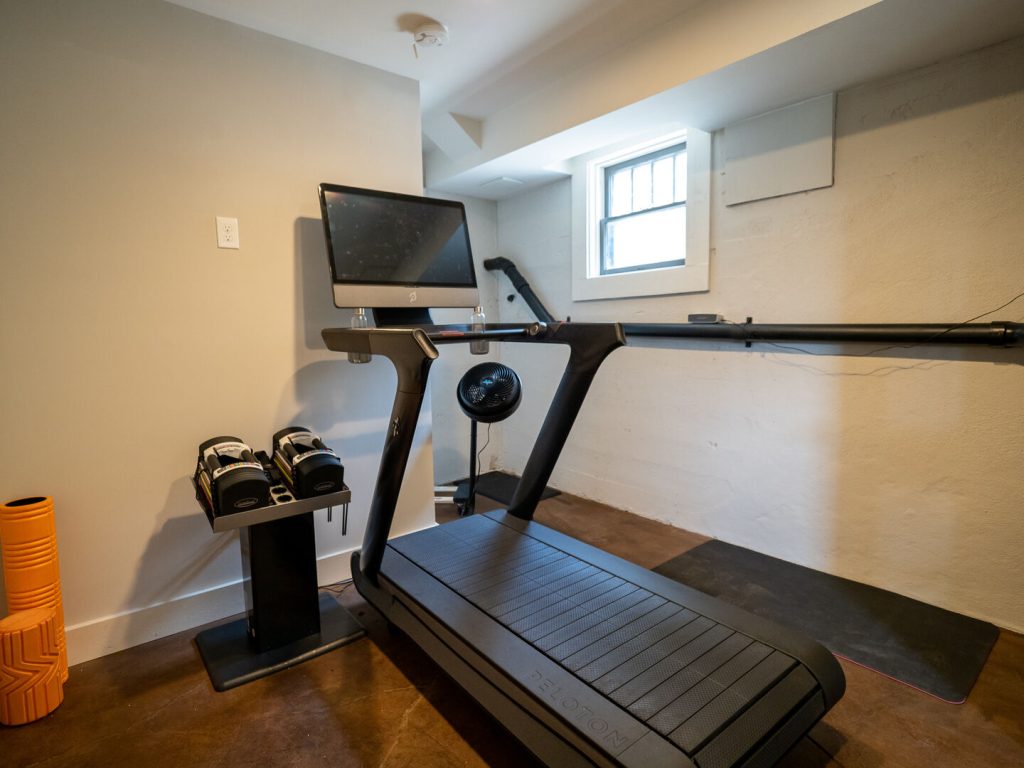
Treadmills are a popular choice for home exercise equipment. They allow you to walk or run indoors, providing a convenient and effective way to stay active. However, when setting up a treadmill in your home, it’s crucial to consider the available space, including the ceiling height. In this article, we will explore the importance of ceiling height when using a treadmill and provide guidance on how much clearance is required for safe and comfortable workouts.

How Much Ceiling Height For Treadmill

The Importance of Ceiling Height for Treadmills

Ceiling height may not be the first thing that comes to mind when shopping for a treadmill, but it’s a critical factor to consider. The reason is simple: when you’re using a treadmill, you’re not just moving horizontally; you’re also moving vertically. This vertical movement is created by the treadmill’s belt, which raises and lowers as you walk or run.

Insufficient ceiling height can lead to several issues when using a treadmill, including:

  1. Safety Concerns: A low ceiling height can increase the risk of accidents. Tall users may inadvertently hit their heads on the ceiling, lose balance, or feel cramped, leading to potential falls.
  2. Discomfort: Exercising in a confined space can be uncomfortable and discouraging. It limits your range of motion and can make your workouts less enjoyable.
  3. Limited Workout Options: Some treadmill workouts include incline settings that require additional vertical space. Inadequate ceiling height may prevent you from taking full advantage of these features.

How Much Ceiling Height Do You Need?

The ideal ceiling height for a treadmill can vary depending on your height and the treadmill’s specifications. As a general guideline, you should aim for a minimum ceiling height of 7 to 8 feet (2.13 to 2.44 meters) above the treadmill’s running surface. Here’s a breakdown of considerations for different treadmill users:

  1. Users of Average Height (Under 6 Feet): Most standard treadmills are designed to be used in rooms with 8-foot ceilings. This height allows for a safe and comfortable workout for individuals of average height.
  2. Tall Users (Over 6 Feet): If you are taller than 6 feet, you may require a higher ceiling clearance. In such cases, consider treadmills with lower deck heights or adjustable incline settings that can minimize the vertical space needed.
  3. Incline Workouts: If you plan to use the treadmill’s incline feature frequently, you may need more ceiling height. The steeper the incline, the more vertical space is required. Ensure that your ceiling can accommodate the highest point the treadmill reaches during incline workouts.

Measuring Ceiling Height

Before purchasing a treadmill or setting up an existing one, it’s essential to measure the ceiling height in the intended workout space. Follow these steps to determine if your ceiling height is sufficient:

  1. Find the Highest Point: Identify the highest point on the treadmill’s deck when it’s inclined at the steepest level you plan to use. Measure the distance from the floor to this point.
  2. Add User Height: To this measurement, add your height and a few extra inches to account for your arm movement and comfort during workouts.
  3. Compare to Ceiling Height: Measure the actual ceiling height in the room where you plan to place the treadmill. Ensure that it provides enough clearance based on the measurements you’ve taken.

Alternative Solutions

If your current ceiling height doesn’t meet the requirements for a treadmill, there are alternative solutions to consider:

  1. Lower the Deck: Some treadmills have adjustable deck heights. Lowering the deck can help you fit the treadmill in a room with limited ceiling height.
  2. Use a Folding Treadmill: Folding treadmills can be stored vertically when not in use, reducing the vertical space they occupy.
  3. Choose a Different Workout Location: If your current space doesn’t accommodate a treadmill, consider relocating it to a room with higher ceilings or using it in an outdoor space.

Read too: How To Dry A Ceiling Quickly

Conclusion

Ceiling height is a crucial factor to consider when setting up a treadmill in your home. Inadequate clearance can lead to safety concerns, discomfort, and limitations in your workout options. By measuring the ceiling height and choosing a treadmill that suits your available space, you can enjoy safe and effective indoor workouts without any ceiling-related constraints.

Demystifying Garage Door Dimensions: Minimum Ceiling Height for a 7′ Garage Door

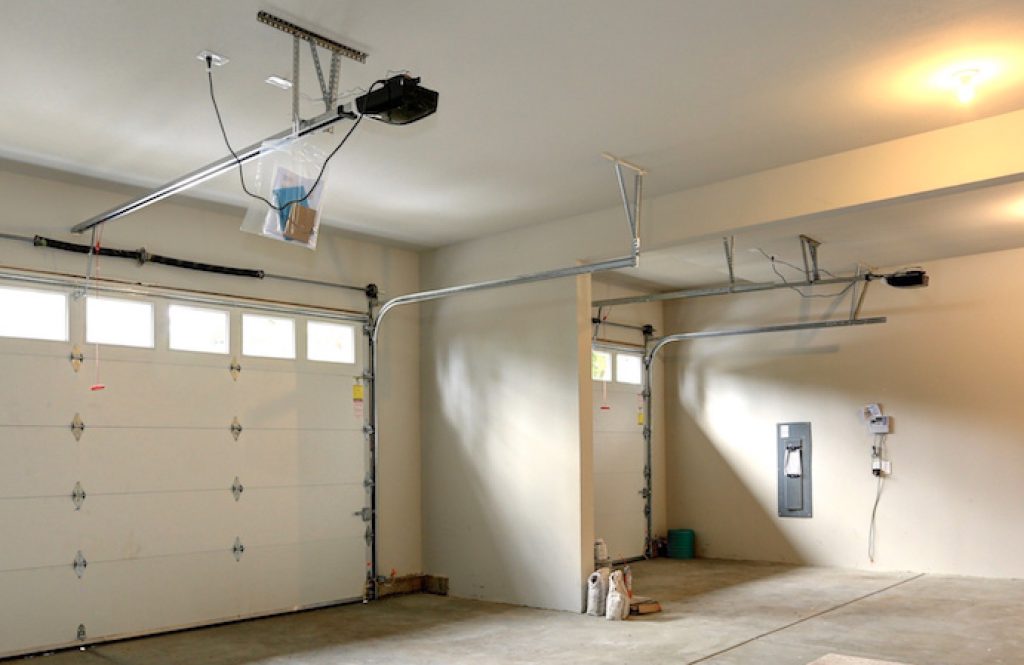
When it comes to garage doors, one of the critical considerations is the available headroom or the ceiling height. If you’re thinking about installing a 7-foot garage door, you may be wondering about the minimum ceiling height required. In this article, we’ll delve into the dimensions, the importance of the ceiling height, and factors to consider when planning for your garage door.

Minimum Ceiling Height For 7' Garage Door

Understanding Garage Door Dimensions

Garage doors come in various dimensions, and the height is a crucial factor. A 7-foot garage door, often known as a standard 7′ door, is a popular choice for residential garages. It provides adequate clearance for most vehicles and is considered the standard for single-car garage doors.

Minimum Ceiling Height for a 7′ Garage Door

The minimum ceiling height required for a 7-foot garage door is typically 8 feet. This measurement includes the space needed for the door’s installation and operation. Here’s the breakdown:

  1. 7 Feet for the Door: The garage door itself is 7 feet in height.
  2. Additional Clearance: To ensure smooth and safe operation, an additional foot of clearance is necessary. This accounts for the door’s track, opener mechanism, and space for the door to open and close without obstruction.
  3. Header Space: The header space, which is the structural support above the garage door, also requires space. This space accommodates the torsion or extension springs, which are essential for counterbalancing the weight of the door.
  4. Opener Mechanism: If you plan to install a garage door opener, you’ll need extra clearance for this equipment, as well as for the garage door’s operation.

Factors to Consider

When determining if your garage has the minimum required ceiling height for a 7′ door, keep the following factors in mind:

  1. Existing Ceiling Height: Measure the existing ceiling height in your garage. If it’s at least 8 feet, you should have sufficient space for a 7′ garage door. However, it’s always a good idea to consult with a professional for an accurate assessment.
  2. Ceiling Obstructions: Be aware of any obstructions in your garage’s ceiling space, such as ductwork, beams, or storage platforms. These obstructions may affect the clearance needed for the door and opener.
  3. Torsion Springs vs. Extension Springs: The type of springs used for your garage door can impact the required headroom. Torsion springs are typically installed horizontally above the door, while extension springs run vertically on both sides of the door. Torsion springs often require less vertical space.
  4. Low-Headroom Kits: In cases where your garage ceiling height is limited, low-headroom kits are available. These kits modify the track and spring system to reduce the required clearance. However, they may not be suitable for all situations and can affect the door’s performance.

Read too: Why Is My Ceiling Fan Leaking Water

Conclusion:

Ensuring the minimum ceiling height for a 7′ garage door is essential for the safe and efficient operation of your garage door system. Adequate headroom allows for the door to open and close smoothly, accommodating your vehicle and any additional equipment you choose to install. Before proceeding with a 7′ garage door installation, it’s advisable to consult with a professional to assess your specific garage and ceiling height to guarantee a successful and hassle-free setup.

How Tall Do Ceilings Need To Be For Golf Simulator?

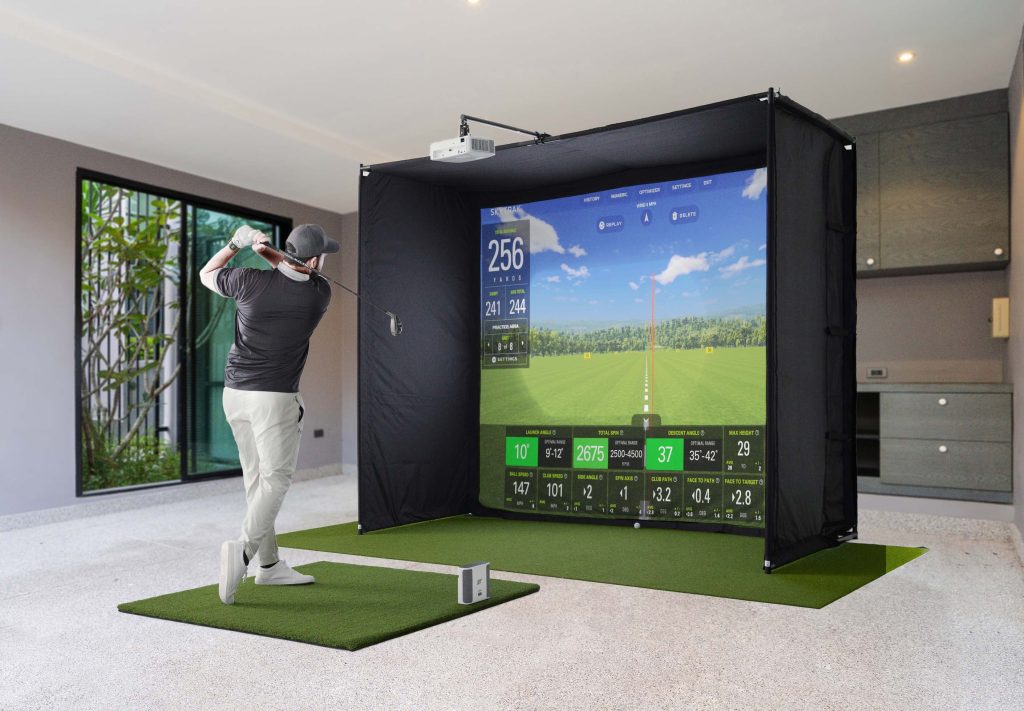
How Tall Do Ceilings Need To Be For Golf Simulator? Golf simulators have revolutionized the way golf enthusiasts practice and enjoy their favorite sport. These advanced systems offer a realistic golfing experience, allowing players to tee off from the comfort of their own homes or indoor facilities. One critical factor to consider when setting up a golf simulator is the height of the ceilings. In this article, we’ll explore how tall your ceilings need to be for a golf simulator and why it matters.

how tall do ceilings need to be for golf simulator

The Importance of Ceiling Height for Golf Simulators

Before we dive into the specific ceiling height requirements, let’s understand why ceiling height is a crucial consideration for your golf simulator setup.

1. Swing Space:

One of the primary reasons for adequate ceiling height is providing enough clearance for your golf swing. When you take a swing with a driver or any other golf club, your arms and club extend both backward and upward. If the ceiling is too low, you risk hitting the ceiling, which not only disrupts your game but can also damage the equipment and the ceiling itself.

2. Realism and Comfort:

To enjoy a realistic golfing experience, it’s essential to have enough overhead space. A taller ceiling allows for a more authentic feel, especially when using projection screens or high-quality monitors. Additionally, it provides a comfortable and safe environment for your swing.

3. Simulated Ball Flight:

Many golf simulators are designed to calculate ball flight and simulate the trajectory of your shots. To do this accurately, the system needs sufficient space for the ball to travel and gather data. Inadequate ceiling height can limit the system’s ability to provide accurate feedback on your shots.

Ceiling Height Requirements for Golf Simulators

The ideal ceiling height for a golf simulator can vary depending on several factors, including your height, the length of your golf clubs, and your swing characteristics. However, as a general guideline, a minimum ceiling height of 9 to 10 feet (2.7 to 3 meters) is recommended. This height should accommodate most golfers comfortably and allow for a full swing with standard-sized clubs.

For taller individuals or those who want more room for their swing, a ceiling height of 12 feet (3.7 meters) or more is preferable. This height provides extra clearance, ensuring that even the tallest golfers can swing freely without any concerns about hitting the ceiling.

Measuring Your Ceiling Height

Before purchasing or setting up a golf simulator, it’s essential to measure your ceiling height accurately. Here’s how you can do it:

  1. Gather your equipment: You’ll need a tape measure, a step ladder, and a friend or family member to assist you.
  2. Find a suitable location: Choose the spot where you plan to set up your golf simulator.
  3. Position the tape measure: Place the ladder in the selected location and extend the tape measure vertically from the floor to the ceiling. Ensure it’s level.
  4. Measure the height: Have your friend or family member read the measurement at the highest point where the ceiling meets the wall.
  5. Record the measurement: Note down the height in feet or meters.

Conclusion: Creating the Ideal Golf Simulator Space

To fully enjoy the benefits of a golf simulator, including improving your game and practicing from the comfort of your own space, it’s crucial to have the right ceiling height. A minimum height of 9 to 10 feet is typically recommended, but taller ceilings, such as 12 feet or more, can provide an even better experience. Measure your ceiling height accurately before investing in a golf simulator to ensure that you have the space needed for a realistic and enjoyable golfing experience at home.