Ceiling fans are a popular addition to homes for their ability to improve comfort and energy efficiency. While many homeowners are adept at DIY projects, installing a ceiling fan can be a bit more complex, especially when electrical work is involved. In this article, we’ll explore why an electrician is hired to install a ceiling fan is a smart decision and what to expect during the installation process.
Why Hire an Electrician for Ceiling Fan Installation
Ceiling fan installation is not just about aesthetics; it involves electrical work that should be done by a trained professional for several reasons:
- Electrical Safety: Electricians are well-versed in electrical safety standards. They can ensure the wiring is done correctly, preventing fire hazards and electrocution risks.
- Code Compliance: Electrical work must comply with local building codes and regulations. Electricians are familiar with these requirements and can ensure your installation meets all standards.
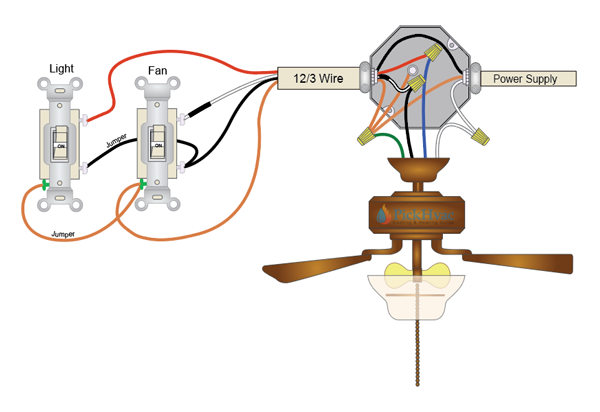
- Proper Wiring: Ceiling fans often require new wiring or modifications to existing wiring. Electricians have the expertise to handle this safely and efficiently.
- Structural Considerations: Electricians can assess the ceiling’s structural integrity and make any necessary reinforcements to support the ceiling fan’s weight.
The Ceiling Fan Installation Process
When you hire an electrician to install a ceiling fan, you can expect the following steps:
- Assessment: The electrician will assess the room to determine the best location for the ceiling fan. Factors like room size, ceiling height, and existing electrical connections will be considered.
- Wiring: If the room doesn’t already have the necessary wiring, the electrician will run new electrical lines to the desired location. This step is critical to ensure the fan operates safely and efficiently.
- Mounting Bracket: The electrician will install a mounting bracket securely to the ceiling. This bracket provides the foundation for the fan and helps distribute its weight.
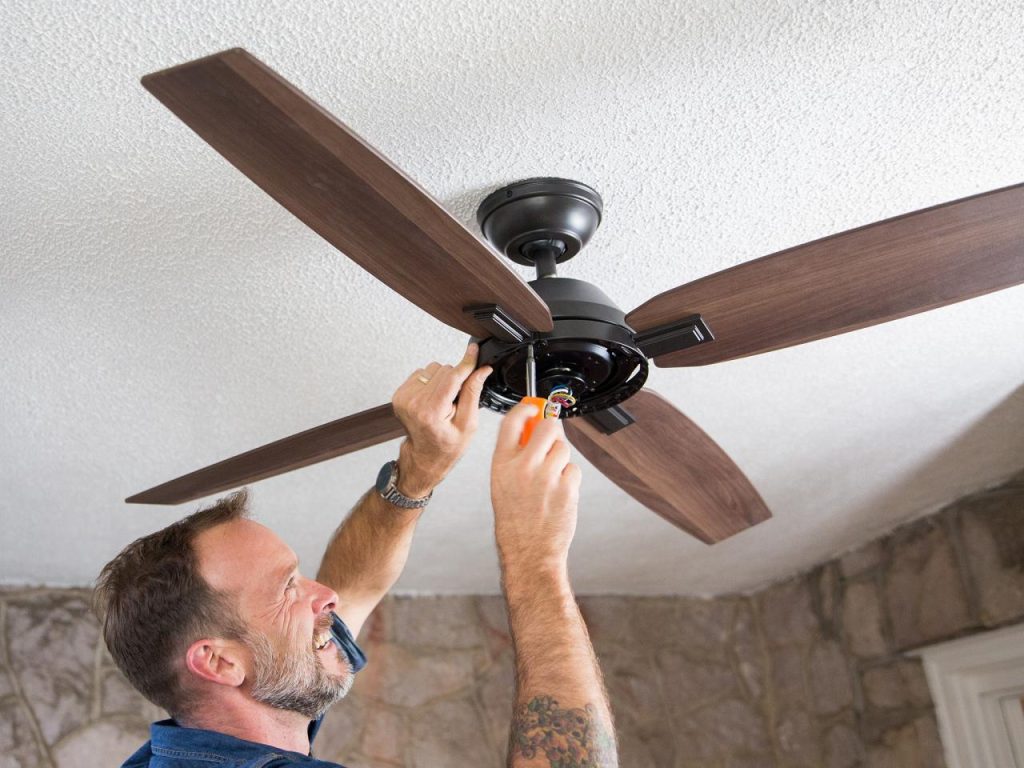
- Assembly: Your electrician will carefully assemble the ceiling fan, ensuring that all components are properly connected and balanced.
- Installation: With the fan assembled, it will be securely attached to the mounting bracket. This step is crucial for safety and stability.
- Wiring Connections: The electrician will connect the fan’s wiring to the electrical supply. They’ll also ensure that the wall switch and remote control (if applicable) are correctly integrated into the electrical system.
- Testing: After installation, the electrician will test the fan’s operation to confirm that it functions correctly and without any issues.
- Cleanup: The electrician will clean up the installation area, removing any debris and ensuring that your space is left tidy.
Benefits of Hiring an Electrician
Hiring an electrician for ceiling fan installation offers numerous benefits:
- Safety: An electrician ensures that the fan is safely installed, reducing the risk of electrical problems or accidents.
- Efficiency: Electricians have the knowledge and tools to complete the installation efficiently, saving you time and effort.
- Compliance: They ensure the installation adheres to local building codes and regulations, preventing potential legal issues.
- Warranty: Many ceiling fans come with warranties that require professional installation for them to remain valid. An electrician can provide the necessary documentation to support any warranty claims.
Conclusion: Professional Quality and Peace of Mind
An electrician is hired to install a ceiling fan not only ensures the safety of your home but also guarantees that the fan operates at its best. With the expertise and knowledge of a qualified electrician, you can enjoy the benefits of a ceiling fan with confidence, knowing that it’s been professionally installed to enhance your comfort and energy efficiency.