Mounting your Sonos One SL speaker on the ceiling can significantly enhance your audio experience, providing better sound distribution and a sleek, clutter-free look. This guide will walk you through everything you need to know about the Sonos One SL Ceiling Mount, from its benefits to installation tips and the best products available.
The Benefits of a Sonos One SL Ceiling Mount
Optimal Sound Distribution
Mounting your Sonos One SL on the ceiling allows for optimal sound distribution throughout the room. Ceiling mounts help in eliminating sound obstructions, creating a more immersive audio experience. This setup is particularly beneficial in large rooms or open floor plans where wall-mounted speakers may not provide adequate coverage.
Read too: Kitchen Lighting For A Vaulted Ceiling: Illuminating Your Space with Style and Functionality
Space-Saving Solution
Using a ceiling mount for your Sonos One SL frees up valuable floor and wall space, making it ideal for minimalist home designs or rooms with limited space. This setup reduces clutter and keeps your speaker safe from accidental damage.
Enhanced Aesthetic Appeal
Ceiling-mounted speakers offer a clean and modern look that can enhance the overall aesthetic of your room. By integrating your Sonos One SL into the ceiling, you maintain a sleek appearance without compromising on sound quality.
Security and Safety
Mounting your Sonos One SL on the ceiling keeps it out of reach of children and pets, reducing the risk of damage or injury. This setup also ensures that the speaker remains securely in place, even in high-traffic areas.
Choosing the Right Sonos One SL Ceiling Mount
Compatibility
When selecting a ceiling mount, ensure that it is specifically designed for the Sonos One SL. This ensures a secure fit and optimal performance. Universal mounts may not provide the same level of stability and security as mounts designed for the Sonos One SL.
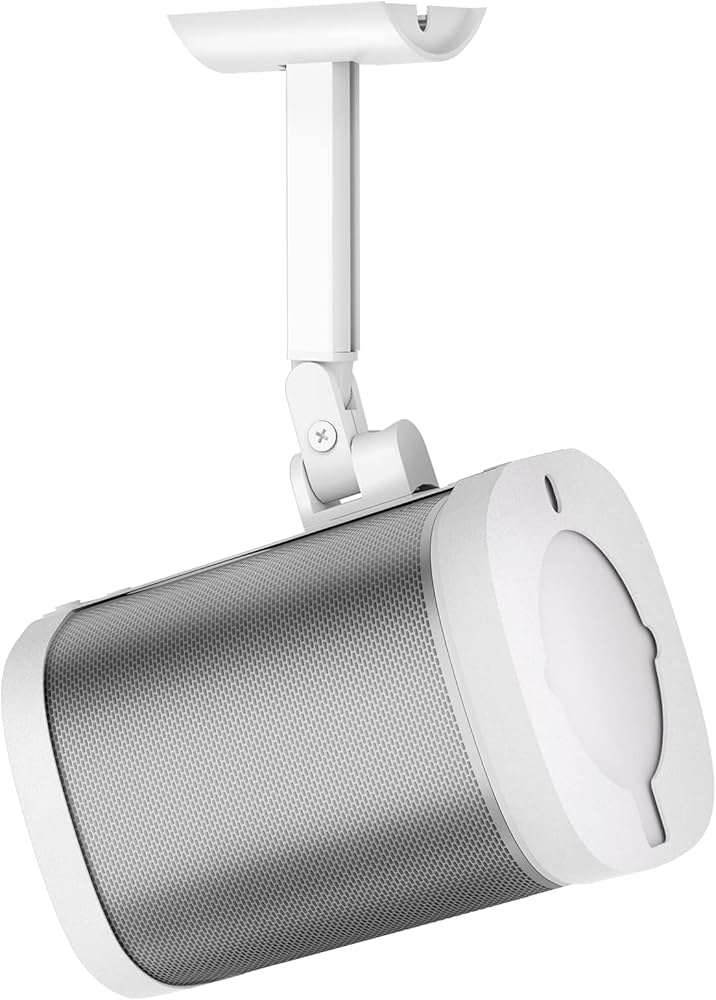
Adjustable Angles
Choose a ceiling mount that allows for adjustable angles. This feature lets you direct the sound precisely where you want it, enhancing the audio experience in your room. Adjustable mounts provide flexibility, enabling you to achieve the best possible sound distribution.
Build Quality
Look for mounts made from high-quality materials such as steel or aluminum. These materials offer better durability and can support the weight of the Sonos One SL more effectively than plastic mounts. A robust mount ensures that your speaker remains securely in place for years to come.
Aesthetic Match
Consider the design and color of the mount to ensure it matches your room’s decor. Some mounts are available in various finishes, allowing you to choose one that complements your interior design. A well-matched mount can blend seamlessly with your ceiling, maintaining a cohesive look.
Ease of Installation
Select a mount that comes with clear instructions and all necessary hardware for easy installation. Some mounts offer features like quick-release mechanisms, making it easier to install or remove the speaker as needed. User-friendly mounts can save time and effort during installation.
How to Install a Sonos One SL Ceiling Mount
Tools and Materials Needed
Before starting the installation, gather the necessary tools and materials:
- Sonos One SL Ceiling Mount
- Drill
- Screws and anchors
- Screwdriver
- Level
- Measuring tape
- Pencil
Step-by-Step Installation Guide
Step 1: Choose the Location
Select the ideal location for your Sonos One SL on the ceiling. Consider factors such as power source accessibility, sound distribution, and aesthetic appeal. Ensure the chosen spot provides optimal coverage for your room.
Step 2: Mark the Mounting Points
Use a level and measuring tape to mark the exact points where the mount will be installed. Double-check the alignment to ensure the speaker will be straight and level. Mark the drilling points with a pencil.
Step 3: Drill the Holes
Drill pilot holes at the marked points to prepare for the screws and anchors. Make sure to use the appropriate drill bit size for the screws and anchors included with your mount. Pilot holes prevent the ceiling from cracking and make it easier to insert the screws.
Step 4: Insert the Anchors
Insert the wall anchors into the pilot holes. These anchors provide additional support and ensure that the mount is securely attached to the ceiling. Use a hammer to gently tap the anchors into place if necessary.
Step 5: Attach the Mount
Align the ceiling mount with the pilot holes and use a screwdriver to secure it in place with the provided screws. Ensure that the mount is firmly attached and can support the weight of the Sonos One SL. Tighten the screws securely to prevent any movement.
Step 6: Mount the Sonos One SL
Attach your Sonos One SL to the ceiling mount according to the manufacturer’s instructions. Ensure that the speaker is securely fastened and cannot be easily dislodged. Some mounts may require you to slide the speaker into place, while others use screws or clamps.
Step 7: Adjust the Angle
If your mount allows for adjustable angles, set the speaker to your desired position. Test the sound to ensure it is directed optimally for your room. Make any necessary adjustments to achieve the best sound distribution.
Enhancing Your Audio Setup with Sonos One SL Ceiling Mount
Integrating with Other Sonos Products
The Sonos One SL ceiling mount can be part of a broader Sonos system. Consider integrating it with other Sonos speakers for a multi-room audio setup. This allows you to control and synchronize music across different rooms, enhancing your home entertainment experience.
Utilizing Voice Control
Pair your Sonos One SL with a compatible voice assistant for added convenience. With voice control, you can easily adjust the volume, change tracks, and manage your audio settings hands-free. Voice control adds a layer of functionality to your ceiling-mounted speaker.
Optimizing Sound Quality
Experiment with the placement and angle of your ceiling-mounted Sonos One SL to find the optimal sound distribution for your room. Use the Sonos app to fine-tune audio settings and create the perfect listening environment. The app provides various tools to customize your audio experience.
Aesthetically Pleasing Integration
Consider painting the ceiling mount to match your ceiling color for a seamless look. This can help the mount blend in, making your setup more visually appealing. An integrated look enhances the overall aesthetic of your room.
Popular Sonos One SL Ceiling Mounts
Vogel’s SOUND 4201 Ceiling Mount
The Vogel’s SOUND 4201 is a robust and versatile ceiling mount designed specifically for the Sonos One SL. It offers 360-degree rotation and a sleek design that complements any room decor. The adjustable angle feature allows for precise sound direction.
Sanus Adjustable Ceiling Mount
Sanus offers an adjustable ceiling mount for the Sonos One SL that provides excellent durability and ease of installation. It features a simple yet effective design that ensures your speaker remains securely in place. The quick-release mechanism makes it easy to install and remove the speaker.
Flexson Ceiling Mount for Sonos One SL
Flexson’s ceiling mount is known for its sturdy build and elegant design. It offers a neat and secure solution for ceiling mounting, with easy-to-follow installation instructions. The mount is designed to match the aesthetic of the Sonos One SL, providing a cohesive look.
Mount-It! Sonos One SL Ceiling Mount
Mount-It! provides a budget-friendly option without compromising on quality. This mount is easy to install and offers reliable support for your Sonos One SL. The adjustable tilt feature allows for customized sound direction, enhancing your audio experience.
Conclusion
Mounting your Sonos One SL on the ceiling is an excellent way to optimize your audio setup while maintaining a clean and modern look. With the right ceiling mount, you can enjoy enhanced sound distribution, save space, and add a touch of sophistication to your room. By following the tips and steps outlined in this guide, you can confidently install and enjoy your Sonos One SL Ceiling Mount.