In the world of audio recording, clarity and quality are paramount. Whether you’re setting up a professional recording studio, a conference room, or even a home podcasting station, one of the best ways to achieve superior sound capture is with a mic hanging from the ceiling. This setup not only helps in reducing background noise but also ensures a clean and organized space. In this comprehensive guide, we’ll delve into the benefits, setup process, and considerations for using a mic hanging from the ceiling.
Why Choose a Mic Hanging From the Ceiling?
Hanging a mic from the ceiling can provide several advantages over traditional microphone stands and mounts. Here’s why you might consider this setup:
Enhanced Audio Quality
When a microphone is suspended from the ceiling, it can be positioned closer to the sound source, which often results in clearer and more direct audio capture. This setup can minimize the pickup of ambient noise and room reverberation, which is particularly beneficial in larger spaces.
Space Efficiency
In environments where space is at a premium, such as small recording studios or busy conference rooms, a mic hanging from the ceiling eliminates the need for floor or desk stands. This not only frees up space but also reduces clutter, creating a more streamlined and professional environment.
Aesthetic Appeal
A hanging mic setup can contribute to a cleaner, more professional look. With the microphone and cables out of the way, the area looks less cluttered, which can be particularly important in video recordings or live streams where aesthetics matter.
Flexibility and Versatility
Ceiling-mounted mics are highly versatile. They can be easily adjusted to different heights and angles, making them suitable for various applications, from voice recording and podcasting to capturing group discussions and performances.
Types of Mics Suitable for Ceiling Hanging
Not all microphones are ideal for ceiling suspension. Here are some types that are particularly well-suited for this setup:
Condenser Microphones
Condenser mics are highly sensitive and can capture a wide range of frequencies with great detail. They are excellent for recording vocals and instruments and are often used in studios and live performance settings.
Shotgun Microphones
Shotgun mics have a highly directional pickup pattern, which makes them ideal for focusing on specific sound sources while minimizing background noise. This makes them a great choice for recording in environments with variable acoustics.
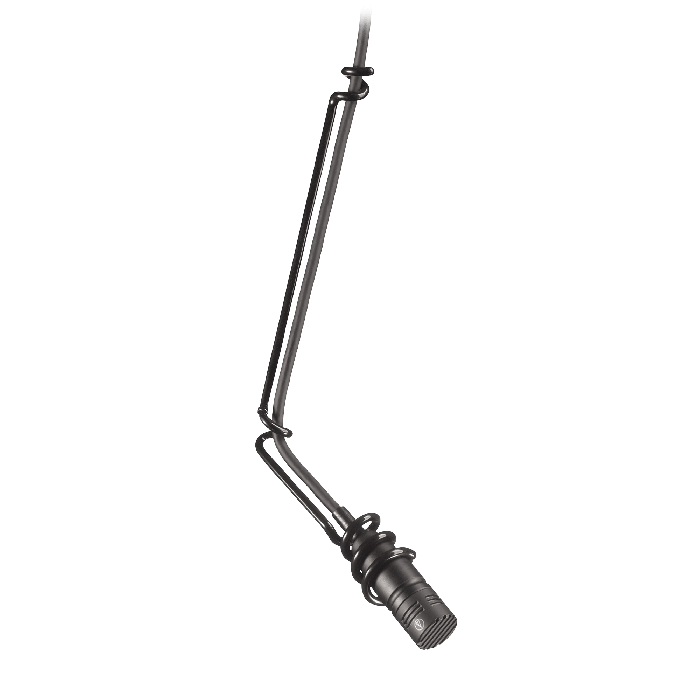
Boundary Microphones
Boundary mics, or PZMs (Pressure Zone Microphones), can be mounted on the ceiling to capture sound from a wide area. They are often used in conference rooms and large meeting spaces to ensure all voices are picked up clearly.
Setting Up a Mic Hanging From the Ceiling
Setting up a ceiling-mounted microphone involves several steps to ensure optimal performance and safety. Here’s a step-by-step guide:
Step 1: Choose the Right Location
Identify the best spot on the ceiling for your mic. This location should be directly above the primary sound source or in the center of the area you wish to capture. Consider the room’s acoustics and potential obstacles.
Step 2: Secure the Mounting Hardware
You’ll need sturdy mounting hardware designed to support the weight of the microphone. This often includes ceiling mounts, suspension cables, and possibly a shock mount to reduce vibrations. Make sure the hardware is securely attached to a ceiling joist or other stable structure.
Step 3: Install the Microphone
Attach the microphone to the mounting hardware. Ensure it is securely fastened and positioned correctly. If using a condenser mic, consider using a pop filter to reduce plosive sounds.
Step 4: Run the Cables
Carefully route the microphone cables along the ceiling and down the wall, securing them with cable clips or channels to keep them tidy and out of the way. This not only prevents tripping hazards but also maintains a clean look.
Step 5: Test the Setup
Before finalizing the setup, test the microphone to ensure it is capturing sound as expected. Make adjustments to the height and angle as needed to achieve the best sound quality.
Best Practices for Using a Mic Hanging From Ceiling
To get the most out of your ceiling-mounted microphone, consider the following best practices:
Optimize Room Acoustics
Even with a high-quality mic, the acoustics of the room can significantly impact sound quality. Use acoustic panels, bass traps, and other sound-absorbing materials to minimize echoes and background noise.
Regular Maintenance
Dust and other debris can accumulate on ceiling-mounted equipment. Regularly clean your microphone and check the mounting hardware to ensure it remains secure.
Use High-Quality Cables
Invest in high-quality, shielded cables to prevent interference and ensure the best possible sound transmission. Poor quality cables can introduce noise and degrade the overall audio quality.
Monitor Levels
When using a ceiling-mounted mic, monitor your recording levels closely to avoid clipping and distortion. Use a reliable audio interface or mixer to adjust gain settings appropriately.
Applications of a Mic Hanging From Ceiling
There are numerous scenarios where a ceiling-mounted microphone setup is advantageous. Here are a few examples:
Recording Studios
In professional recording studios, ceiling-mounted mics can be used to capture vocals and instruments with clarity. This setup helps in maintaining an organized space and avoiding the clutter of multiple mic stands.
Conference Rooms
For business meetings and conference rooms, ceiling-mounted microphones ensure that all participants are heard clearly without the need for individual mics. This setup is particularly useful for video conferencing and large group discussions.
Classrooms and Lecture Halls
In educational settings, ceiling-mounted mics can capture lectures and discussions effectively, ensuring that all students can hear the instructor and each other clearly.
Theatrical Productions
In theaters, ceiling-mounted mics can be used to capture dialogue and sound effects on stage without interfering with the performance. This setup provides a clean and unobtrusive audio capture solution.
Challenges and Considerations
While a ceiling-mounted mic setup offers many benefits, there are some challenges and considerations to keep in mind:
Installation Complexity
Installing a mic on the ceiling can be more complex than using a traditional stand. It often requires drilling, mounting, and running cables through walls or ceilings, which may not be suitable for all environments.
Accessibility
Once installed, ceiling-mounted mics can be harder to access for adjustments or maintenance. Ensure the initial setup is done correctly to minimize the need for frequent changes.
Cost
High-quality ceiling mounts and suspension systems can be more expensive than standard microphone stands. Additionally, professional installation may be required, adding to the overall cost.
Conclusion
A mic hanging from the ceiling can significantly enhance audio quality and provide a clean, organized setup for various applications. Whether you’re recording in a studio, conducting a business meeting, or capturing a live performance, understanding how to properly install and utilize a ceiling-mounted microphone is key to achieving the best results.
Read too: Understanding and Dealing with Ants in the Ceiling Spaces: Navigating the Intrusion
By following the steps outlined in this guide and considering the best practices, you can optimize your audio setup and enjoy clear, high-quality recordings with minimal background noise. Embrace the advantages of a ceiling-mounted mic and take your audio projects to the next level.