Embarking on a journey to enhance your living space? Learn how to “Install Rockwool In Ceiling” for improved acoustics, thermal insulation, and a more comfortable atmosphere.
Introduction
Creating a space that offers both comfort and functionality involves careful consideration of various elements, and the ceiling is no exception. Rockwool, known for its exceptional insulating properties, can be a game-changer when properly installed in ceilings. In this guide, we’ll explore the step-by-step process to “Install Rockwool In Ceiling,” offering insights into its benefits and the transformative impact it can have on your environment.
Understanding: Install Rockwool In Ceiling
What is Rockwool?
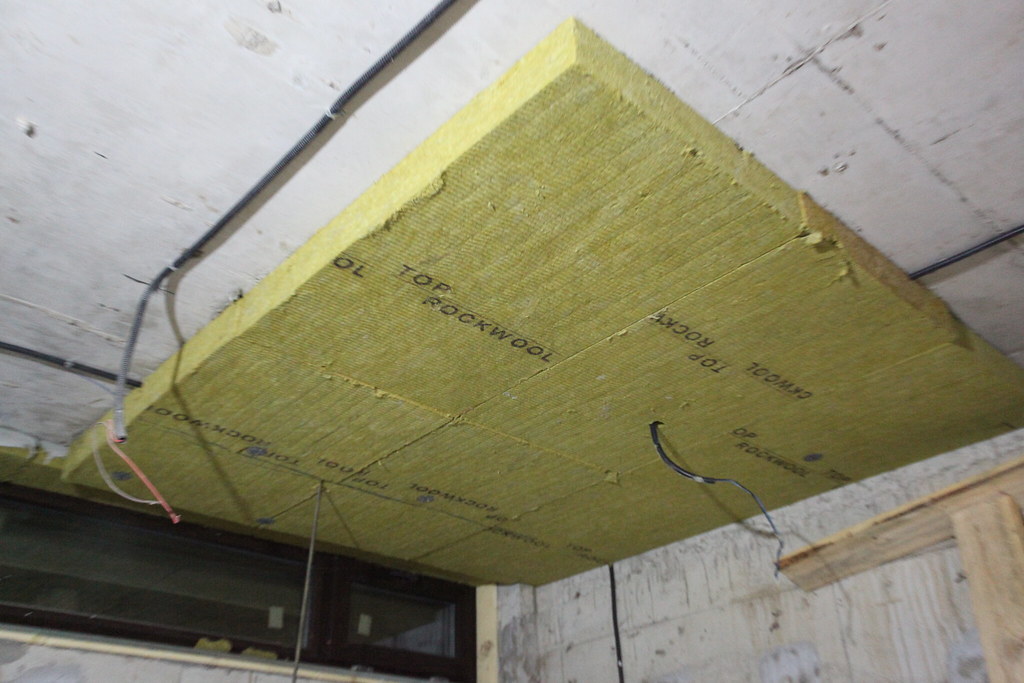
Rockwool, also known as mineral wool, is a versatile insulation material made from basalt rock and recycled slag. It is renowned for its fire resistance, sound absorption capabilities, and thermal insulation properties.
Benefits of Installing Rockwool In Ceiling
- Enhanced Acoustic Performance: Rockwool acts as an excellent sound absorber, reducing echoes and minimizing noise transfer between rooms.
- Improved Thermal Insulation: By adding a layer of Rockwool in the ceiling, you create a barrier that helps regulate indoor temperatures, leading to energy efficiency.
- Fire Resistance: Rockwool is non-combustible, providing an added layer of safety to your home or commercial space.
Step-by-Step Guide to Install Rockwool In Ceiling
1. Gather Materials and Tools:
- Rockwool Insulation Batts or Rolls
- Protective Gear (gloves, goggles, mask)
- Utility Knife
- Measuring Tape
- Staple Gun or Adhesive
2. Measure and Cut:
- Measure the distance between ceiling joists and the length required for the insulation batts or rolls.
- Use a utility knife to cut the Rockwool to the appropriate size, ensuring a snug fit.
3. Wear Protective Gear:
- Before handling Rockwool, wear gloves, goggles, and a mask to protect yourself from fibers.
4. Install Rockwool Between Ceiling Joists:
- Place the cut Rockwool between the ceiling joists, ensuring a tight fit to avoid gaps.
- Use a staple gun or apply adhesive to secure the insulation in place.
5. Seal Gaps and Joints:
- Inspect the installed Rockwool and seal any gaps or joints with additional material.
6. Cover with Ceiling Material:
- Once the Rockwool is securely in place, cover it with the chosen ceiling material, whether it be drywall, panels, or another finish.
Additional Tips for a Successful Installation
- Consider Professional Assistance: If you’re unsure about the installation process, or if your ceiling has complex structures, consider hiring a professional installer.
- Ensure Adequate Ventilation: Proper ventilation is essential to prevent moisture buildup. Install vents or take necessary measures to maintain a well-ventilated space.
Read too: Understanding and Addressing a Leaky Ceiling in Your Apartment: Navigating the Drips
Conclusion
Installing Rockwool in the ceiling is a proactive step towards creating a more comfortable and energy-efficient living or working environment. By following the detailed guide outlined above, you can harness the benefits of Rockwool insulation and enjoy improved acoustics, thermal regulation, and enhanced fire safety. Whether you’re a homeowner or a commercial space manager, the decision to “Install Rockwool In Ceiling” can make a significant difference in the overall quality and sustainability of your space.