How to paint a basement ceiling? Your basement is a hidden gem in your home, offering valuable additional living space. However, many homeowners overlook the ceiling when it comes to renovation and design. A painted basement ceiling can add character and charm to the space, making it feel like an integral part of your home. In this article, we will guide you through the process of painting a basement ceiling, from preparation to execution, and reveal the magic of this transformation.
The Importance of a Well-Designed Ceiling
Elevating the Aesthetics of Your Basement
The ceiling of your basement plays a crucial role in the overall aesthetics of the space. A well-designed ceiling can:
1. Enhance the Ambiance:
- A carefully chosen color and design can make your basement feel warm and inviting.
2. Hide Imperfections:
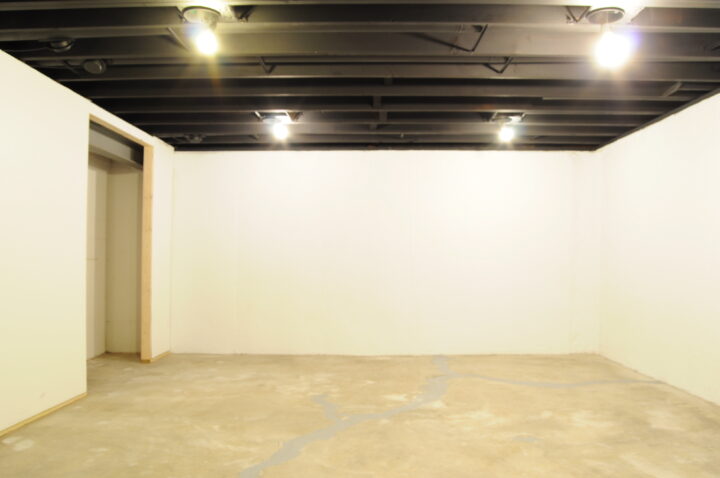
- A painted ceiling can conceal imperfections, pipes, wires, and ducts that are often present in basements.
3. Define Zones:
- By using different colors or finishes, you can create distinct zones within your basement for various purposes.
Preparing for the Paint Job
Setting the Stage for Success
Before you dive into painting your basement ceiling, it’s essential to prepare adequately. Here are the steps to get you started:
1. Clean the Ceiling:
- Dust and clean the ceiling to ensure that the paint adheres properly. Use a vacuum cleaner with a brush attachment or a duster to remove loose particles.
2. Repair Damage:
- Inspect the ceiling for any damage, such as cracks or holes. Repair these issues using a suitable filler or patching compound.
3. Protect the Area:
- Cover the floor and any items in your basement with drop cloths or plastic sheets to prevent paint splatters.
4. Choose the Right Paint:
- Select a paint that is suitable for your ceiling’s material and your desired finish. Latex or water-based paints are typically recommended for basement ceilings.
Painting the Basement Ceiling
Turning Your Vision into Reality
Now that your basement ceiling is prepped and you’ve gathered the necessary materials, it’s time to start painting.
1. Start with a Primer:
- Apply a coat of primer to the ceiling to create an even base for the paint. Primer helps the paint adhere better and provides a smoother finish.
2. Use a Roller:
- A paint roller is an effective tool for applying paint to the ceiling. Use an extension pole to reach high or hard-to-access areas.
3. Work in Sections:
- Divide the ceiling into manageable sections and work on one section at a time. This approach ensures even coverage and prevents the paint from drying too quickly.
4. Apply Multiple Coats:
- Depending on the desired finish and the color you’re using, you may need to apply two or more coats of paint. Allow each coat to dry before applying the next.
5. Be Mindful of Drips:
- Watch out for drips and streaks, especially when applying paint to an overhead surface. Correct any imperfections immediately.
Read too: How Much Ceiling Height For Treadmill
Finishing Touches and Ideas
Bringing Your Vision to Life
As you near the end of your basement ceiling painting project, consider these finishing touches and creative ideas:
1. Accent Colors:
- Create a unique atmosphere by using an accent color for beams, ducts, or other architectural features.
2. Stencils or Patterns:
- Add flair to your ceiling by using stencils or creating patterns that complement the overall design of your basement.
3. Incorporate Lighting:
- Well-placed lighting fixtures can highlight your newly painted ceiling, creating a dynamic and appealing look.
Conclusion:
How to paint a basement ceiling? A painted basement ceiling can transform a neglected space into a captivating and functional part of your home. By following the steps outlined in this guide and considering creative ideas for your ceiling, you can achieve a unique and visually appealing basement that suits your style and needs. Don’t let your basement’s potential go to waste; start your ceiling painting project and unlock the beauty of this often-overlooked area.