How To Install A Tongue And Groove Ceiling? A tongue and groove ceiling adds a touch of elegance and charm to any room. Its classic, clean lines and seamless appearance can enhance the aesthetic of your home, whether you’re renovating a single room or undertaking a whole-house makeover. This guide will walk you through the process of installing a tongue and groove ceiling, providing you with practical tips and detailed instructions to achieve a professional-looking result.
What Is a Tongue and Groove Ceiling?
A tongue and groove ceiling features wooden planks that interlock through a “tongue” (a protruding edge) and “groove” (a recessed edge). This design creates a snug fit between the planks, ensuring a seamless and attractive finish. Tongue and groove ceilings are known for their durability and classic appearance, making them a popular choice for both modern and traditional interiors.
Read too: Kitchen Lighting For A Vaulted Ceiling: Illuminating Your Space with Style and Functionality
Benefits of Tongue and Groove Ceilings
- Aesthetic Appeal: The interlocking planks create a uniform look, adding character and warmth to your space.
- Durability: Tongue and groove ceilings are sturdy and can withstand wear and tear over time.
- Easy Installation: With the right tools and materials, tongue and groove ceilings can be installed relatively easily by DIY enthusiasts.
- Versatility: Available in various wood types, finishes, and sizes, they can suit a range of interior design styles.
Tools and Materials Needed
Before starting your project, gather the following tools and materials:
Tools
- Tape measure
- Pencil
- Saw (circular or miter saw)
- Hammer or nail gun
- Level
- Drill
- Stud finder
- Pry bar
- Safety glasses and gloves
Materials
- Tongue and groove ceiling planks (wood or engineered)
- Wood filler (if needed)
- Finishing nails or screws
- Ceiling adhesive (optional, depending on the method)
- Paint or stain (if finishing the ceiling yourself)
Preparing for Installation
1. Measure the Ceiling
Start by measuring the dimensions of the ceiling where you plan to install the tongue and groove planks. Determine the total square footage and calculate how many planks you will need. Most manufacturers provide coverage information for their planks, which will help you estimate the quantity required.
2. Select Your Planks
Choose planks that match your desired aesthetic. Tongue and groove ceiling planks come in various types of wood, finishes, and sizes. Ensure that the planks you select are suitable for your climate and intended use.
3. Prepare the Ceiling
Before installation, prepare the ceiling surface:
- Remove Old Fixtures: Take down any existing ceiling fixtures, such as lights or fans.
- Inspect for Damage: Check the ceiling for any signs of damage, such as leaks or mold. Address any issues before proceeding.
- Clean the Surface: Ensure that the ceiling is clean and free of dust or debris.
How To Install A Tongue And Groove Ceiling: Step-by-Step Instructions
1. Locate and Mark the Joists
Use a stud finder to locate the ceiling joists. Mark their positions along the perimeter of the ceiling with a pencil. This will help you secure the planks properly.
2. Install a Batten or Furring Strips
For a more secure installation, attach battens or furring strips perpendicular to the joists. This provides a solid base for the planks and helps ensure they are evenly spaced.
- Measure and Cut: Measure the length of the ceiling and cut the battens or furring strips to fit.
- Attach the Strips: Use finishing nails or screws to secure the battens to the joists, spacing them according to the width of the planks.
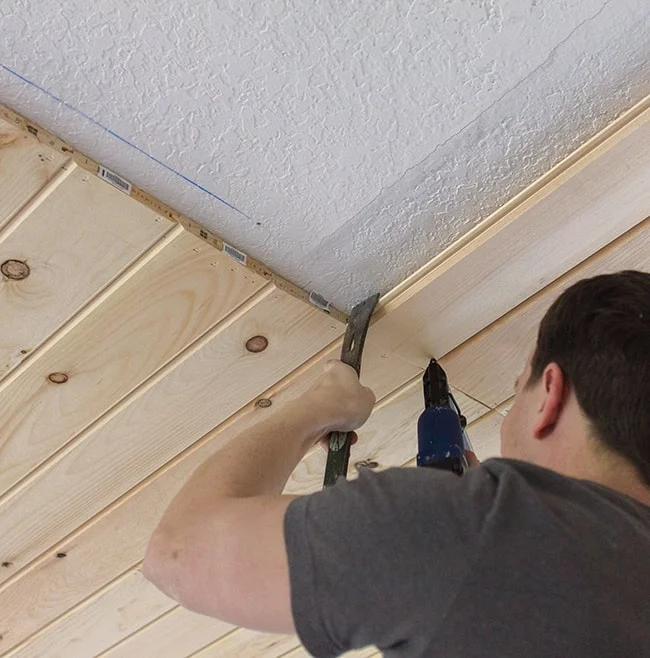
3. Start the Installation
Begin installing the tongue and groove planks:
- Position the First Plank: Place the first plank along one edge of the ceiling, aligning it with the battens or joists.
- Secure the Plank: Use a nail gun or hammer to attach the plank to the ceiling. If using nails, drive them through the tongue at an angle to hide the nail heads. Alternatively, you can use screws for added security.
- Continue Installing: Slide the next plank into the groove of the previous plank. Ensure that the planks are tightly fitted and level as you work your way across the ceiling.
4. Cutting and Fitting
- Measure and Cut Planks: Measure and cut planks as needed to fit around obstacles such as light fixtures or vents. Use a saw to make precise cuts.
- Fit Around Obstacles: For areas around fixtures or vents, cut the planks to fit snugly. Use a jigsaw or coping saw for detailed cuts.
5. Finish the Installation
- Fill Gaps and Nails: Use wood filler to cover any gaps or nail holes. Smooth the filler with a putty knife and allow it to dry completely.
- Sand the Surface: Lightly sand the surface to ensure a smooth finish. Be sure to wear a dust mask while sanding.
- Apply Finish: Paint or stain the ceiling as desired. Follow the manufacturer’s instructions for application and drying times.
Tips for a Professional Finish
1. Ensure Proper Ventilation
During the installation and finishing process, ensure that the room is well-ventilated. This helps with drying and prevents the buildup of fumes from adhesives or finishes.
2. Check for Level
Regularly check that the planks are level and evenly spaced. Use a level and adjust as needed to maintain a uniform appearance.
3. Allow for Expansion
Wood can expand and contract with changes in temperature and humidity. Allow for slight gaps between the planks and the wall to accommodate these changes without affecting the overall appearance.
4. Consider Professional Help
If you’re unsure about any aspect of the installation or if the project seems too complex, consider hiring a professional. A contractor can ensure that the installation is done correctly and provide advice on finishing techniques.
Maintenance and Care
Once your tongue and groove ceiling is installed, follow these maintenance tips to keep it looking its best:
- Regular Cleaning: Dust the ceiling regularly with a soft cloth or duster. Avoid using harsh chemicals or abrasive cleaners.
- Inspect for Damage: Periodically check for signs of damage or wear. Address any issues promptly to prevent further problems.
- Touch-Up Finishes: Reapply paint or stain as needed to maintain the ceiling’s appearance and protect the wood.
Conclusion
Installing a tongue and groove ceiling can dramatically enhance the look and feel of your space. By following these steps and tips, you can achieve a beautiful and professional finish. Whether you’re a DIY enthusiast or considering professional installation, understanding the process and preparation will help you create a stunning ceiling that adds value and charm to your home.