When it comes to maintaining a comfortable and healthy indoor environment, proper ventilation is key. A drop ceiling exhaust fan is a crucial component in achieving this, especially in spaces with drop ceilings. This comprehensive guide will cover everything you need to know about drop ceiling exhaust fans, including their benefits, installation tips, and maintenance advice to ensure efficient airflow and enhanced indoor air quality.
What is a Drop Ceiling Exhaust Fan?
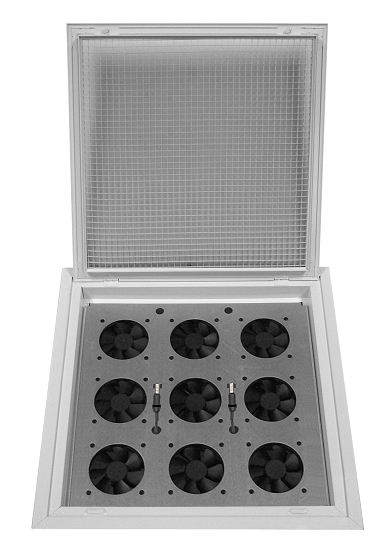
A drop ceiling exhaust fan is designed to fit seamlessly into a drop ceiling grid. Unlike traditional ceiling fans or wall-mounted exhaust fans, drop ceiling models are specifically engineered to be integrated into the ceiling tiles, making them ideal for spaces with low ceilings or areas where conventional exhaust systems aren’t feasible.
Benefits of a Drop Ceiling Exhaust Fan
Drop ceiling exhaust fans offer several advantages, particularly in commercial and residential settings with drop ceilings:
- Improved Air QualityProper ventilation is essential for maintaining good indoor air quality. A drop ceiling exhaust fan helps remove stale air, odors, and contaminants from the room, promoting a healthier environment.
- Space EfficiencyThese fans are designed to fit into the existing ceiling grid, saving valuable space and avoiding the need for bulky installations. This is especially beneficial in areas where ceiling height is limited or where aesthetics are a concern.
- Enhanced ComfortBy removing excess moisture and heat, a drop ceiling exhaust fan can help regulate the temperature and humidity levels in the room, improving overall comfort.
- Energy EfficiencyModern drop ceiling exhaust fans are designed to be energy-efficient, helping to reduce energy consumption and lower utility bills compared to less efficient ventilation systems.
Read too: Kitchen Lighting For A Vaulted Ceiling: Illuminating Your Space with Style and Functionality
How to Choose the Right Drop Ceiling Exhaust Fan
Selecting the right drop ceiling exhaust fan involves considering several factors to ensure it meets your specific needs and installation requirements. Here are key aspects to consider:
1. Fan Size and Capacity
The size and capacity of the exhaust fan should match the dimensions and airflow needs of the space. Larger rooms or spaces with higher moisture levels may require a more powerful fan to ensure effective ventilation.
2. Airflow Rating
The airflow rating, measured in cubic feet per minute (CFM), indicates how much air the fan can move. A higher CFM rating means better airflow and ventilation. Choose a fan with an appropriate CFM rating for the size of the room.
3. Noise Level
Noise levels can vary between models. For quiet operation, look for fans that are specifically designed to operate quietly, especially in areas where noise could be a concern, such as offices or bedrooms.
4. Energy Efficiency
Energy-efficient fans can help reduce operating costs and environmental impact. Look for fans with ENERGY STAR® certification or other energy-saving features.
5. Installation Requirements
Ensure that the fan you choose is compatible with your drop ceiling grid and that you have the necessary space for installation. Some fans may require additional components or modifications for proper fitting.
6. Additional Features
Consider additional features such as built-in lighting, humidity sensors, or remote controls. These features can add convenience and enhance the functionality of the fan.
Installation of a Drop Ceiling Exhaust Fan
Proper installation is crucial for the optimal performance of a drop ceiling exhaust fan. Here’s a step-by-step guide to installing a drop ceiling exhaust fan:
1. Gather Tools and Materials
Before starting the installation, gather all necessary tools and materials, including the exhaust fan, a drill, a screwdriver, a level, measuring tape, and ceiling tiles.
2. Turn Off Power
Ensure that the power to the installation area is turned off at the circuit breaker. This is important for safety during the installation process.
3. Prepare the Ceiling
Measure and mark the location where the fan will be installed. Make sure the area is clear of any obstructions and that the drop ceiling grid can support the weight of the fan.
4. Cut the Ceiling Tile
If necessary, cut the ceiling tile to fit the fan. Use a utility knife or a suitable cutting tool to create an opening that matches the size of the fan.
5. Install the Fan
Follow the manufacturer’s instructions for mounting the fan into the drop ceiling grid. Typically, this involves securing the fan to the grid using brackets or clips.
6. Connect Electrical Wiring
Connect the fan’s electrical wiring according to the provided instructions. Ensure that all connections are secure and properly insulated.
7. Test the Fan
Turn the power back on and test the fan to ensure it operates correctly. Check for proper airflow and listen for any unusual noises.
8. Replace Ceiling Tiles
Once the fan is installed and tested, replace the ceiling tiles around the fan, ensuring a secure fit and clean appearance.
Maintenance of a Drop Ceiling Exhaust Fan
Regular maintenance is essential to keep your drop ceiling exhaust fan operating efficiently. Here are some maintenance tips:
1. Clean the Fan
Regularly clean the fan blades and grille to remove dust and debris. This helps maintain optimal airflow and prevents buildup that can affect performance.
2. Check for Obstructions
Periodically check the fan for any obstructions that may block airflow, such as debris or insects. Ensure that the ventilation ducts are clear and unobstructed.
3. Inspect Wiring
Inspect the fan’s wiring and connections for any signs of damage or wear. If you notice any issues, address them promptly to avoid potential safety hazards.
4. Lubricate Moving Parts
If your fan model requires lubrication, apply lubricant to the moving parts as recommended by the manufacturer. This helps reduce friction and prolongs the life of the fan.
5. Replace Filters
Some drop ceiling exhaust fans may have filters that need to be replaced periodically. Check the manufacturer’s recommendations for filter replacement intervals and ensure that filters are replaced as needed.
6. Schedule Professional Inspections
Consider scheduling regular professional inspections for your exhaust fan to ensure it is functioning correctly and to address any potential issues before they become major problems.
Troubleshooting Common Issues
If you encounter problems with your drop ceiling exhaust fan, here are some common issues and troubleshooting tips:
1. Fan Not Operating
If the fan is not operating, check the power supply and ensure that the circuit breaker is not tripped. Verify that the electrical connections are secure and that the fan is properly mounted.
2. Poor Airflow
If the airflow is insufficient, check for obstructions in the fan or ventilation ducts. Ensure that the fan’s CFM rating is appropriate for the room size and that the fan blades are clean and free of debris.
3. Unusual Noises
Unusual noises, such as rattling or grinding, may indicate loose or damaged components. Inspect the fan for any loose parts and address any issues promptly to avoid further damage.
4. Inconsistent Operation
If the fan operates inconsistently, check the wiring and connections for any loose or damaged components. Ensure that the fan is properly installed and aligned.
Conclusion
A drop ceiling exhaust fan is an effective solution for enhancing ventilation and maintaining a comfortable indoor environment, especially in spaces with drop ceilings. By understanding the benefits, choosing the right fan, and following proper installation and maintenance procedures, you can ensure optimal performance and longevity of your exhaust fan. Regular upkeep and timely troubleshooting will help keep your drop ceiling exhaust fan functioning efficiently and contribute to a healthier and more pleasant indoor space.